
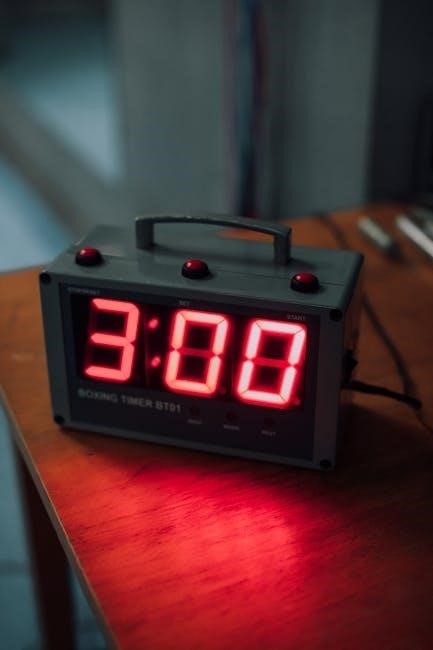
intermatic light timer instructions
Intermatic light timers offer convenient automation for indoor and outdoor lighting systems. They replace traditional switches, enabling programmable scheduling and energy-efficient control of various light types.
1.1 Overview of Intermatic Light Timer Models
Intermatic offers a range of light timer models, including the EJ500, DT17, and ST01, each designed for different applications. These timers are compatible with incandescent and fluorescent lights and can replace standard or 3-way switches. Models like the EJ500 feature an astronomic setting, adjusting schedules based on daylight changes. The DT17 supports up to 14 ON/OFF settings daily, while the ST01 includes a manual override mode. Some timers, such as the EI230, offer countdown functionality. All models provide energy-efficient automation, with options for random modes to enhance security and smart integration for advanced control. They cater to both residential and commercial needs.
1.2 Benefits of Using Intermatic Light Timers
Intermatic light timers provide numerous benefits, including energy savings and enhanced convenience. They allow users to automate lighting schedules, reducing manual intervention and ensuring consistent operation. Features like astronomic adjustment and random modes offer security by simulating occupancy. These timers are compatible with various light types, including incandescent and fluorescent, and can replace traditional switches. They also support smart integration, enabling remote control through compatible systems. By automating lighting, Intermatic timers help reduce energy waste and extend bulb life, while their programmable settings ensure lights operate efficiently and securely, tailored to user preferences and lifestyles.

Installation Instructions
Intermatic light timers are installed by replacing existing switches, ensuring compatibility with incandescent and fluorescent lights. They require proper wiring and a Decora-style wall plate for secure mounting.
2.1 Pre-Installation Requirements
Before installing an Intermatic light timer, ensure the circuit is disconnected to avoid electrical hazards. Verify the presence of both hot and neutral wires in the junction box. For 3-way installations, check that all switches controlling the same light are compatible. A Decora-style wall plate is required but not included. Make sure the timer model supports the load type (incandescent or fluorescent). If unsure, consult the product specifications or manual for voltage and compatibility details. Proper preparation ensures a safe and successful installation.
2.2 Step-by-Step Installation Guide
Turn off power to the circuit at the breaker box and verify with a voltage tester.
Remove the old light switch, carefully pulling out the wires from the junction box.
Connect the wires to the timer according to the manual: match black (hot), white (neutral), and copper (ground) wires.
Tuck the wires into the wall box, ensuring enough space for the timer.
Mount the timer using the provided screws and snap it into place.
Install the Decora-style wall plate, aligning the red indicator light with the top screw hole.
Turn the power back on and test the timer to ensure proper operation.
2.3 Testing the Timer After Installation
After installation, press the ON/OFF button several times to ensure the timer clicks and the light toggles on and off. If the light doesn’t respond, check the wiring connections and ensure they match the timer’s terminals. Verify that the timer is in manual mode (MAN) for testing. If issues persist, refer to the troubleshooting section or the user manual for guidance. Proper function ensures automated scheduling will work seamlessly.

Programming the Timer
Program the timer by setting the clock and creating daily ON/OFF schedules. Use the astronomic feature for automatic daylight adjustments or enable manual override when needed.
3.1 Setting the Clock and Daylight Saving Time
Start by setting the timer’s clock to the correct local time. Press the CLOCK button to adjust the hours and minutes. Enable Daylight Saving Time (DST) mode if required. The astronomic feature automatically adjusts for DST and seasonal daylight changes. For manual overrides, press the MODE button to toggle between AUTO and MANUAL modes. Ensure the timer displays the correct time to synchronize your lighting schedule. Proper time setup ensures accurate automation of your lighting system throughout the year.
3.2 Creating ON/OFF Settings for Daily Schedules
To create a daily schedule, press the MODE button until the display shows “AUTO” for automatic operation. Use the ON/OFF button to toggle between programming modes. Set the desired ON and OFF times by rotating the time dial or pressing the NEXT button to cycle through hours and minutes. You can program up to 14 ON/OFF events per day. For precise control, use 1-minute intervals. After setting all events, press the CLOCK button to save and exit. The timer will now follow your programmed schedule, automating your lighting system efficiently.
3.3 Using the Astronomic Feature
The astronomic feature automatically adjusts your timer based on sunrise and sunset times for your location. To activate it, press the MODE button until “ASTRO” appears on the display. Enter your local time zone and daylight saving preferences. The timer will calculate the correct ON/OFF times for dawn and dusk. This feature ensures your lights turn on/off in sync with natural light changes, optimizing energy use and security. After setup, the timer will update daily, adapting to seasonal variations without manual adjustments. This feature is ideal for outdoor lighting systems, providing seamless automation year-round.

Special Features of Intermatic Timers
Intermatic timers offer advanced features like manual override, random mode for security, and smart integration. These features enhance convenience, security, and compatibility with smart home systems.
4.1 Manual Override Mode
Intermatic timers feature a manual override mode, allowing users to control lights directly without adhering to programmed schedules. This mode operates like a standard ON/OFF switch, enabling immediate adjustments. Pressing the ON/OFF button toggles the light’s state, bypassing automated settings temporarily. Manual override is ideal for unexpected situations or when temporary changes are needed. The timer retains its programmed settings and resumes automatic operation after manual intervention. This feature provides flexibility and convenience, ensuring users can always override the timer when necessary. It is accessible via the timer’s interface, offering seamless control over connected lights or devices.
4.2 Random Mode for Security
Intermatic timers offer a Random Mode designed to enhance home security. This feature varies the switching times within 30-minute intervals based on programmed settings, creating a lived-in look. By simulating human activity, it deters potential intruders when the house is unoccupied. Users can enable Random Mode through the timer’s interface, ensuring unpredictable ON/OFF cycles. This mode integrates seamlessly with existing schedules and is compatible with various lighting types. It provides an additional layer of security without compromising the convenience of automated lighting control, making it an ideal feature for homeowners seeking to protect their property while maintaining energy efficiency.
4.3 Smart Integration and Compatibility
Intermatic timers are designed for seamless integration with smart home systems, offering enhanced control and compatibility. Models like the Ascend smart light switch are Alexa-compatible, allowing voice commands and remote adjustments via smartphones. This integration enables users to customize lighting schedules and settings effortlessly. Compatibility extends to various lighting types, including LEDs and fluorescents, ensuring versatile applications. Smart features also allow for energy monitoring and automated updates, ensuring optimal performance. This compatibility makes Intermatic timers a modern solution for homeowners seeking to upgrade their lighting systems with cutting-edge technology while maintaining reliability and ease of use.
Troubleshooting Common Issues
Troubleshooting Intermatic timers involves identifying issues like malfunctioning displays or incorrect settings. Check power connections, reset timers, and ensure proper wiring to resolve common problems quickly.
5.1 Timer Not Turning Lights On/Off
If the timer fails to control the lights, check the power connection and ensure the timer is in the correct mode (MAN, AUTO, or RAND). Verify all wiring connections are secure and correct. Ensure the timer’s program is set properly and the clock is accurate; If issues persist, reset the timer by removing the battery or disconnecting power for 10 seconds. Consult the user manual for specific reset instructions and troubleshooting steps to resolve the issue effectively.
5.2 Display Issues and Battery Replacement
If the timer’s display is blank, dim, or malfunctioning, first check the battery. Ensure the battery is installed correctly, with the positive (+) side facing up. For models with a CR2032 lithium battery, open the battery compartment and verify proper installation. If issues persist, replace the battery with a new one, matching the specifications in the user manual. After replacement, the timer will initialize automatically. For persistent display problems, consult the manual or reset the timer by disconnecting power temporarily. Proper battery maintenance ensures optimal performance and clear display functionality.
5.3 Wiring and Connection Problems
Wiring issues are common during timer installations. Ensure the timer is connected to a neutral wire, as most models require it for correct operation. If the timer fails to control the light, check the load and line wire connections. For 3-way setups, verify the jumper wire configuration. If the timer does not click when activated, inspect for loose connections or reversed wires. Refer to the manual for specific wiring diagrams. If problems persist, consult a licensed electrician, especially for complex configurations. Proper wiring ensures safe and reliable timer functionality for your lighting system.