Manuals

microtalk cobra manual

Microtalk Cobra Manual: A Comprehensive Guide (Updated 04/22/2026)

Welcome! This manual expertly guides you through your Cobra Microtalk radio‚ ensuring optimal performance and enjoyment‚ despite potential service interruptions like the one planned for January 14th.

Congratulations on selecting a Cobra Microtalk radio for your communication needs! These radios represent a fantastic blend of convenience‚ reliability‚ and affordability‚ perfect for a wide range of applications. Whether you’re planning outdoor adventures‚ coordinating family activities‚ or simply needing a dependable way to stay connected‚ Cobra Microtalk radios deliver.

Understanding the core functionalities of your radio is key to maximizing its potential. This guide will walk you through everything from basic operation to advanced features‚ ensuring a seamless user experience. Remember that advertised ranges – typically up to 2 miles for FRS and 10 miles for GMRS – are optimal estimates and can vary significantly based on terrain and environmental factors.

We’ll cover essential aspects like FRS and GMRS distinctions‚ channel selection‚ and troubleshooting‚ empowering you to confidently utilize your new communication tool. Prepare to explore the world of two-way radio communication with Cobra!

What’s Included in the Box

Upon opening your Cobra Microtalk radio package‚ please verify that all components are present and accounted for. Your box should contain the following items: one (or more‚ depending on the model purchased) Cobra Microtalk radio unit(s)‚ a rechargeable battery pack for each radio‚ and a convenient charging adapter.

Additionally‚ you’ll find a detailed user manual – this very document! – to guide you through setup and operation. Some models may also include belt clips for easy portability‚ and potentially earbud/microphone headsets for hands-free communication.

Carefully inspect all items for any signs of damage that may have occurred during shipping. If anything is missing or appears damaged‚ please contact Cobra Support immediately for assistance. Retain the original packaging for potential warranty claims or returns. Enjoy your new radios!

Understanding FRS and GMRS Radios

Cobra Microtalk radios utilize either Family Radio Service (FRS) or General Mobile Radio Service (GMRS) technology‚ or both. FRS radios operate on specific frequencies and require no license for use‚ making them ideal for casual communication. However‚ FRS radios typically have lower power output and a shorter range – often around 2 miles in optimal conditions.

GMRS radios‚ conversely‚ offer higher power and extended range‚ potentially reaching up to 10 miles. However‚ GMRS operation requires a license from the Federal Communications Commission (FCC). Obtaining a GMRS license is a straightforward process and allows access to more channels and greater transmission power.

Understanding these differences is crucial for selecting the appropriate radio and operating it legally. Your Cobra Microtalk manual will detail which frequencies and power levels are available on your specific model.

FRS Radio Basics

FRS radios are designed for short-range‚ license-free communication‚ perfect for family outings or keeping in touch during recreational activities. They operate on a set of 22 channels‚ with some channels shared with other services. Most consumer FRS radios have a maximum power output of 0.5 watts‚ contributing to their limited range – typically around 2 miles‚ though this can vary significantly.

Key features of FRS radios include simple operation‚ making them user-friendly for all ages. They often include features like channel scanning‚ volume control‚ and squelch adjustment to minimize interference. Remember that advertised ranges are often optimistic; real-world performance depends on terrain and obstructions.

Your Cobra Microtalk FRS radio provides convenient communication without the need for licensing‚ offering a straightforward solution for short-distance connectivity.

GMRS Radio Basics & Licensing Requirements

GMRS (General Mobile Radio Service) radios offer extended range and higher power output compared to FRS‚ typically up to 50 watts. This allows for communication distances of up to 10 miles‚ or even further under ideal conditions. GMRS radios also utilize a wider range of channels‚ providing more options and reducing congestion.

However‚ unlike FRS‚ GMRS requires a license from the Federal Communications Commission (FCC). Licensing is relatively straightforward and affordable‚ covering an entire family. Obtaining a license ensures legal operation and access to the full capabilities of your GMRS radio.

Your Cobra Microtalk radio‚ if GMRS capable‚ will offer enhanced performance with a valid license. Remember to check the FCC website for current licensing requirements and application procedures before transmitting on GMRS channels.

Key Features of Your Cobra Microtalk Radio

Your Cobra Microtalk radio is packed with features designed for reliable communication. Enjoy clear transmissions with its advanced noise reduction technology‚ minimizing static and interference. The radio boasts channel scanning‚ quickly locating active conversations in your area. A convenient call button facilitates quick group signaling‚ and the VOX (Voice Operated Exchange) function enables hands-free operation.

Furthermore‚ many models support CTCSS/DCS codes‚ enhancing privacy by filtering out unwanted transmissions. Durable construction ensures resilience in various environments‚ while user-friendly controls make operation intuitive. Expect optimal range‚ though influenced by terrain and obstructions‚ potentially reaching up to 2 miles (FRS) or 10 miles (GMRS).
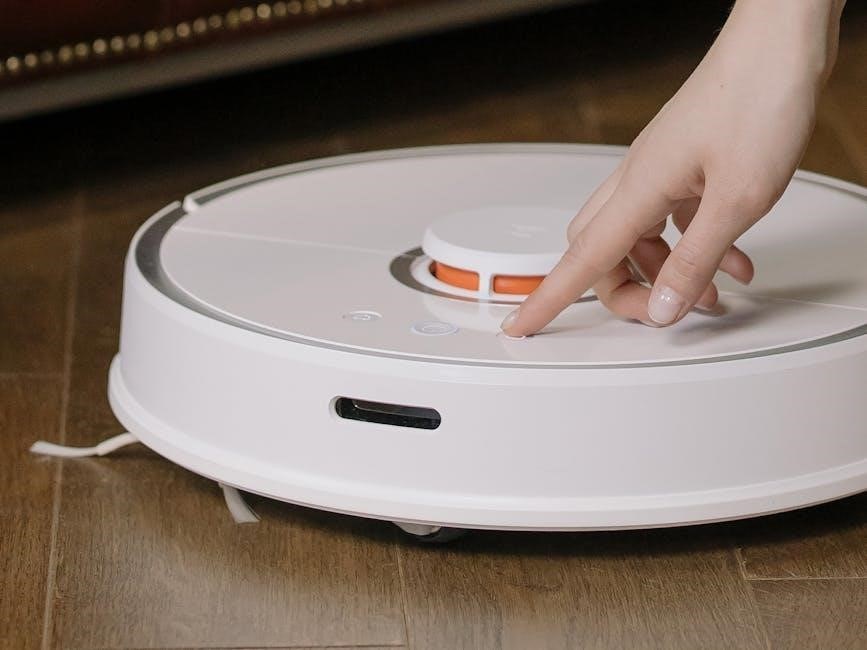
Powering On and Off

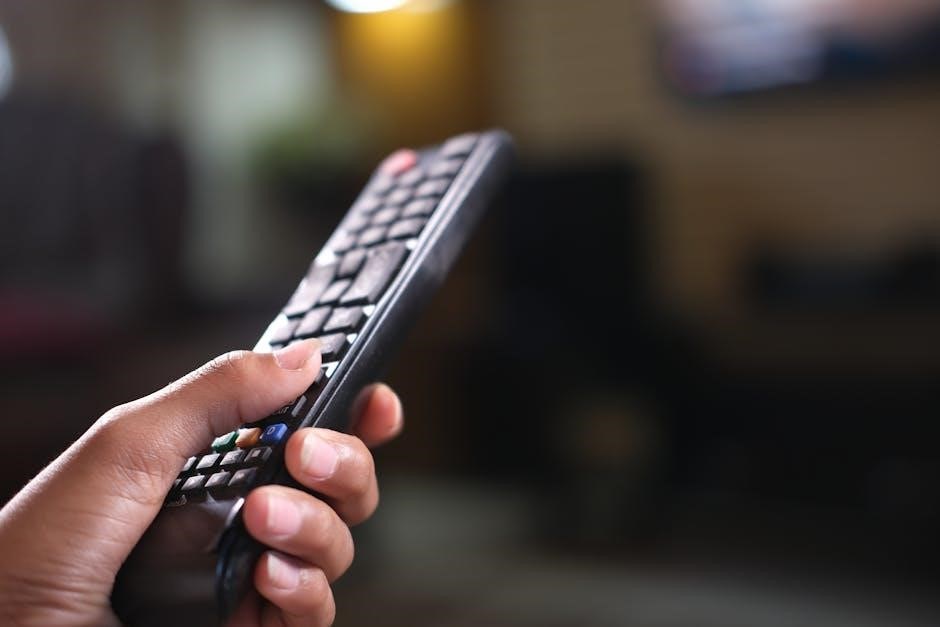
To power on your Cobra Microtalk radio‚ locate the power button – typically a circular button prominently positioned on the device. Press and hold this button for approximately two seconds until the LCD screen illuminates‚ indicating the radio is active. A welcome tone may also sound‚ confirming successful power-up. Ensure the battery has sufficient charge for optimal performance.

To power off‚ repeat the process: press and hold the power button for two seconds. The LCD screen will darken‚ and any audible tones will cease. Always power off the radio when not in use to conserve battery life. Remember planned service interruptions‚ like the one on January 14th‚ won’t affect this basic function!

Channel Selection and Scanning

Selecting a channel on your Cobra Microtalk radio is straightforward. Utilize the channel up/down buttons‚ usually located on the front or side of the device‚ to navigate through the available channels. The current channel number will be displayed on the LCD screen. Consider potential interference when choosing a channel; a less crowded channel offers clearer communication.

The scan function automatically searches for active transmissions across all channels. Press the ‘Scan’ button to initiate this process. The radio will briefly pause on any channel with activity. If you wish to communicate on that channel‚ press the ‘PTT’ (Push-to-Talk) button while the radio is paused. Remember‚ even with planned outages like January 14th‚ scanning remains functional.

Volume Control and Squelch Adjustment

Adjusting the volume on your Cobra Microtalk radio is typically achieved using dedicated volume up and down buttons‚ or a rotating dial. Start with a low volume and gradually increase it to a comfortable listening level. Be mindful of your surroundings and avoid excessively loud volumes that could damage your hearing.

Squelch control minimizes unwanted background noise‚ such as static‚ when no signal is present. A higher squelch level blocks weaker signals‚ resulting in a cleaner audio experience. However‚ setting it too high may prevent you from hearing faint transmissions. Experiment to find the optimal squelch setting for your environment‚ even during potential service disruptions like those planned for January 14th.

Using the Call Button and VOX Function

The Call button on your Cobra Microtalk radio provides a quick way to alert another user. Pressing this button typically sends a tone‚ signaling your intention to communicate. This is useful for initiating a conversation without needing to verbally announce yourself first‚ even with potential service impacts on January 14th.

VOX (Voice Operated Exchange) allows for hands-free operation. When enabled‚ the radio transmits automatically when it detects sound from your voice. Adjust the VOX sensitivity level to prevent accidental transmissions from background noise. Remember‚ optimal range is around 2 miles for FRS and up to 10 for GMRS‚ but actual range varies.

Understanding Range Limitations

Realistic expectations are crucial when using Cobra Microtalk radios. While manufacturers often advertise ranges of up to 2 miles for FRS and 10 miles for GMRS‚ these are optimal conditions. Actual performance is significantly affected by terrain and obstructions‚ potentially impacting communication even without planned outages like the one scheduled for January 14th.

FRS range is inherently limited by power restrictions. GMRS offers greater range‚ but requires an FCC license. Remember‚ factors like buildings‚ trees‚ and even weather can drastically reduce effective range. Understanding these limitations ensures you utilize your radio effectively and avoid frustration‚ maximizing its utility in real-world scenarios.

Factors Affecting Range (FRS)

FRS radios operate on relatively low power‚ making them susceptible to range limitations. Terrain plays a significant role; hills and valleys obstruct signals‚ reducing effective communication distance. Obstructions like buildings‚ trees‚ and even dense foliage absorb and deflect radio waves‚ diminishing range. Weather conditions‚ particularly atmospheric interference‚ can also impact performance‚ similar to potential service disruptions on dates like January 14th.

Line of sight is ideal‚ but rarely achievable. The more obstacles between radios‚ the shorter the range. Radio interference from other devices can further degrade signal quality. Understanding these factors allows users to position themselves strategically for optimal FRS communication‚ maximizing usability despite inherent limitations.

Factors Affecting Range (GMRS)

GMRS radios‚ with their higher power output‚ generally achieve greater range than FRS‚ but are still subject to environmental influences. Terrain remains a critical factor; mountainous areas and dense forests significantly reduce effective communication distance. Obstructions – buildings‚ trees‚ and other structures – absorb and reflect radio waves‚ limiting signal propagation‚ much like potential service impacts on dates like January 14th.

Atmospheric conditions and radio interference from other sources can also degrade performance. While GMRS offers extended range‚ maintaining a clear line of sight is still optimal. Utilizing external antennas can further enhance range‚ but careful consideration of these factors is crucial for reliable communication.

Troubleshooting Common Issues

Experiencing problems with your Cobra Microtalk radio? This section addresses frequent concerns. If your radio exhibits no power‚ verify battery installation and charging status. Poor reception often stems from distance‚ obstructions‚ or incorrect channel selection; try rescanning for available signals. Static and interference can be minimized by adjusting the squelch control or changing channels‚ similar to addressing service impacts like those planned for January 14th.

Ensure you’re operating within the radio’s specified range and consider environmental factors. If issues persist‚ consult the battery information section or contact Cobra support for further assistance. A factory reset might resolve software glitches.

No Power

Encountering a complete lack of power in your Cobra Microtalk radio is frustrating‚ but often easily resolved. First‚ confirm proper battery installation‚ ensuring correct polarity (+/-). Next‚ verify the batteries are adequately charged; even new batteries may require initial charging. If using rechargeable batteries‚ check the charging process and ensure the charger is functioning correctly – remember potential service disruptions like the January 14th outage could impact charging accessories.

Try replacing the batteries with a fresh set to rule out battery failure. Inspect the battery contacts within the radio for any corrosion or debris‚ cleaning them gently if necessary. If the issue persists‚ contact Cobra support.

Poor Reception

Experiencing weak or distorted reception with your Cobra Microtalk radio can stem from several factors. Ensure you’re within the radio’s effective range – remember advertised ranges (up to 10 miles for GMRS‚ 2 miles for FRS) are optimal and rarely achieved in real-world conditions. Obstacles like buildings‚ trees‚ and terrain significantly impede signal transmission. Try relocating to a higher‚ unobstructed position.

Verify the correct channel is selected and consider using the scan function to locate active channels. Interference from other electronic devices can also cause poor reception. Be mindful of potential service impacts‚ like the planned January 14th outage‚ which might indirectly affect network conditions.

Static and Interference

Encountering static or unwanted noise during operation of your Cobra Microtalk radio is a common issue with several potential causes. External electronic devices – including other radios‚ computers‚ and even some lighting systems – can generate interference. Try moving away from these sources. Atmospheric conditions and electrical storms can also contribute to static.

Adjusting the squelch control can help filter out weak signals and reduce static‚ but be careful not to eliminate desired transmissions. Remember that planned service disruptions‚ such as the one scheduled for January 14th‚ could potentially introduce temporary network anomalies. Ensure proper antenna connection and consider testing on different channels.

Battery Information and Charging

Your Cobra Microtalk radio utilizes rechargeable batteries for extended use. It’s crucial to understand proper charging procedures to maximize battery life and performance. Always use the provided charger‚ as using incompatible chargers can damage the battery or create a safety hazard. Initial charging may take several hours for optimal capacity.

Avoid overcharging the batteries‚ as this can reduce their lifespan. Disconnect the charger once the charging indicator shows a full charge. Battery performance can be affected by temperature; extreme heat or cold can temporarily reduce capacity. Remember potential service impacts‚ like the January 14th outage‚ won’t affect battery operation.

Replacing the Battery

When battery life diminishes significantly‚ replacement may be necessary. First‚ ensure the radio is powered off to prevent any electrical issues during the process. Locate the battery compartment‚ typically on the back or bottom of the unit‚ and carefully open it following the instructions in this manual. Remove the old battery‚ noting its orientation for correct installation of the new one.

Insert the new battery‚ matching the polarity markings (+ and -) precisely. Securely close the battery compartment. Dispose of the old battery responsibly‚ following local regulations for battery recycling. Remember‚ even with potential service disruptions like the planned January 14th outage‚ battery replacement remains straightforward.

Care and Maintenance

To ensure longevity and optimal performance of your Cobra Microtalk radio‚ regular care is essential. Clean the exterior with a damp cloth‚ avoiding harsh chemicals or abrasive cleaners. Store the radio in a cool‚ dry place‚ away from direct sunlight and extreme temperatures. Periodically inspect the antenna for damage and ensure it’s securely attached.

Avoid dropping the radio or exposing it to excessive moisture. While services may experience temporary impacts‚ like the planned outage on January 14th‚ proper maintenance keeps your radio reliable. Regularly check the battery contacts for corrosion and clean them if necessary. Following these simple steps will maximize your radio’s lifespan and functionality.

Safety Precautions

Prioritize safety when operating your Cobra Microtalk radio. Avoid using the radio while driving‚ as it can cause distraction. Be mindful of your surroundings and maintain situational awareness. Do not attempt to disassemble or modify the radio‚ as this could result in damage or injury. Keep the radio out of reach of small children.

Be aware of potential interference from other electronic devices‚ similar to potential service disruptions like the one scheduled for January 14th. Do not expose the radio to extreme temperatures or flammable materials. Follow all applicable laws and regulations regarding radio communication. Responsible use ensures a safe and enjoyable experience with your Cobra Microtalk radio.

Understanding CTCSS and DCS Codes

CTCSS (Continuous Tone-Coded Squelch System) and DCS (Digital Coded Squelch) are privacy codes that filter out unwanted transmissions on shared channels. Think of them as digital “doorbells” – your radio only responds to signals with the matching code. While not providing true security‚ they reduce interference from other users‚ similar to minimizing disruptions during planned maintenance like January 14th’s outage.

Setting a CTCSS or DCS code allows you to communicate privately with others using the same code. Your Cobra Microtalk radio supports both systems. Consult the channel chart in this manual to find compatible codes. Experimenting with these codes can significantly improve clarity and reduce unwanted noise‚ enhancing your overall radio experience. Remember‚ others must use the same code to communicate with you.

Programming Channels (If Applicable)

Certain Cobra Microtalk models offer the ability to program channels for customized frequency access. This feature allows you to store frequently used frequencies or those specific to your local area‚ much like bookmarking websites for quick access. Refer to your radio’s specific model number to determine if programming is supported. If so‚ you’ll typically need a programming cable and computer software‚ often available separately.

Programming involves downloading the software‚ connecting your radio‚ and inputting the desired frequencies and codes. Always double-check your entries to ensure accuracy. Incorrect programming can lead to communication issues. Remember‚ even with programming‚ adherence to FRS/GMRS regulations is crucial‚ similar to respecting service availability during planned outages like the one on January 14th.

Resetting Your Radio to Factory Defaults

Occasionally‚ your Cobra Microtalk radio may experience unexpected behavior due to altered settings or programming conflicts. Resetting to factory defaults restores the radio to its original‚ out-of-the-box condition‚ effectively clearing any customized configurations. This process is often initiated through a specific button combination‚ detailed in your model’s specific manual – consult it for precise instructions.

Before resetting‚ understand that all saved channels‚ codes‚ and personalized settings will be erased. This is similar to a system restore on a computer‚ reverting to a previous state. While helpful for resolving issues‚ it requires re-establishing your preferred settings. Remember‚ even a reset won’t overcome limitations like range‚ or service interruptions like the one planned for January 14th.

Warranty Information

Your Cobra Microtalk radio is covered by a limited one-year warranty against defects in materials and workmanship from the date of original purchase. This warranty doesn’t cover damage resulting from misuse‚ abuse‚ neglect‚ accidents‚ modification‚ or unauthorized repair attempts. Proof of purchase is required for all warranty claims; retain your receipt carefully.

To initiate a warranty claim‚ contact Cobra Support (details provided later in this manual). They will guide you through the process‚ which may involve returning the radio for inspection and repair or replacement. Note that this warranty is non-transferable and applies only to the original purchaser. Service interruptions‚ like the one planned for January 14th‚ do not affect warranty coverage.

Contacting Cobra Support

For assistance with your Cobra Microtalk radio‚ or to address any questions not covered in this manual‚ Cobra offers multiple support channels. You can visit the official Cobra website for frequently asked questions‚ troubleshooting guides‚ and downloadable resources. Alternatively‚ you can reach their dedicated support team via phone during business hours – check the website for current timings.

Please have your radio’s model number and date of purchase readily available when contacting support to expedite the assistance process. Be aware that service availability may occasionally be impacted by planned maintenance‚ such as the outage scheduled for January 14th. Cobra strives to provide prompt and helpful support to all its customers.

Manuals

tineco ifloor 2 manual

Tineco iFloor 2 Manual: A Comprehensive Guide (Updated 04/15/2026)

Welcome! This manual provides detailed instructions for your Tineco iFloor 2. It covers setup, operation, maintenance, and warranty details – a 2-year limited warranty applies.

Congratulations on choosing the Tineco iFloor 2, a revolutionary all-in-one wet-dry vacuum designed to simplify your floor cleaning routine! This innovative device seamlessly vacuums and mops simultaneously, saving you valuable time and effort. The iFloor 2 is engineered to tackle a variety of hard floor surfaces, including tile, sealed hardwood, laminate, and vinyl.

This manual serves as your comprehensive guide to understanding and utilizing all the features of your new cleaning companion. We’ll walk you through everything from initial setup and operation to regular maintenance, ensuring optimal performance and longevity. Your Tineco appliance is covered by a 2-year limited warranty protecting against defects in materials and workmanship. Please retain this manual for future reference and familiarize yourself with the safety precautions outlined within to ensure safe and effective cleaning.

What’s Included in the Box

Upon opening your Tineco iFloor 2 package, please verify that all the following components are present. This ensures you have everything needed for a successful setup and cleaning experience. The box should contain: 1 x Tineco iFloor 2 Main Unit – the core of your wet-dry vacuum system. 1 x Clean Water Tank – for fresh cleaning solution. 1 x Dirty Water Tank – to collect the wastewater during cleaning.

Additionally, you’ll find: 1 x High-Performance Brush Roll – designed for effective floor cleaning. 1 x Filter – to trap dust and debris. 1 x Power Adapter – for charging the device. Please review the included documentation regarding the 2-year limited warranty. If any components are missing or damaged, immediately contact Tineco Support for assistance. Retain the original packaging for potential returns or warranty claims.

Key Features and Benefits

The Tineco iFloor 2 revolutionizes floor cleaning with its powerful cordless design. Experience the convenience of simultaneous vacuuming, washing, and drying – saving you time and effort. Key features include iLoop™ Smart Sensor Technology, which intelligently adjusts suction and water flow based on detected dirt. Enjoy streak-free cleaning on various sealed hard floors, from hardwood to tile.

Benefit from the device’s lightweight construction and swivel steering for effortless maneuverability. The two cleaning modes – Auto and Max – cater to different cleaning needs. A 2-year limited warranty protects against defects. The iFloor 2’s self-cleaning brush roll minimizes maintenance, while the separate clean and dirty water tanks ensure hygienic operation. Experience a cleaner, healthier home with the Tineco iFloor 2!

Safety Precautions

Important Safety Instructions: To ensure safe operation of your Tineco iFloor 2, always read this section carefully. Only use the device for its intended purpose – cleaning indoor hard floors. Do not use on carpets or rugs. Never operate the device with a damaged cord or plug.

Keep hair, loose clothing, and fingers away from moving parts. Do not use flammable liquids or detergents. Always disconnect the device from power before cleaning or maintenance. Avoid operating on wet surfaces or near water sources. This appliance is not intended for use by persons (including children) with reduced physical, sensory, or mental capabilities, or lack of experience, unless supervised.

Adherence to these precautions will prevent potential hazards and ensure the longevity of your iFloor 2.

Setting Up Your Tineco iFloor 2

Get Started! This section details how to prepare your iFloor 2 for optimal cleaning performance, including charging and assembly procedures for immediate use.

Charging the Device

Initial Charge: Before the first use, it’s crucial to fully charge your Tineco iFloor 2. This ensures optimal battery performance and cleaning power. Locate the charging port on the base of the device.

Charging Procedure: Connect the provided power adapter to the charging port and plug it into a standard wall outlet. The handle display will illuminate, indicating the charging status. A solid light typically signifies a full charge.

Charging Time: A complete charge usually takes approximately 3-4 hours. Avoid using the iFloor 2 while it’s charging. The display will show a full battery icon when charging is complete.

Battery Indicator: Regularly monitor the battery indicator on the handle to understand the remaining run time. Low battery levels will prompt a flashing indicator, signaling the need for recharging. Proper charging extends the lifespan of your iFloor 2’s battery.

Assembling the iFloor 2

Handle Attachment: Begin by aligning the handle with the designated connection point on the main body of the Tineco iFloor 2. Ensure a secure fit by firmly pressing the handle down until you hear a distinct click. This confirms proper locking.

Brush Roll Installation: Gently slide the brush roll into its housing at the base of the device. Verify it spins freely after installation. Proper brush roll function is vital for effective cleaning.

Foot Assembly (if applicable): Some models may include a foot assembly for enhanced stability. Attach this to the base following the provided diagrams, ensuring it’s securely fastened.

Final Check: Before use, double-check all connections to guarantee a stable and safe operating experience. A correctly assembled iFloor 2 will deliver optimal performance and longevity.

Filling the Clean Water Tank

Tank Location: The clean water tank is located on the main body of the Tineco iFloor 2, typically at the rear. Gently remove the tank by pressing the release button, if equipped, or lifting it directly.

Water Type: Only use clean, lukewarm tap water. Do not add detergents, cleaning solutions, or any other liquids, as this can damage the internal components and void the warranty.

Fill Level: Fill the tank to the “Max” fill line indicated inside. Overfilling can cause leakage during operation. Ensure the tank is securely closed after filling.

Re-Installation: Carefully re-insert the filled tank back into its designated slot until it clicks into place. A secure fit is crucial to prevent spills during cleaning.

Operating the Tineco iFloor 2

Get Started: Power on, select your desired cleaning mode (Auto or Max), and utilize the spray trigger for optimal floor cleaning performance.

Powering On and Off

Initiating Operation: To power on your Tineco iFloor 2, firmly press the power button located on the handle. A clear indicator light will illuminate, confirming the device is active and ready for use. The display panel will also activate, showcasing the selected cleaning mode and battery status.

Selecting a Mode: Before commencing cleaning, ensure you’ve chosen the appropriate cleaning mode – Auto for everyday messes or Max for more stubborn stains. The selected mode is visually displayed on the unit;

Terminating Operation: To power off the iFloor 2, simply press the power button again. The indicator light will extinguish, and the display panel will deactivate, signifying the device is now in standby mode. Always ensure the device is fully powered off when not in use, and before performing any maintenance procedures. Proper shutdown conserves battery life and ensures safety.

Selecting Cleaning Modes (Auto, Max)

Auto Mode: For daily cleaning tasks on sealed hard floors, utilize the Auto mode. This setting intelligently adjusts the water flow and suction power based on the detected dirt level, providing efficient and effective cleaning while conserving battery life. It’s ideal for routine maintenance and light messes.

Max Mode: When tackling stubborn stains, dried-on spills, or high-traffic areas, switch to Max mode. This setting delivers maximum suction power and increased water flow, ensuring a deeper and more thorough clean. Be mindful that Max mode consumes battery power at a faster rate.

Mode Selection: Easily switch between Auto and Max modes by pressing the dedicated mode selection button on the handle. The currently selected mode will be clearly indicated on the display panel. Choose wisely to optimize cleaning performance and battery usage.

Using the Spray Trigger

Spray Trigger Operation: The spray trigger, conveniently located on the handle, controls the release of the cleaning solution onto the floor. Press and hold the trigger to spray the solution while simultaneously moving the iFloor 2 forward or backward for optimal cleaning.

Spray Control: The amount of solution dispensed is directly proportional to how long you hold the trigger. Short presses deliver a light mist, while longer presses provide a more substantial spray. Adjust your technique based on the level of dirt and the type of flooring.

Preventing Oversaturation: Avoid prolonged, continuous spraying, as this can lead to floor oversaturation. Use short, controlled bursts to maintain a consistently damp, but not soaking wet, surface. This ensures effective cleaning without leaving behind residue.

Navigating the Display Panel

Display Overview: The iFloor 2 features an intuitive display panel providing crucial information during operation. The panel illuminates upon powering on, showcasing battery level, cleaning mode, and any error alerts.

Battery Indicator: A series of illuminated bars indicates the remaining battery life. A low battery warning will appear when charging is needed. Ensure the device is connected to the charger for optimal performance.

Cleaning Mode Indicator: Icons clearly display the selected cleaning mode – Auto or Max. Switching between modes is done via the mode button. The display confirms your selection.

Error Alerts: Should an issue arise, such as a clogged brush roll or full dirty water tank, an error code will appear on the display. Refer to the troubleshooting section for resolution.

Maintenance and Care

Keep your iFloor 2 performing optimally! Regularly empty the dirty water tank, clean the brush roll, and replace the filter for best results.

Emptying the Dirty Water Tank

Properly emptying the dirty water tank is crucial for maintaining your Tineco iFloor 2’s performance and hygiene. Before emptying, ensure the device is powered off and the clean water tank is removed to prevent spills. Gently detach the dirty water tank from the base of the iFloor 2 – a slight twisting motion usually helps.

Carry the tank carefully to a suitable drain or disposal area. The tank features a convenient pouring spout designed to minimize splashing. Slowly pour the dirty water, avoiding any contact with your skin or clothing. Important: Do not attempt to disassemble the dirty water tank further for cleaning, as this could damage internal components.

After emptying, rinse the tank thoroughly with clean water. Ensure all debris is removed before reattaching it to the iFloor 2. A clean dirty water tank ensures optimal suction and prevents unpleasant odors during future cleaning sessions. Regular emptying, after each use or as needed, is highly recommended.

Cleaning the Brush Roll

Maintaining a clean brush roll is essential for effective floor cleaning with your Tineco iFloor 2. Begin by powering off the device and disconnecting it from the charging base. Locate the brush roll access panel, typically on the bottom of the unit. Carefully remove the brush roll according to the instructions in the full manual.

Remove any visible hair, fibers, or debris wrapped around the brush roll. You can use scissors or a seam ripper to carefully cut away stubborn tangles. Inspect the brush roll for any damage and replace it if necessary. Wipe down the brush roll with a damp cloth to remove any remaining residue.

Ensure the brush roll is completely dry before reinstalling it. A clean brush roll guarantees optimal performance and prevents the spread of dirt during cleaning. Regular cleaning, ideally after each use, will prolong the life of your iFloor 2 and maintain its cleaning power.

Replacing the Filter

Maintaining optimal suction requires regular filter replacement in your Tineco iFloor 2. A clogged filter reduces cleaning performance. Locate the filter compartment, usually within the dirty water tank area. Power off and disconnect the device before accessing the filter.

Remove the old filter, noting its orientation for correct installation of the new one. Rinse the filter compartment with clean water and allow it to dry completely; Insert the new, genuine Tineco filter, ensuring it’s securely seated. Incorrect installation can compromise cleaning efficiency.

Replace the filter every 3-6 months, depending on usage frequency and cleaning conditions. A clean filter ensures powerful suction and prevents motor damage. Refer to the full manual for specific filter model numbers and purchasing information. Regular filter changes are vital for peak performance.

Troubleshooting Common Issues

Experiencing problems with your Tineco iFloor 2? Here’s a quick guide. If the device won’t power on, check the battery charge and ensure the power cord is securely connected. Reduced suction often indicates a full dirty water tank or a clogged filter – address these first.

For streaking, ensure you’re using the correct amount of cleaning solution and the brush roll is clean. If the iFloor 2 leaks, inspect the water tanks for proper sealing and cracks. Unusual noises may signal a foreign object in the brush roll; power off and carefully remove it.

If issues persist, consult the full manual or Tineco support. Remember, attempting repairs yourself may void the 2-year warranty. Always prioritize safety and disconnect the device before any inspection or maintenance.

Warranty Information (2-Year Limited Warranty)

Your Tineco iFloor 2 is covered by a 2-year limited warranty protecting against original defects in materials and workmanship, ensuring lasting performance.

Contacting Tineco Support

Need assistance with your Tineco iFloor 2? Our dedicated support team is here to help! We understand that sometimes you may encounter questions or require troubleshooting assistance, and we are committed to providing excellent customer service.

You can reach Tineco Support through several convenient channels. For immediate assistance, please visit our official website at www.tineco.com and utilize the live chat feature. Alternatively, you can contact us via email at support@tineco.com. Our team strives to respond to all email inquiries within 24-48 business hours.

If you prefer to speak with a representative directly, you can call our toll-free number at 1-800-TINECO (1-800-846-326). Please have your model number and purchase date readily available when contacting support to expedite the assistance process. We also offer a comprehensive FAQ section and helpful video tutorials on our website to address common questions and concerns.

Manuals

tempur-pedic ergo remote control manual pdf

Tempur-Pedic Ergo Remote Control Manual PDF: A Comprehensive Guide

This guide provides detailed instructions for your Tempur-Pedic Ergo adjustable base, focusing on the remote control. Download the PDF manual for complete operating instructions, remote pairing, and troubleshooting.

The Tempur-Pedic Ergo System represents a significant advancement in sleep technology, designed to enhance comfort and support through customizable adjustability. This system seamlessly integrates a high-quality Tempur-Pedic mattress with a sophisticated adjustable base, controlled via a user-friendly remote control. Understanding the core components and functionalities of the Ergo System is crucial for maximizing its benefits.

The Ergo base isn’t merely a platform; it’s an integral part of a holistic sleep experience. It allows you to effortlessly adjust your sleeping position, promoting better alignment and reducing pressure points. The system’s responsiveness is managed through the remote control, offering precise control over head and foot elevation, and access to features like massage and Zero Gravity positioning.

Before operating your Tempur-Pedic Ergo base, it’s essential to familiarize yourself with this manual. It provides comprehensive instructions, from initial setup and remote pairing to advanced feature utilization and safety protocols. This PDF manual serves as your primary resource for unlocking the full potential of your Ergo System, ensuring years of restful and restorative sleep. Proper understanding will also aid in troubleshooting any potential issues.

Understanding the Ergo Plus Adjustable Base

The Tempur-Pedic Ergo Plus Adjustable Base is engineered for superior comfort and personalized support. This model, controlled by a dedicated remote control, offers a range of adjustments to optimize your sleep posture. Key features include independent head and foot elevation, allowing for customized positioning to alleviate pressure and enhance relaxation.

The base’s robust construction ensures durability and stability, accommodating various Tempur-Pedic mattress types. It’s designed to work in harmony with the mattress, maximizing its pressure-relieving properties. The Ergo Plus isn’t simply about adjustability; it’s about creating a sleep environment tailored to your individual needs.

Refer to the PDF manual for detailed diagrams and instructions regarding assembly and operation. The manual outlines proper usage guidelines and safety precautions. Understanding the base’s capabilities, as detailed in the remote control guide, is vital for a seamless experience. This includes information on remote pairing and potential troubleshooting steps. Familiarize yourself with the system before use to fully benefit from its features.

Key Features of the Ergo Extend Adjustable Base

The Tempur-Pedic Ergo Extend Adjustable Base elevates your sleep experience with advanced features designed for ultimate comfort and convenience. This model, operated via a user-friendly remote control, boasts enhanced adjustability compared to standard bases. Key highlights include precise head and foot articulation, allowing for personalized positioning to reduce pressure points and promote relaxation.

Beyond basic adjustments, the Ergo Extend incorporates features like zero-gravity positioning, simulating weightlessness for optimal spinal alignment. The PDF manual provides detailed instructions on utilizing these advanced functions. It’s crucial to consult the manual for proper operation and safety guidelines.

The base’s design prioritizes quiet operation, ensuring minimal disturbance during adjustments. The remote control offers intuitive control over all features. For comprehensive guidance, download the Tempur-Pedic Ergo PDF manual, which includes remote pairing procedures and troubleshooting tips. Understanding these features, as outlined in the manual, unlocks the full potential of your Ergo Extend base.

Wireless Remote Control Overview

The Tempur-Pedic Ergo system utilizes a sophisticated wireless remote control for seamless operation of your adjustable base. This remote is designed for intuitive use, granting effortless control over all base functions. Before operation, carefully review the remote control guide within the Tempur-Pedic Ergo PDF manual to familiarize yourself with its layout and features.

The remote typically features clearly labeled buttons for head and foot adjustments, pre-set positions like “Zero Gravity,” and massage functions (if equipped). The PDF manual provides a detailed button function breakdown. It’s essential to understand each button’s purpose for optimal use.

Proper remote functionality relies on correct battery installation and pairing with the base. The manual offers step-by-step instructions for both processes. Should you encounter connectivity issues, refer to the troubleshooting section within the Tempur-Pedic Ergo PDF manual for solutions. Maintaining a functional remote is key to enjoying the full benefits of your adjustable base.

Remote Control Button Functions

The Tempur-Pedic Ergo remote control boasts a user-friendly interface with dedicated buttons for precise adjustments. The “Head Up/Down” and “Foot Up/Down” buttons control the incline of respective sections. Utilize these for personalized comfort. Pre-set position buttons, such as “Zero Gravity,” instantly achieve pre-configured ergonomic positions, detailed in the Tempur-Pedic Ergo PDF manual.

If your model includes massage functionality, dedicated “Massage” buttons will activate various intensity levels. The PDF manual illustrates the available massage programs. A “Memory” or “Favorite” button allows you to save your preferred positions for quick recall. The remote also features a “Child-Lock” button, enhancing safety by disabling operation.

Refer to pages 10-13 of the PDF manual for a comprehensive visual guide to each button’s function. Understanding these controls unlocks the full potential of your adjustable base. Remember to consult the manual for specific details related to your Ergo model, as button layouts may vary slightly.

Battery Installation and Replacement

Your Tempur-Pedic Ergo remote control requires batteries for operation. The PDF manual details the specific battery type needed – typically AAA or AA batteries, depending on the model. To install batteries, locate the battery compartment, usually on the back of the remote. Gently slide off the compartment cover.

Insert the batteries according to the polarity markings (+ and -) inside the compartment. Ensure the batteries are securely seated. Replace the compartment cover until it clicks into place. If the remote doesn’t respond, double-check battery polarity and ensure the batteries are fresh.

Low battery indicators on the remote display will signal when replacement is needed. Always replace batteries in pairs for optimal performance. Dispose of used batteries responsibly, following local regulations. The Tempur-Pedic Ergo PDF manual provides diagrams illustrating the battery installation process. Refer to it for visual guidance and specific instructions for your remote model.

Remote Pairing Instructions

Remote pairing is necessary if your remote control becomes disconnected from the adjustable base. The Tempur-Pedic Ergo PDF manual provides detailed, step-by-step instructions. Typically, the process involves accessing a pairing mode on both the base and the remote.

Begin by ensuring the adjustable base is powered on. Locate the pairing button on the base – its location varies by model, so consult the manual. Press and hold the pairing button until an indicator light begins to flash. Simultaneously, on the remote, press and hold the designated pairing buttons (often the ‘Head Up’ and ‘Foot Up’ buttons together).

Continue holding both buttons until the indicator light on the base stops flashing, signifying a successful connection. If pairing fails, repeat the process, ensuring both devices are within close proximity. The manual also outlines alternate pairing procedures if the initial method doesn’t work. Successful pairing allows full control of your Tempur-Pedic base via the remote.

Alternate Remote Pairing Procedures

If the standard remote pairing process fails, the Tempur-Pedic Ergo PDF manual details several alternate procedures. These often involve a more direct connection method, bypassing potential interference. One method may require disconnecting and reconnecting the power cord to the adjustable base to reset the pairing module.

Another procedure might involve a specific sequence of button presses on the remote itself, initiating a forced pairing mode. The manual emphasizes the importance of performing these steps precisely as outlined. Some models feature a physical reset button on the base’s control box, requiring a pin or small tool for activation.

Before attempting alternate procedures, ensure fresh batteries are installed in the remote. If issues persist, consult the manual’s troubleshooting section or contact Tempur-Pedic customer support. These alternate methods are designed to address unique pairing challenges and restore full functionality to your adjustable base’s remote control.

Troubleshooting Common Remote Issues

The Tempur-Pedic Ergo PDF manual dedicates a section to resolving frequent remote control problems. A common issue is unresponsive buttons, often solved by replacing the batteries with fresh ones. If the remote still doesn’t function, check for obstructions between the remote and the base’s receiver.

Pairing difficulties are also addressed, referencing the remote pairing instructions. Interference from other wireless devices can sometimes disrupt the signal; try moving potential sources of interference away from the base. If the base responds erratically, a remote reset might be necessary, detailed in the manual.

For unresponsive bases, verify the power connection and ensure the base is receiving power. The manual also suggests checking the control box for any error lights. If problems persist, consult the manual’s advanced troubleshooting guide or contact Tempur-Pedic support for assistance.

Operating Instructions: Basic Adjustments

The Tempur-Pedic Ergo PDF manual outlines simple adjustments using the remote control. The “Head Up/Down” buttons control the head section of the base, allowing for reading or television viewing. Similarly, “Foot Up/Down” adjusts the foot section, promoting leg elevation for comfort.

To achieve a flat position, press both the “Head Down” and “Foot Down” buttons simultaneously until the base is fully lowered. The manual emphasizes using gentle, controlled presses to avoid abrupt movements. Familiarize yourself with the remote’s layout for intuitive operation.

The manual also details how to save preferred positions using the memory function, enabling quick access to customized comfort levels. Remember to consult the PDF for visual diagrams illustrating button functions and adjustment ranges. Proper understanding of these basic adjustments enhances the overall Tempur-Pedic experience.

Operating Instructions: Advanced Features (Massage, Zero Gravity)

The Tempur-Pedic Ergo PDF manual details advanced features like massage and Zero Gravity positioning, controlled via the remote. The massage function offers varying intensity levels, adjustable through dedicated buttons on the remote control. The manual advises starting with the lowest setting and gradually increasing as desired.

Zero Gravity mode, designed to simulate a weightless experience, is activated by a specific button on the remote. This position elevates both the head and feet, potentially relieving pressure points. The manual highlights the benefits of this mode for relaxation and improved circulation.

Detailed diagrams within the PDF illustrate the optimal body positioning for each massage intensity and Zero Gravity level. Always refer to the manual for safety precautions and recommended usage times. Mastering these features unlocks the full potential of your Tempur-Pedic adjustable base, enhancing comfort and well-being.

Setting Up a Tandem System with Dual Remotes

The Tempur-Pedic Ergo PDF manual provides clear instructions for configuring a tandem system, allowing two adjustable bases to operate independently or in unison with separate remotes. This setup is ideal for couples with differing comfort preferences.

Initial synchronization requires accessing a specific pairing mode on both bases, as detailed in the manual. Each remote control must then be individually paired to its corresponding base. The PDF includes step-by-step diagrams illustrating the process, ensuring accurate connection.

Once paired, users can operate their bases independently, adjusting head and foot positions to their liking. Alternatively, a “sync” function, accessible via the remote, allows simultaneous adjustments. The manual emphasizes the importance of following the pairing sequence precisely to avoid operational issues. Proper setup guarantees a personalized and coordinated sleep experience.

Child-Lock Safety Feature Activation/Deactivation

The Tempur-Pedic Ergo adjustable base remote control incorporates a child-lock safety feature, preventing unintended operation. The Tempur-Pedic Ergo PDF manual details the activation and deactivation process, crucial for households with children or pets.

Activation typically involves pressing and holding a specific combination of buttons on the remote for a designated duration. The manual provides a visual guide, illustrating the exact button sequence. Once activated, the base will not respond to remote commands, ensuring safety.

Deactivation requires repeating the same button combination. The PDF clearly states that the remote will provide visual confirmation – often a change in indicator light – upon successful activation or deactivation. It’s important to consult the manual for your specific model, as button sequences may vary. This feature offers peace of mind, preventing accidental adjustments and potential hazards.

Emergency Stop Functionality

The Tempur-Pedic Ergo adjustable base is equipped with an emergency stop function, designed for immediate halting of movement. As detailed in the Tempur-Pedic Ergo PDF manual, this critical safety feature is readily accessible, prioritizing user well-being.

In any situation requiring an immediate stop – accidental activation, obstruction detection, or unforeseen circumstances – simply pressing any button on the remote control will instantly cease all base movement. This overrides any ongoing adjustments, providing a swift and reliable response.

The manual emphasizes that this functionality is not a substitute for attentive operation and adherence to safety guidelines. However, it serves as a vital safeguard. The PDF also clarifies that the base will remain stationary until another command is issued via the remote. Familiarize yourself with this feature by reviewing the manual before initial use, ensuring a safe and comfortable experience.

Power Outage Procedures and Manual Operation

The Tempur-Pedic Ergo adjustable base, as outlined in the comprehensive PDF manual, offers a manual operation capability in the event of a power outage. This ensures you aren’t completely stranded during unexpected disruptions.

While the remote control becomes inoperable without power, the base can be returned to a flat, horizontal position manually. The manual details a specific procedure involving locating the manual release cord, typically found near the power supply. Pulling this cord disengages the motor, allowing you to gently lower the base.

Important safety notes within the PDF stress caution during manual operation. Avoid forcing the mechanism and ensure no obstructions are present. Once power is restored, the base should automatically reset. Refer to the manual for detailed diagrams and step-by-step instructions. Understanding this procedure beforehand, as detailed in the Tempur-Pedic Ergo PDF manual, provides peace of mind and ensures continued comfort.

FCC Compliance Information

This Tempur-Pedic Ergo adjustable base and its accompanying remote control adhere to the regulations set forth by the Federal Communications Commission (FCC). As detailed in the Tempur-Pedic Ergo PDF manual, this device has been tested and found to comply with the limits for a Class B digital device.

These limits are designed to provide reasonable protection against harmful interference in a residential installation. Operation is subject to two conditions: first, the device must not cause harmful interference, and second, it must accept any interference received, including interference that may cause undesired operation.

The PDF manual explicitly states that any changes or modifications not expressly approved by Tempur-Pedic could void the user’s authority to operate the equipment; For detailed FCC compliance statements and information regarding radio frequency exposure, please consult the complete PDF manual available for download. This ensures adherence to legal standards and responsible device usage;

Repair and Replacement Information

Regarding repairs or replacement of your Tempur-Pedic Ergo Plus adjustable base or its remote control, the Tempur-Pedic Ergo PDF manual directs users to contact Tempur-Pedic customer support or an authorized service provider. Attempting self-repair may void the warranty and potentially damage the unit.

The manual emphasizes that unauthorized repairs are not covered under the warranty; For remote control issues, the PDF provides troubleshooting steps; however, if the remote is defective, a replacement can be obtained through Tempur-Pedic. Details on initiating a warranty claim or purchasing replacement parts are outlined in the downloadable PDF manual.

The manual also clarifies that Tempur-Pedic is not responsible for damage resulting from improper repairs. Always refer to the official Tempur-Pedic documentation for accurate and up-to-date information on repair procedures and replacement options, ensuring the longevity and proper functioning of your adjustable base system.

Downloading the Tempur-Pedic Ergo PDF Manual

Accessing the complete Tempur-Pedic Ergo PDF manual is crucial for understanding all features and functionalities of your adjustable base and remote control. The manual provides comprehensive instructions, from initial setup and remote pairing to advanced features like massage and Zero Gravity positioning.

Several online resources offer the PDF download. Searching “Tempur-Pedic ERGO PDF manual” will lead you to the official Tempur-Pedic website or authorized document repositories. This manual covers various Ergo models, including the Ergo Plus and Ergo Extend, ensuring you find information specific to your base.

The PDF format allows for easy viewing on computers, tablets, and smartphones. It includes detailed diagrams of the remote control, explanations of each button’s function, and troubleshooting guides for common issues. Downloading and saving the manual ensures you always have access to vital operating instructions and warranty information.

Manuals

girard awning manual

Girard Awning Manual: A Comprehensive Guide

Discover effortless relaxation with your Girard awning! This guide provides essential information for installation, operation, maintenance, and troubleshooting, ensuring years of enjoyable use.

Understanding Your Girard Awning

Girard awnings are renowned for their quality and innovative design, offering superior protection and convenience for your recreational vehicle. These power awnings significantly enhance your camping experience by providing shade and shelter from the elements. Understanding the core components and functionality of your Girard awning is crucial for safe and effective operation.

Key features include a robust motor system, durable fabric, and a sleek, integrated housing. The awning’s operation is typically controlled via a wall-mounted switch or a remote control, allowing for easy deployment and retraction. However, a manual override feature is also incorporated for emergency situations or when power is unavailable. Proper understanding of this feature is vital.

Before you begin, familiarize yourself with the specific model of your awning, as installation and operation procedures can vary. Referencing your awning’s manual will provide detailed instructions tailored to your particular unit, ensuring optimal performance and longevity.

Awning Models & Identification

Girard Systems offers a diverse range of awning models, each designed to suit various RV types and preferences. Common models include the GG750, known for its reliability and ease of use, and the NOVA, featuring a streamlined design and advanced functionality. Identifying your specific model is the first step towards accessing the correct documentation and support.

Model numbers are typically located on a sticker affixed to the awning’s housing or the motor assembly. This sticker will also contain important information such as the manufacturing date and serial number. Accurate identification ensures you download the correct Girard awning manual for your unit.

Visual inspection can also help differentiate between models. Consider the shape of the awning housing, the type of fabric used, and the presence of any unique features. Consulting the Girard Systems website or contacting their customer support can further assist in confirming your awning’s model.

Initial Inspection & Unpacking

Carefully unpack your Girard awning, taking inventory of all components against the packing list. Inspect the awning and all included parts for any visible damage incurred during shipping. Note any scratches, dents, or broken pieces immediately and document them with photographs.

Verify the presence of the awning fabric, roller assembly, mounting brackets, hardware, and the Girard awning manual itself. Report any missing items to the retailer or Girard Systems customer support promptly. Before proceeding, ensure you have a clear workspace and the necessary tools for installation.

Pay close attention to the awning fabric, checking for tears or imperfections. A thorough initial inspection will prevent complications during installation and ensure a smooth setup process. Retain all packaging materials until you are satisfied with the condition of the product.

Safety Precautions Before Installation

Prioritize safety during the installation of your Girard awning. Always disconnect the power supply to the RV before commencing any electrical work related to the awning. Work on a stable, level surface and utilize appropriate safety gear, including safety glasses and gloves.

Ensure the roof of your RV is clean and dry before mounting brackets. Avoid working in windy conditions, as this can create a hazardous environment. Never attempt to lift or maneuver heavy awning components alone; seek assistance from another person.

Be mindful of overhead obstructions, such as power lines or tree branches. Double-check all connections and fasteners to ensure they are secure. Consult a qualified RV technician if you are unsure about any aspect of the installation process. Ignoring these precautions could lead to injury or damage.

Installation Procedures

Begin by carefully considering roof mount applications and necessary clearances. Securely attach brackets, following layout guidelines, before mounting the awning step-by-step for optimal performance.

Roof Mount Application Considerations

Prior to initiating the roof mount installation of your Girard NOVA awning, meticulous planning is absolutely crucial. The required clearance varies significantly depending on the RV manufacturer, demanding careful assessment of your specific vehicle’s roof profile. Factors such as roof shape, the intended depth of the awning installation, and the type of roof mount bracket employed all contribute to the overall clearance needs.

It’s essential to thoroughly evaluate these elements to ensure proper functionality and prevent potential damage. Girard Systems strongly encourages consulting with their support team if any uncertainties arise regarding appropriate clearances or bracket selection. Ignoring these considerations could lead to operational issues or compromise the awning’s structural integrity. Remember, a secure and properly installed awning enhances your RV experience, providing reliable shade and protection from the elements.

Bracket Layout & Mounting

Careful bracket layout is paramount for a secure and reliable Girard awning installation. Begin by precisely marking the bracket positions on your RV’s roof, ensuring accurate alignment with pre-drilled holes or designated mounting points. Utilize appropriate measuring tools to maintain consistent spacing between brackets, as specified in the awning’s installation guide.

Once the positions are marked, securely mount the brackets using self-tapping screws designed for RV roofing materials. Ensure the screws are properly tightened to prevent loosening during travel or operation. Avoid over-tightening, which could potentially damage the roof surface. Double-check the stability of each bracket before proceeding to the next step. A solid bracket foundation is critical for the awning’s long-term performance and safety, providing a stable base for the awning’s operation.

Awning Mounting – Step-by-Step

With the brackets securely mounted, carefully lift the Girard awning into position. Align the awning’s mounting arms with the corresponding brackets, ensuring a snug and secure fit. Gently slide the awning onto the brackets, verifying that all mounting points are properly engaged.

Next, secure the awning to the brackets using the provided hardware – typically bolts and locking washers. Tighten the hardware gradually and evenly, avoiding excessive force that could damage the awning or brackets. Double-check all connections to confirm they are firmly secured. Finally, perform a visual inspection to ensure the awning is level and properly aligned before operating. A correctly mounted awning will extend and retract smoothly, providing years of reliable shade and protection.

Operation & Functionality

Enjoy seamless operation with your Girard awning! Understand normal functions, manual override options, and quick troubleshooting for common issues, maximizing your outdoor experience.

Normal Operation of the Awning

Your Girard awning is designed for simple, convenient operation. Typically, deployment is initiated via a wall-mounted switch or, in some models, a remote control. Pressing the designated button will activate the motor, extending the awning smoothly and automatically. The awning will extend to its fully open position, and the motor will cease operation.

To retract the awning, simply press the corresponding “retract” button. The awning will then roll back into its cassette housing. It’s crucial to ensure there are no obstructions – people, objects, or debris – in the awning’s path during both extension and retraction. Always observe the awning’s movement and immediately stop operation if any resistance is encountered.

Remember that wind conditions can significantly impact awning operation. Avoid deploying the awning in high winds, as this could cause damage to the fabric or the mechanism. Regular use and adherence to these guidelines will ensure long-lasting performance and enjoyment of your Girard awning.

Using the Manual Override Feature

In the event of power failure or motor malfunction, your Girard awning can be operated manually. Locate the endcap opposite the motor and remove it by unscrewing the three Phillips head screws. Beneath this cap, you’ll find the manual override shaft.

Using a 13mm wrench, carefully turn the shaft clockwise to retract the awning, and counter-clockwise to deploy it. The process requires physical effort, and the speed of operation will be significantly slower than with the motor. It’s important to apply steady, even pressure to avoid straining the mechanism.

Remember to fully secure the awning in either the fully open or fully closed position after manual operation. Once power is restored or the motor is repaired, the awning can be returned to normal motorized operation. This feature provides a vital backup for continued usability.

Troubleshooting Common Issues

Encountering problems with your Girard awning? Several common issues can arise. If the awning fails to deploy fully, check for obstructions and ensure the manual override isn’t engaged. A motor that runs but the awning doesn’t move suggests a potential gear or linkage problem – professional inspection is recommended.

No power to the awning often indicates a blown fuse or a disconnected power supply. Verify the fuse and wiring connections. Before attempting any electrical repairs, disconnect the power source. Don’t wrestle with the awning; consult the manual for specific troubleshooting steps.

Remember, attempting complex repairs without proper knowledge can cause further damage; When in doubt, contact a qualified RV technician or Girard Systems support for assistance. Prioritize safety and refer to the complete manual for detailed guidance.

Awning Fails to Deploy Fully

If your Girard awning starts to extend but stops short of full deployment, several factors could be at play. First, carefully inspect the awning’s path for any obstructions – branches, debris, or even accumulated dirt can hinder movement. Ensure the manual override isn’t accidentally engaged, as this will prevent motorized operation.

Check for binding in the awning arms or fabric. A slight misalignment or snag can cause the motor to strain and stop. Gently attempt to manually extend the awning a small amount to identify any points of resistance. If resistance is felt, do not force it.

Consult your awning manual for specific reset procedures or troubleshooting steps related to partial deployment. If the issue persists, professional service may be required to diagnose and repair any internal mechanical problems.

Motor Runs But Awning Doesn’t Move

When the motor operates but the awning remains stationary, the issue likely lies within the drive mechanism. Begin by verifying the manual override isn’t engaged; attempting to power the awning with the override active will prevent movement. Inspect the shear pin – a safety feature designed to break under excessive stress – for damage or breakage. A broken shear pin requires replacement.

Carefully examine the gearbox and drive components for any visible signs of wear, damage, or disconnection. Listen for unusual noises during motor operation, which could indicate internal gear failure. Disconnect power before any inspection of electrical components.

If you’re uncomfortable with mechanical troubleshooting, consult a qualified RV technician. Attempting repairs without proper knowledge could cause further damage or personal injury.

No Power to the Awning

If your Girard awning receives no power, begin troubleshooting with the simplest checks. Verify the awning’s circuit breaker in your RV’s electrical panel hasn’t tripped. Reset it if necessary. Next, inspect the awning’s wiring connections, ensuring they are secure and free from corrosion. Check the fuse dedicated to the awning; a blown fuse will interrupt power supply.

Using a multimeter, confirm voltage is reaching the awning’s motor connector. If voltage is present at the connector but the motor isn’t responding, the motor itself may be faulty. If there’s no voltage, trace the wiring back towards the power source, looking for breaks or shorts.

Remember to disconnect all power sources before conducting any electrical inspections or repairs. If you are not comfortable with electrical work, consult a qualified RV technician.

Maintenance & Care

Prolong your awning’s life with routine cleaning and inspections! Regular care protects against wear, ensuring reliable performance and maximizing your outdoor enjoyment.

Cleaning Your Girard Awning

Maintaining a clean Girard awning not only enhances its appearance but also extends its lifespan. Regular cleaning prevents the buildup of dirt, mildew, and other debris that can damage the fabric and components. For routine cleaning, use a mild soap and water solution – specifically designed for RV awnings is preferable – and a soft brush or sponge.

Avoid harsh chemicals, abrasive cleaners, or pressure washers, as these can strip the fabric’s protective coating and cause fading or tearing. Gently scrub the awning fabric, paying attention to areas with visible dirt or stains. Rinse thoroughly with clean water to remove all soap residue.

Allow the awning to air dry completely before retracting it. Inspect the awning periodically for any signs of damage, such as tears, holes, or loose stitching, and address them promptly to prevent further deterioration. Consistent cleaning and inspection will ensure your Girard awning remains in optimal condition for years to come, providing reliable shade and enjoyment.

Winterization & Storage

Proper winterization and storage are crucial for protecting your Girard awning from damage during cold weather months. Before storing, thoroughly clean the awning fabric to remove any dirt, debris, or mildew, following the cleaning guidelines outlined previously. Fully retract the awning and ensure it is completely dry before covering it.

Consider using a breathable awning cover specifically designed for RV awnings to shield it from snow, ice, and UV rays. Avoid using plastic tarps, as they can trap moisture and promote mildew growth. If possible, store your RV in a covered location, such as a garage or storage facility, to further protect the awning from the elements.

Regularly inspect the awning during storage for any signs of damage or wear. Following these winterization steps will help ensure your Girard awning remains in excellent condition and ready for use when the warmer weather returns, maximizing its longevity and performance.

Regular Inspection Points

Consistent inspection is key to maintaining your Girard awning’s functionality and preventing costly repairs. Routinely check the awning fabric for tears, fraying, or mildew, addressing any issues promptly. Examine the awning arms and brackets for signs of corrosion, looseness, or damage, tightening bolts as needed.

Pay close attention to the awning’s motor and electrical connections, ensuring wires are secure and free from damage. Test the manual override feature periodically to confirm it operates smoothly. Inspect the awning’s casing for cracks or deformities, and verify the proper operation of all sensors and switches.

Furthermore, check the sealant around the mounting brackets for any gaps or deterioration, reapplying sealant as necessary to prevent water intrusion. By diligently following these inspection points, you can proactively identify and address potential problems, ensuring your Girard awning provides years of reliable service.

Girard Awning Parts & Replacement

Locate specific replacement components easily! Identify parts using your awning model number and consult the detailed parts list within the Girard awning manual.

Identifying Replacement Parts

Accurate part identification is crucial for a successful repair. Begin by referencing your Girard awning’s model number, typically found on a label affixed to the awning’s housing or within the original documentation. This number is essential when ordering replacements.

The Girard awning manual contains detailed exploded diagrams illustrating each component, along with corresponding part numbers. Carefully compare the damaged part to the diagrams to ensure a precise match. Pay close attention to subtle variations, as even minor differences can affect compatibility.

Commonly replaced parts include awning fabric, roller tubes, end caps, support arms, and motor components. When ordering, specify the exact part number, quantity, and awning model. Consider contacting Girard Systems directly or an authorized dealer for assistance if you are unsure about the correct part. Providing clear photos of the damaged component can also expedite the process, ensuring you receive the correct replacement for your Girard awning.

Where to Find Girard Awning Manuals

Locating the correct manual is the first step towards maintaining your Girard awning. The official Girard Systems website (girardsystems.com) is the primary source, offering a comprehensive archive of manuals for all their awning models. Navigate to the “Support” or “Resources” section and utilize the search function, entering your awning’s model number for precise results.

Alternatively, many RV dealerships that sell Girard awnings also provide access to digital manuals or can supply physical copies. Online RV forums and communities dedicated to RV maintenance often host shared links to manuals, offering a collaborative resource.

Furthermore, a general internet search using keywords like “Girard awning manual” combined with your specific model number can yield relevant results. Remember to verify the source’s credibility before downloading any manual to ensure it’s the official and up-to-date version for your Girard awning system.

Manuals

honeywell th5220d1003 manual

Honeywell TH5220D1003 Manual: A Comprehensive Guide

This manual provides detailed instructions for the Honeywell TH5220D1003 non-programmable digital thermostat, covering installation, operation, and troubleshooting.
It’s a crucial resource for homeowners and HVAC professionals alike, ensuring proper setup and efficient use of this widely-used thermostat model.

The Honeywell TH5220D1003 is a widely utilized, non-programmable digital thermostat designed for reliable and straightforward temperature control in residential settings. As a member of the FocusPRO series, it offers a user-friendly interface and dependable performance. This thermostat is a direct replacement for many existing thermostats, making upgrades simple and efficient.

This model is particularly favored for its ease of installation and operation, eliminating the complexities of programmable features for users who prefer a consistent temperature setting. The TH5220D1003 is compatible with a broad range of heating and cooling systems, including gas, oil, and electric. Understanding its features and proper installation procedures, detailed within this manual, will ensure optimal comfort and energy efficiency within your home. It’s a cost-effective solution for maintaining a comfortable indoor climate.

Key Features of the TH5220D1003 Model

The Honeywell TH5220D1003 boasts several key features that contribute to its popularity. Primarily, it’s a non-programmable thermostat, offering simple, consistent temperature control without the need for scheduling. The large, easy-to-read display clearly shows the current temperature and setpoint.

Its compatibility with various heating and cooling systems – gas, oil, and electric – makes it a versatile choice for many homes. The thermostat also includes a precise temperature control, ensuring consistent comfort. Importantly, it’s designed as a direct replacement for many existing thermostats, simplifying the installation process. Furthermore, the unit is built with reliable components, ensuring long-lasting performance. The FocusPRO series emphasizes user-friendliness and dependable operation, making this model an excellent choice for straightforward climate control.

Installation Procedures

Proper installation is vital for optimal performance. This section details safety precautions, required tools, wiring diagrams, and a step-by-step guide for a successful setup.

Safety Precautions Before Installation

Before beginning the installation process, prioritize safety to prevent electrical shock, fire hazards, or damage to the system. Always disconnect power to the heating and cooling system at the breaker box or fuse before removing the old thermostat or connecting any wires.

If replacing a thermostat containing mercury, do not dispose of it in the trash. Mercury is a hazardous material, and proper recycling is essential. Contact your local waste management authority for specific instructions on mercury disposal.

Ensure the installation area is dry and free from obstructions. Read and understand all instructions in this manual before proceeding. If you are uncomfortable with electrical wiring, consult a qualified HVAC technician for assistance. Failure to follow these precautions could result in serious injury or property damage.

Tools Required for Installation

Proper preparation is key to a smooth installation process. You will need a few essential tools to successfully install your Honeywell TH5220D1003 thermostat. A small screwdriver (both flathead and Phillips head) is crucial for removing and tightening screws on the thermostat and wiring connections.

A wire stripper/cutter will be necessary to safely strip the insulation from the thermostat wires without damaging the conductors. A level ensures the thermostat is mounted straight for accurate readings and a professional appearance.

A pencil is helpful for marking screw holes and wire locations. Optionally, a voltage tester can confirm power is off before handling wires, and a digital multimeter can assist with troubleshooting. Having these tools readily available will streamline the installation process.

Wiring Diagram Overview

Understanding the wiring diagram is paramount before commencing installation. The Honeywell TH5220D1003 typically utilizes a standard wiring configuration, but variations exist depending on your heating/cooling system. Common terminals include R (power), W (heat), Y (cool), G (fan), and C (common – often blue).

W2 is often used for second-stage heating. Carefully identify the corresponding wires from your existing thermostat and label them before disconnecting. The diagram illustrates how these wires connect to the TH5220D1003’s terminals.

Incorrect wiring can damage your system, so double-check all connections. For gas-fired unit heaters and duct furnaces (HD/HDB, HDS/HDC, etc.), specific wiring selections apply. Always refer to the detailed wiring diagram included with your thermostat or available online for accurate guidance.

Step-by-Step Installation Guide

Begin by turning off power to your HVAC system at the breaker. Remove the cover of your old thermostat and carefully disconnect the wires, labeling each one as you go. Use the provided wall label to mark the wire locations. Mount the Honeywell TH5220D1003 baseplate to the wall, ensuring it’s level.

Connect the wires to the corresponding terminals on the new thermostat baseplate, referencing the wiring diagram. Securely attach the thermostat to the baseplate. Restore power at the breaker. The thermostat should power on and initiate the setup process. Follow the on-screen prompts to configure your system type and preferences.

Verify proper operation by testing both heating and cooling modes.

Replacing an Existing Thermostat

Before replacing your thermostat, completely shut off power to your heating and cooling system at the circuit breaker to avoid electrical shock. Carefully remove the cover of the existing thermostat, exposing the wiring terminals. Crucially, label each wire with its corresponding terminal designation before disconnecting them – this is vital for correct re-installation.

Disconnect the wires and remove the old baseplate. Mount the Honeywell TH5220D1003 baseplate using the provided screws and wall anchors, ensuring it’s level. Connect the labeled wires to the appropriate terminals on the new baseplate, referencing the wiring diagram. Secure the thermostat to the baseplate and restore power at the breaker.

Test the system to confirm proper operation of both heating and cooling.

Mercury Disposal Information

If your old thermostat contains mercury in a sealed tube – a common feature in older models – it requires careful and responsible disposal. Do not discard it with regular household trash. Mercury is a hazardous material and poses environmental risks if improperly handled.

Contact your local waste management authority for specific instructions on recycling or proper disposal procedures in your area. Many communities have designated collection sites or events for hazardous waste. Some retailers also offer thermostat recycling programs.

Proper disposal protects the environment and public health. Ignoring these guidelines could lead to mercury contamination. Honeywell emphasizes responsible handling of older thermostats containing mercury, ensuring compliance with environmental regulations.

Operating Instructions

The Honeywell TH5220D1003 offers simple temperature control, system mode selection (heat, cool, off), and fan settings for comfortable home climate management.

Understanding the Display

The Honeywell TH5220D1003 thermostat features a clear, easy-to-read display providing essential information at a glance. The primary area showcases the current room temperature, prominently displayed in a large font. Adjacent to this, you’ll find the set temperature, indicating your desired heating or cooling point.

Below the temperature readings, the display indicates the current system mode – whether the system is in Heat, Cool, or Off mode. Small icons visually represent these modes for quick identification. Additionally, the display shows the fan setting, indicating if the fan is set to Auto or On.

During operation, the display may also briefly show messages or error codes, providing diagnostic information if issues arise. A battery icon will illuminate when the batteries are low, prompting replacement. Familiarizing yourself with these display elements will allow for efficient monitoring and control of your home’s comfort.

Setting the Temperature

Adjusting the temperature on your Honeywell TH5220D1003 thermostat is straightforward. Utilize the clearly marked Up and Down temperature control buttons located on the thermostat face. Pressing the Up button increases the set temperature, while the Down button decreases it.

Each press typically adjusts the temperature in one-degree increments, though this may vary. The display will update in real-time, showing the new set temperature as you make adjustments; The thermostat will then automatically activate your heating or cooling system to reach and maintain this desired temperature.

Remember that the thermostat responds to the set temperature, not the current room temperature. Allow sufficient time for the system to respond to changes, ensuring comfortable and efficient climate control. Avoid frequent, large temperature adjustments for optimal energy usage.

System Mode Selection (Heat, Cool, Off)

The Honeywell TH5220D1003 thermostat offers three primary system modes: Heat, Cool, and Off. Selecting the appropriate mode ensures your HVAC system operates as intended. The System button allows you to cycle through these options.

In Heat mode, the thermostat activates your heating system when the room temperature falls below the setpoint. Cool mode activates the cooling system when the temperature rises above the setpoint. The Off mode disables both heating and cooling, allowing for manual control or system shutdown.

Ensure the correct mode is selected based on the season and your comfort preferences. The currently selected mode is typically indicated on the thermostat display. Proper mode selection is crucial for efficient operation and maintaining a comfortable indoor environment.

Fan Control Settings

The Honeywell TH5220D1003 thermostat provides options for controlling the fan operation, influencing both air circulation and system efficiency. You can typically select between Auto and On settings using the fan control button.

In Auto mode, the fan operates only during heating or cooling cycles, circulating air when the system is actively working to adjust the temperature. Selecting On forces the fan to run continuously, regardless of whether heating or cooling is engaged.

Continuous fan operation can improve air circulation and even out temperature distribution, but it also consumes more energy. Consider your comfort needs and energy-saving goals when choosing a fan control setting. The current fan setting is usually displayed on the thermostat’s screen.

Troubleshooting Common Issues

This section details solutions for typical problems, such as the thermostat not powering on, inaccurate temperature readings, or a system unresponsive to settings.

Thermostat Not Powering On

If your Honeywell TH5220D1003 thermostat fails to power on, begin by verifying the power source. Check the circuit breaker or fuse box to ensure the thermostat’s circuit hasn’t tripped or blown. Confirm that the thermostat wires are securely connected to the correct terminals – a loose connection can interrupt power.

Inspect the batteries, if your model utilizes them, and replace them with fresh ones. Ensure the thermostat is properly seated on the wall plate; a poor connection here can also prevent power-up. If replacing a previous thermostat, double-check that the ‘C’ wire (common wire) is connected, as this is often required for consistent power.

If the issue persists, consult a qualified HVAC technician to diagnose potential wiring problems or a faulty thermostat unit. Do not attempt repairs if you are uncomfortable working with electrical wiring.

Incorrect Temperature Readings

If the Honeywell TH5220D1003 displays inaccurate temperature readings, several factors could be at play. Ensure the thermostat isn’t exposed to direct sunlight, drafts, or heat sources like lamps, as these can skew the temperature sensor. Verify the thermostat is level on the wall; an uneven installation can affect accuracy.

Check for obstructions near the thermostat that might impede airflow. Compare the thermostat’s reading with a reliable thermometer placed nearby to confirm the discrepancy. Consider adjusting the temperature differential setting (though limited on this non-programmable model) which influences how much the temperature needs to change before the system activates.

If the problem continues, the thermostat’s sensor may be faulty, requiring replacement by a qualified HVAC professional. Avoid attempting internal repairs yourself.

System Not Responding to Thermostat

If your heating or cooling system isn’t responding to the Honeywell TH5220D1003, begin by checking the circuit breaker or fuse box to ensure power is supplied to the system. Verify the thermostat is set to the correct system mode (Heat, Cool, or Off) and that the set temperature is appropriately adjusted.

Inspect the wiring connections at both the thermostat and the HVAC unit, ensuring all wires are securely fastened and haven’t come loose. Confirm the system’s emergency switch isn’t turned off. A blown fuse within the HVAC unit itself could also be the culprit.

If these checks don’t resolve the issue, there may be a problem with the HVAC system itself, requiring professional diagnosis and repair. Do not attempt to repair the HVAC system without proper training.

Error Codes and Their Meanings

The Honeywell TH5220D1003 thermostat utilizes error codes to signal potential issues within the heating or cooling system. While this model is relatively simple, understanding these codes can aid in troubleshooting. A flashing display or specific character combinations indicate a problem.

Unfortunately, the TH5220D1003 has limited error code functionality compared to more advanced models. Common issues are often indicated by a completely blank display (power issue) or erratic temperature readings. If a specific code appears, consulting the full installation guide (available online as a PDF) is crucial.

For unresolved error indications, contacting Honeywell support directly is recommended. Professional HVAC technicians possess the expertise to accurately diagnose and resolve complex system errors.

Advanced Settings & Programming (Limited for Non-Programmable Model)

The TH5220D1003 is a non-programmable thermostat, offering limited advanced settings. Adjusting the temperature differential is the primary customization option available to users.

Understanding Non-Programmable Functionality

Unlike programmable thermostats, the Honeywell TH5220D1003 operates on a consistent, user-defined temperature setting. This means it doesn’t allow for pre-set schedules for different times of the day or days of the week.

Its simplicity is its strength; you set the desired temperature, and the thermostat maintains it. This makes it ideal for users who prefer a straightforward heating and cooling experience without the complexity of programming.

The absence of programming features doesn’t mean a lack of control. You can easily adjust the temperature up or down as needed, and select between Heat, Cool, or Off modes.

This model prioritizes ease of use, making it a great choice for those unfamiliar with advanced thermostat settings or those who simply want a reliable, no-fuss climate control solution. It’s a dependable option for consistent comfort.

Adjusting Temperature Differential

The temperature differential, often referred to as “cycle rate,” determines how much the room temperature needs to deviate from the setpoint before the heating or cooling system turns on or off.

The TH5220D1003 typically has a fixed differential, meaning it isn’t user-adjustable through the thermostat’s interface. This fixed differential is designed to provide efficient and consistent temperature control without requiring complex settings adjustments.

A smaller differential results in more frequent, shorter cycles, while a larger differential leads to less frequent, longer cycles. The factory setting aims for a balance between comfort and energy efficiency.

While not directly adjustable by the user, understanding this concept is helpful for diagnosing potential issues. If the system cycles too frequently or not enough, it might indicate a different underlying problem rather than a differential setting issue.

Technical Specifications

The TH5220D1003 operates on 24VAC power, handles temperatures between 40°F and 90°F, and is compatible with standard 24VAC heating and cooling systems.

Power Requirements

The Honeywell TH5220D1003 thermostat is designed to operate with a standard 24 Volt Alternating Current (VAC) power supply, commonly found in most residential heating and cooling systems. It does not require batteries for basic operation, relying instead on the consistent power provided by the HVAC system’s control transformer.

This 24VAC power is typically delivered through the ‘C’ (Common) wire connection. If your existing system lacks a ‘C’ wire, a ‘C’ wire adapter may be necessary for proper functionality – consult a qualified HVAC technician for assistance with this.

Important Note: Attempting to power the thermostat with any voltage other than 24VAC can cause permanent damage to the unit and potentially void the warranty. Always ensure the power supply is correctly configured before installation.

Temperature Range

The Honeywell TH5220D1003 thermostat is capable of accurately displaying and controlling temperatures within a broad range, suitable for most residential climates. The display temperature range extends from 40°F to 90°F (4.4°C to 32.2°C). However, the controllable temperature range – the settings you can actually program – typically falls between 50°F and 90°F (10°C and 32.2°C).

While the thermostat can display temperatures outside this control range, it won’t actively attempt to heat or cool your home below 50°F or above 90°F. This prevents unnecessary strain on your HVAC system.

Compatibility with Heating/Cooling Systems

The Honeywell TH5220D1003 thermostat demonstrates broad compatibility with a variety of common heating and cooling systems, making it a versatile choice for many homes. It supports single-stage and multi-stage conventional heating systems, including gas, oil, and electric furnaces. It also works effectively with central air conditioning systems, heat pumps (without auxiliary heat control), and even some millivolt systems.

However, it’s crucial to verify compatibility before installation. This thermostat is not designed for line voltage systems (110V/220V) or systems requiring advanced features like zoning or communicating protocols. Always consult a qualified HVAC technician if you’re unsure about compatibility with your specific system.

Important: Incorrect wiring or installation can damage both the thermostat and your HVAC equipment.

Resources & Support

For further assistance, Honeywell provides downloadable manuals in PDF format and comprehensive support via their contact information. Warranty details are also readily available online.

Downloading the Manual (PDF)

Accessing a digital copy of the Honeywell TH5220D1003 manual is straightforward and offers convenient offline access to crucial information. Several online repositories host the PDF version, allowing users to download it directly to their computers, tablets, or smartphones. ManualsLib is a prominent source, providing a readily available download link for the 21-page user manual.

Thermostat.guide also offers a downloadable installation guide for the TH5220D Non-Programmable Digital Thermostat. Having the PDF manual ensures you always have the necessary documentation at your fingertips, whether you’re installing the thermostat, troubleshooting issues, or simply need a refresher on its operating procedures. This eliminates the need to search for a physical copy and provides a portable, easily shareable resource.

Honeywell Support Contact Information

For direct assistance with your Honeywell TH5220D1003 thermostat, reaching out to Honeywell’s support team is a valuable option. While specific contact details aren’t explicitly provided in the readily available online resources, Honeywell offers comprehensive support through their official website. Navigating to the Honeywell Home website is the first step to accessing their support channels.

Users can typically find FAQs, troubleshooting guides, and contact forms for submitting inquiries. Depending on the nature of your issue, you may be able to connect with a support representative via phone or online chat. Remember to have your thermostat model number (TH5220D1003) readily available when contacting support to expedite the assistance process. Exploring the Honeywell Home website will provide the most up-to-date contact information.

Warranty Information

Regarding warranty coverage for the Honeywell TH5220D1003 thermostat, specific details are typically outlined in the documentation included with the product at the time of purchase. While readily available online resources don’t explicitly state the warranty terms, Honeywell generally offers a limited warranty on their thermostats, covering defects in materials and workmanship under normal use.

The duration of the warranty can vary, so it’s crucial to retain your proof of purchase (receipt or invoice) to validate any potential warranty claims. To obtain precise warranty information, it’s recommended to consult the original product packaging or visit the Honeywell Home website. There, you can find detailed warranty statements and instructions on how to initiate a claim if needed.

Manuals

wiat-4 scoring manual pdf free download

WIAT-4 Scoring Manual PDF Free Download: A Comprehensive Guide

Navigating Google Maps offers guidance for online cartography, including directions, Street View, map creation, and real-time traffic updates; troubleshooting download issues is key.

Understanding the WIAT-4

Google Maps serves as a central aid, offering navigation assistance through online maps accessible via browsers or mobile devices, detailing route planning and Street View utilization.

Users can create, edit, and share maps, alongside accessing live traffic and public transport information. Troubleshooting download and update problems within Google Maps is crucial for optimal functionality, ensuring app versions remain current.

Safety is paramount; awareness of surroundings is vital when using directions, prioritizing adherence to traffic laws and road signage. Directions are available for diverse modes – driving, transit, walking, cycling, and more – enhancing navigational flexibility. Searching for places, like restaurants, is streamlined, providing personalized results and detailed information.

Street View allows immersive exploration of landmarks and businesses, while the official Google Maps Help Center provides tutorials and answers to frequently asked questions, supporting a comprehensive user experience.

What is the WIAT-4?

Google Maps provides a platform for exploring the world, offering detailed maps and navigational tools accessible on both computers and mobile devices. Users can search for specific locations, such as restaurants, and receive personalized results with comprehensive information.

Street View functionality allows for immersive virtual exploration of landmarks, businesses, and natural wonders, enhancing the user experience. Route planning supports various transportation methods, including driving, public transit, walking, and cycling, catering to diverse needs.

The app’s help center offers tutorials and answers to frequently asked questions, ensuring users can effectively utilize its features. Troubleshooting guides address common issues like download problems, maintaining app functionality. Prioritizing safety, Google Maps encourages awareness of surroundings and adherence to traffic regulations while navigating.

Customization options, like choosing a driving avatar, further personalize the user experience within the Google Maps ecosystem.

Why a Scoring Manual is Crucial

Google Maps’ success hinges on reliable functionality, requiring users to maintain updated versions of the app to avoid download and update issues. Troubleshooting steps are readily available to resolve these problems, ensuring a seamless experience.

The platform’s features, like Street View, demand accurate data and consistent performance, necessitating regular updates. Navigational accuracy is paramount, and the help center provides guidance on utilizing features effectively and safely.

Understanding version numbers is crucial for identifying and addressing potential compatibility issues. Prioritizing safety, Google Maps emphasizes situational awareness and adherence to traffic laws during navigation. Personalized experiences, such as avatar selection, rely on a stable and functional app.

Consistent updates guarantee optimal performance and access to the latest features within the Google Maps ecosystem.

Locating a WIAT-4 Scoring Manual PDF

Google Maps’ help center provides tutorials, and answers frequently asked questions; searching for places, like restaurants, is easily done within the application.

Official Sources for Download

Accessing the WIAT-4 Scoring Manual PDF directly from the publisher, WPS (Western Psychological Services), is the most reliable and legally sound approach. Their official website typically provides resources for test purchasers and those authorized to administer the assessment. Look for a dedicated section for test materials or scoring documentation after completing the necessary purchase and verification processes.

Furthermore, professional organizations involved in psychological assessment, such as the National Association of School Psychologists (NASP) or the American Psychological Association (APA), may offer links or guidance to official sources. However, these organizations generally redirect users to the WPS website for the actual manual download. Be cautious of any website claiming to offer a “free” download from unofficial channels, as these may violate copyright laws and potentially contain compromised files.

Remember to verify the authenticity of any download link and ensure it originates from a trusted source to protect yourself from malware or inaccurate information. Always prioritize official channels for obtaining crucial scoring materials.

Legitimate Websites Offering the Manual

Beyond the WPS official website, several educational resource platforms and authorized distributors legitimately offer the WIAT-4 Scoring Manual PDF, often requiring proof of qualification to purchase. These include specialized educational supply stores catering to psychologists and school professionals. Examples may encompass websites like Nelson-Denny Resources or other academic testing material providers.

However, access is typically restricted to individuals with appropriate credentials – such as licensed psychologists, school psychologists, or those enrolled in relevant graduate programs. Verification of professional status is a standard practice to ensure responsible test usage and adherence to ethical guidelines. These sites prioritize legal compliance and secure transactions.

Always confirm the website’s security (HTTPS protocol) and review their terms of service before making a purchase. Legitimate vendors will clearly state their policies regarding digital downloads and copyright protection.

Risks of Downloading from Unofficial Sources

Downloading the WIAT-4 Scoring Manual PDF from unverified websites poses significant risks. These sources frequently harbor malware, viruses, and other malicious software that can compromise your device and data security. Furthermore, such downloads often violate copyright laws, potentially leading to legal repercussions for unauthorized possession and use.

The integrity of the manual itself is also questionable. Unofficial copies may be incomplete, outdated, or contain errors, leading to inaccurate scoring and unreliable interpretations. This can severely impact the validity of assessments and potentially harm individuals being evaluated.

Moreover, these sites often lack secure payment gateways, exposing your financial information to fraud. Prioritize legitimate sources to safeguard your professional integrity, ethical responsibilities, and personal security.

WIAT-4 Scoring: Core Concepts

Google Maps provides directions for various modes of transport – driving, transit, walking, cycling, and more – alongside Street View exploration capabilities.

Standard Scores, Percentile Ranks, and Age Equivalents

Google Maps empowers users to search for places – restaurants, landmarks, and businesses – directly within the application, offering personalized results and detailed information. Utilizing Street View, individuals can virtually explore locations, experiencing museums, arenas, and even local shops as if physically present.

The platform’s versatility extends to providing directions for diverse transportation methods, including driving, public transit, walking, cycling, and even flights. It’s crucial to remain aware of surroundings and adhere to traffic regulations while using Google Maps for navigation. Regularly updating the app ensures access to the latest features and improvements, resolving potential download or update issues through basic troubleshooting steps. Checking the app version within settings confirms you’re utilizing the most current iteration.

Understanding Confidence Intervals

Google Maps allows users to personalize their driving avatar within the application, enhancing the navigation experience. The official Help Center provides tutorials and answers to frequently asked questions, supporting effective map usage. Searching on Google Maps is straightforward; simply enter a desired category, like “restaurants,” and explore the resulting options.

For optimal performance, addressing download and update issues is vital, often resolved through basic troubleshooting. Staying aware of surroundings and prioritizing actual traffic regulations are paramount for safe navigation. Google Maps supports diverse directions – driving, transit, walking, cycling, and more – catering to varied needs. Regularly checking the app version ensures access to the latest features and a smooth user experience, maximizing the platform’s potential.

Composite Scores and Their Interpretation

Google Maps facilitates exploration through Street View, offering immersive experiences of landmarks, museums, and businesses. Users can create, edit, and share custom maps, fostering collaboration and personalized navigation. The platform provides real-time traffic and public transit information, aiding efficient route planning. Troubleshooting download problems ensures uninterrupted access to these features.

Prioritizing safety, Google Maps emphasizes situational awareness and adherence to traffic laws. Searching for places is simple, with personalized results appearing under the search box. The app supports various transportation modes, adapting to individual preferences. Regularly updating the app guarantees access to the newest functionalities and a refined user experience, enhancing overall map utility and reliability.

Detailed Scoring Procedures

Google Maps allows users to explore locations via Street View, create personalized maps, and receive real-time traffic updates for efficient navigation and route planning.

Subtest Scoring Guidelines

Google Maps provides a versatile platform for exploring the world, offering detailed directions for various modes of transportation – driving, public transit, walking, cycling, and even flights.

Users can search for specific places, like restaurants, and receive personalized recommendations. The integrated Street View feature allows for immersive exploration of landmarks and businesses, enhancing the user experience.

Furthermore, Google Maps facilitates map creation and editing, enabling users to customize their own maps and share them with others. Real-time traffic updates and public transit information ensure efficient route planning, while the app’s settings allow users to check their version and stay informed.

Remember to prioritize safety and awareness while using directions, always adhering to traffic regulations and confirming signage. Google Maps is a powerful tool for navigation and discovery.

Supplemental Materials and Their Use

Google Maps empowers users to explore the world through a user-friendly interface, offering detailed search capabilities for various categories, such as restaurants and local businesses.

The platform’s personalized search results enhance the discovery process, while Street View provides immersive virtual tours of landmarks and establishments. Users can easily obtain directions for diverse transportation methods, including driving, public transit, and cycling.

Google Maps also supports map creation, editing, and sharing, allowing for customized navigation experiences. Real-time traffic updates and public transit information contribute to efficient route planning, and the app’s settings provide access to version information.

Prioritizing safety and awareness is crucial when utilizing directions, always adhering to traffic laws and verifying signage. Google Maps remains a valuable resource for both navigation and exploration.

Error Detection and Correction in Scoring

Google Maps facilitates seamless navigation with features like personalized search results and detailed directions for various transport modes – driving, transit, walking, and more.

Users can explore places through Street View, experiencing landmarks and businesses virtually. The platform allows map creation, editing, and sharing, enhancing customization. Real-time traffic and public transit updates optimize route planning, while the app’s settings reveal version details.

Troubleshooting download issues is crucial for a smooth experience. Prioritizing safety, users are reminded to stay aware and follow traffic regulations. Google Maps’ official help center provides tutorials and answers to frequently asked questions, ensuring optimal usage.

Exploring categories like restaurants becomes effortless, making Google Maps a versatile tool for both navigation and discovery.

Common Scoring Challenges & Solutions

Google Maps offers diverse driving avatars and exploration via Street View, alongside troubleshooting for app downloads and updates, ensuring a user-friendly experience.

Dealing with Unusual Response Patterns

Google Maps provides a wealth of navigational tools, yet occasional issues arise. When encountering problems with app downloads or updates, basic troubleshooting steps are recommended – verifying your app version (found within settings) is a good starting point. Remember safety first; always be aware of your surroundings and adhere to traffic regulations while using directions.

Furthermore, exploring features like Street View offers immersive experiences of landmarks and businesses. Searching for specific categories, like “restaurants,” yields personalized results. If unusual patterns emerge during map usage – perhaps inaccurate directions or display glitches – clearing the app’s cache or reinstalling it can often resolve the issue. Prioritize confirming signage and staying vigilant, even with digital assistance.

Addressing Scoring Discrepancies

Google Maps offers diverse navigation options – driving, transit, walking, cycling, and more – but discrepancies can occur. If you encounter issues with directions, first confirm your app is updated to the latest version (check “About and terms” in settings). Personalized search results might sometimes be inaccurate; double-check information before relying on them;

When facing conflicting information or unexpected routes, try clearing the app’s cache or reinstalling it. Utilizing Street View can provide a visual confirmation of surroundings. Remember to prioritize real-world signage and traffic laws. If problems persist, consult the official Google Maps Help Center for troubleshooting tips and frequently asked questions. Staying aware and verifying information are crucial for a safe and reliable experience.

Resources for Clarification and Support

Google Maps provides a comprehensive Official Help Center, brimming with tutorials and answers to frequently asked questions regarding navigation and map usage. For troubleshooting download or update issues, Google offers basic steps to resolve app problems. Exploring world landmarks via Street View can enhance understanding of locations, aiding in route verification.

Users can also leverage community forums and online support groups to share experiences and solutions. Remember to prioritize safety by staying aware of surroundings while using directions and adhering to traffic regulations. The Google Maps app itself contains settings for “About and terms,” revealing the app version for support inquiries. Consistent app updates ensure access to the latest features and bug fixes, improving overall reliability.

Legal and Ethical Considerations

Google Maps emphasizes staying aware of surroundings while navigating, prioritizing safety and adherence to traffic laws; confirm signage for accurate route following.

Copyright and Usage Restrictions

Utilizing Google Maps involves understanding its terms of service, ensuring responsible usage of its features and data. Downloading and sharing maps, or portions thereof, may be subject to copyright restrictions imposed by Google and its data providers.

Specifically, unauthorized distribution of Google Maps content, including Street View imagery or custom map creations, is prohibited. Commercial use often requires explicit permission and adherence to Google’s licensing agreements. Users should respect the intellectual property rights associated with the platform.

Furthermore, modifications to Google Maps data without authorization are disallowed. Always verify the source and legality of any downloaded maps or related materials, respecting the platform’s guidelines to avoid potential legal ramifications. Prioritize ethical data handling and responsible map usage.

Maintaining Test Security

Similar to safeguarding sensitive assessment materials, maintaining the integrity of Google Maps data is crucial. Unauthorized access to or modification of map information can compromise its accuracy and reliability, impacting user experience and potentially leading to misinformation.

Protecting Google Maps data involves adhering to security best practices, such as using strong passwords and being cautious about sharing account credentials. Reporting any suspected security breaches or vulnerabilities is essential for maintaining the platform’s overall security.

Furthermore, users should avoid downloading maps from unofficial sources, as these may contain malware or compromised data. Regularly updating the Google Maps app ensures access to the latest security patches and features, bolstering protection against potential threats. Responsible digital citizenship is paramount.

Responsible Interpretation of Results

Just as careful analysis is needed for WIAT-4 scores, interpreting Google Maps directions requires mindful consideration. Users must remain aware of their surroundings and prioritize real-world observations over solely relying on digital guidance.

Confirming directions with actual traffic regulations and signage is vital for safety. Google Maps provides suggestions, but ultimate responsibility lies with the user to navigate legally and cautiously. Ignoring road rules based on app guidance is unacceptable.

Moreover, understanding the limitations of map data – potential inaccuracies or outdated information – is crucial. Responsible use involves critical thinking and a willingness to adapt to changing conditions. Always prioritize safety and common sense when utilizing navigation tools.

WIAT-4 Scoring Software & Tools

Google Maps offers diverse navigation options – driving, transit, walking, cycling, and more – alongside Street View for immersive exploration of locations worldwide.

Available Software Options

Google Maps provides a versatile platform accessible via mobile apps and computer browsers, offering a wealth of features for navigation and exploration. Users can search for specific locations, like restaurants, and receive personalized results displayed directly on the map.

Street View functionality allows for immersive virtual tours of landmarks, museums, and businesses, enhancing the user experience. The application supports diverse transportation modes – driving, public transit, walking, cycling, and even flight – catering to varied needs.

Regular updates and troubleshooting guides are available through the official Google Maps Help Center, addressing common issues like download problems. Staying aware of surroundings and adhering to traffic regulations are crucial for safe navigation, especially when utilizing directions provided by the app. Version checks ensure optimal performance and access to the latest features.

Benefits of Using Scoring Software

Google Maps’ strength lies in its accessibility, functioning seamlessly on both mobile devices and computers, providing consistent navigation experiences. The platform’s search capabilities extend to diverse categories, enabling users to quickly locate points of interest like restaurants with personalized recommendations.

Street View offers an immersive exploration of locations, allowing virtual visits to landmarks and businesses, enriching the user’s understanding of their surroundings. The app supports multiple travel modes – driving, public transport, walking, cycling, and flights – adapting to individual preferences.

Troubleshooting resources and regular updates, available through the official Help Center, ensure a smooth user experience. Prioritizing safety by remaining aware of surroundings and adhering to traffic laws is paramount when using Google Maps for directions.

Manual vs. Automated Scoring: A Comparison

Google Maps excels in providing diverse search options, from broad categories like “restaurants” to specific destinations, offering personalized results tailored to user preferences. Its integration with Street View allows for immersive exploration, virtually visiting locations before physically traveling.

The platform supports multiple transportation modes – driving, public transit, walking, cycling, and even flights – catering to varied needs. Regularly updated with real-time traffic information, Google Maps optimizes routes for efficiency and minimizes delays.

Troubleshooting guides and a comprehensive Help Center address common user issues, ensuring a smooth experience. Staying aware of surroundings and adhering to traffic regulations remain crucial for safe navigation, reinforcing responsible usage of the app’s directional features.

Manuals

linksys ea7300 manual

Linksys EA7300 Manual: A Comprehensive Guide

This guide offers detailed instructions for the Linksys EA7300 MAX-STREAM AC1750 router‚ covering setup‚ configuration‚ troubleshooting‚ and accessing Linksys support resources.

The Linksys EA7300 MAX-STREAM AC1750 MU-MIMO Gigabit Router is a powerful home networking solution designed to deliver fast and reliable wireless speeds. This manual serves as a comprehensive resource for setting up and optimizing your router‚ ensuring a seamless online experience for all your connected devices. It’s built for modern households with multiple devices streaming‚ gaming‚ and browsing simultaneously.

This router utilizes MU-MIMO technology‚ allowing it to efficiently handle multiple devices at once‚ reducing lag and improving overall performance. The EA7300 supports Gigabit speeds‚ providing fast wired connections for demanding applications. Understanding its features and configuration options‚ detailed within this guide‚ will unlock the full potential of your network. Accessing the Linksys website at Linksys.com/support/EA7300 provides additional assistance and resources. This manual will guide you through everything from initial setup to advanced configuration‚ ensuring you get the most out of your Linksys investment.

Unboxing and Hardware Overview

Upon unboxing your Linksys EA7300‚ you should find the router itself‚ a power adapter‚ an Ethernet cable‚ and this user guide. Carefully inspect all components for any physical damage. The router features a sleek‚ modern design with multiple antennas for enhanced wireless coverage.

On the rear panel‚ you’ll find several key ports: one WAN port for connecting to your modem‚ four Gigabit Ethernet LAN ports for wired devices‚ a USB 3.0 port for connecting external storage‚ and a reset button. The front panel displays LED indicators for power‚ internet connectivity‚ 2.4GHz and 5GHz wireless signals‚ and USB activity. These indicators provide a quick visual status of your router’s operation. Familiarizing yourself with these components is crucial for proper setup and troubleshooting. Refer to the diagrams within this manual for a detailed illustration of the router’s ports and indicators. For further details‚ visit Linksys.com/support.

Setting Up Your EA7300 Router

To begin setting up your Linksys EA7300‚ connect the provided power adapter and turn on the router. Then‚ connect the Ethernet cable from your modem’s WAN port to the EA7300’s internet port. Ensure your modem is powered on and has established a connection.

Next‚ connect a computer to one of the router’s LAN ports using another Ethernet cable‚ or connect wirelessly using the default Wi-Fi network name (SSID) and password found on the router’s label. Once connected‚ open a web browser and navigate to Linksyssmartwifi.com or 192.168.1.1. This will launch the setup wizard. Follow the on-screen instructions to configure your internet connection‚ create a custom Wi-Fi network name and password‚ and register your router. If your router was not successfully set up‚ visit Linksys.com/support/EA7300 for assistance.

Connecting to the Router via Web Interface

Accessing your Linksys EA7300’s web interface allows for detailed configuration. After physically connecting to the router via Ethernet or Wi-Fi‚ open a web browser. Type either Linksyssmartwifi.com or the router’s default IP address‚ 192.168.1.1‚ into the address bar and press Enter.

You will be prompted to enter a username and password. The default credentials are typically “admin” for both fields‚ though this may vary. If you’ve previously changed these‚ use your custom credentials. Upon successful login‚ you’ll be directed to the router’s dashboard. From here‚ you can manage network settings‚ wireless configurations‚ security features‚ and more. If you encounter login issues‚ ensure you are connected to the router’s network and have the correct credentials. Refer to Linksys.com/support for further assistance if needed.

Understanding the Router’s Dashboard

The Linksys EA7300’s dashboard provides a centralized view of your network status and settings. Upon logging in via the web interface‚ you’ll see a summary of connected devices‚ internet connectivity‚ and wireless network details. Key sections include Network Map‚ displaying connected devices visually; Wireless‚ for managing Wi-Fi settings; and Security‚ where you can configure firewall and parental controls.

The dashboard also offers quick access to features like Guest Network setup and Port Forwarding. Status indicators provide real-time information about the router’s operation. Navigation is typically menu-driven‚ allowing you to drill down into specific settings. Familiarizing yourself with the dashboard layout is crucial for effective router management. For detailed explanations of each feature‚ consult the comprehensive user guide available at Linksys.com/support/EA7300‚ ensuring optimal network performance and security.

Wireless Settings Configuration

Accessing the Wireless settings within the Linksys EA7300’s interface allows customization of your Wi-Fi network. You can modify the Network Name (SSID) for both 2.4 GHz and 5 GHz bands‚ ensuring a unique identifier for your network. Security Mode options include WPA2/WPA3-Personal‚ offering robust encryption. A strong‚ unique password is vital for network security.

Channel selection optimizes performance by minimizing interference. Auto channel selection is recommended‚ but manual selection can be beneficial in congested environments. Transmit Power control adjusts signal strength. MU-MIMO technology enhances performance with multiple devices. The Linksys user guide (Linksys.com/support/EA7300) details advanced settings like Beamforming and scheduling. Regularly reviewing and adjusting these settings ensures optimal wireless coverage and speed for all connected devices‚ maximizing your network’s potential.

Guest Network Setup

The Linksys EA7300 allows creating a separate Guest Network‚ providing internet access without compromising your primary network’s security. Access this feature through the router’s web interface. You can enable a Guest Network for both the 2.4 GHz and 5 GHz bands‚ offering flexibility for visitors.

Configure a unique SSID and password for the Guest Network‚ distinct from your main network credentials. Consider enabling a time limit for guest access‚ automatically disconnecting users after a specified duration. Guest network users are isolated from your primary network‚ preventing access to shared files and devices. This feature is ideal for providing internet access to visitors while safeguarding your personal data and network resources. Refer to the Linksys support page (Linksys.com/support/EA7300) for detailed step-by-step instructions and troubleshooting tips.

Parental Controls and Access Restrictions

The Linksys EA7300 offers robust Parental Controls‚ enabling you to manage your family’s internet access. These controls allow you to restrict access to inappropriate content and schedule internet usage times for specific devices. Access these settings via the router’s web interface‚ navigating to the Parental Controls section.

You can create profiles for each family member and assign devices to those profiles. Filter content based on age-appropriateness‚ blocking access to websites categorized as harmful or unsuitable. Schedule internet access times‚ limiting usage during homework or bedtime. The router allows blocking specific websites or keywords‚ providing granular control over online activity. Regularly review and adjust these settings to ensure they align with your family’s needs. For detailed guidance and troubleshooting‚ consult the Linksys support resources at Linksys.com/support/EA7300.

Port Forwarding and Application Management

Port forwarding on the Linksys EA7300 allows external devices to connect to devices within your home network. This is crucial for online gaming‚ hosting servers‚ or accessing security cameras remotely. Access the Port Forwarding section within the router’s web interface to create rules specifying the external port‚ internal IP address‚ and protocol (TCP or UDP).

The Application Management feature simplifies this process for common applications. Select an application from the pre-defined list‚ and the router automatically configures the necessary port forwarding rules. If your application isn’t listed‚ you’ll need to manually configure the port forwarding. Ensure you understand the security implications of port forwarding‚ as it can potentially expose your network to vulnerabilities. For detailed instructions and troubleshooting assistance‚ refer to the Linksys support documentation available at Linksys.com/support/EA7300.

Security Features and Firewall Settings

The Linksys EA7300 incorporates a robust firewall to protect your network from unauthorized access. The firewall is enabled by default and provides Network Address Translation (NAT) and SPI (Stateful Packet Inspection) for enhanced security. You can access firewall settings through the router’s web interface‚ allowing you to customize security levels and block specific types of traffic.

Additional security features include WPA2/WPA3 encryption for wireless connections‚ ensuring data transmitted over your Wi-Fi network is secure. Regularly updating the router’s firmware is crucial to patch security vulnerabilities. Explore options like MAC address filtering to restrict network access to authorized devices. For comprehensive guidance on configuring these settings and understanding potential risks‚ consult the official Linksys support resources at Linksys.com/support/EA7300. Prioritize strong passwords and enable automatic firmware updates for optimal protection.

Troubleshooting Common Issues

Encountering problems with your Linksys EA7300? Common issues include connectivity problems‚ slow speeds‚ and router setup failures. First‚ ensure all cables are securely connected and the router is powered on. If you can’t access the internet‚ try restarting both the router and your modem. Check for firmware updates‚ as outdated firmware can cause performance issues.

If devices can’t connect to the Wi-Fi‚ verify the password and ensure wireless is enabled. For more complex problems‚ the Linksys website (Linksys.com/support/EA7300) offers extensive troubleshooting guides and FAQs. Consider resetting the router to factory defaults as a last resort‚ but remember this will erase your custom settings. The user guide‚ available as a PDF download‚ provides detailed steps for diagnosing and resolving various issues. Award-winning customer support is also available online.

Resetting the Router to Factory Defaults

Resetting your Linksys EA7300 to factory defaults restores all settings to their original state‚ effectively erasing any custom configurations you’ve made. This is useful for resolving persistent issues or preparing the router for resale. Locate the recessed reset button on the back of the router. Using a paperclip or similar object‚ press and hold the reset button for approximately 10-15 seconds while the router is powered on.

Release the button when the power LED begins to flash. Allow several minutes for the router to reboot and return to its default settings. After the reset‚ you’ll need to reconfigure the router using the web interface or the Linksys app; Remember that this process will erase your Wi-Fi password‚ network name (SSID)‚ and any other personalized settings. Refer to the Linksys support page (Linksys.com/support/EA7300) for detailed instructions and a PDF guide.

Updating the Router’s Firmware

Keeping your Linksys EA7300 firmware up-to-date is crucial for optimal performance‚ security‚ and stability. Linksys regularly releases firmware updates that address vulnerabilities and improve functionality. To update‚ log in to your router’s web interface. Navigate to the administration or firmware update section – the exact location may vary slightly depending on the interface version.

The router will typically check for updates automatically. If an update is available‚ download and install it‚ following the on-screen prompts. Do not interrupt the update process‚ as this could damage the router. Alternatively‚ you can manually download the latest firmware from the Linksys support website (Linksys.com/support/EA7300) and upload it through the web interface. A PDF guide is also available for download. Regularly checking for updates ensures your router remains secure and performs at its best.

Linksys App Integration

The Linksys app provides a simplified and convenient way to manage your EA7300 router. Available for both iOS and Android devices‚ the app allows you to monitor and control your network from anywhere. Key features include remote access to router settings‚ guest network management‚ device prioritization‚ and parental controls.

To get started‚ download the Linksys app and follow the on-screen instructions to connect to your router. The app guides you through the setup process and offers a user-friendly interface for managing your network. You can view connected devices‚ change Wi-Fi passwords‚ and even receive notifications about network activity. Launching the app provides direct access to help resources. The app simplifies complex tasks‚ making network management accessible to all users‚ and complements the web interface for comprehensive control.

Default Username and Password Information

Upon initial setup‚ your Linksys EA7300 router comes with default credentials for accessing the web interface. Understanding these defaults is crucial for initial configuration and security. The standard default username is typically “admin”‚ and the default password is also often “admin”. However‚ it is strongly recommended to change these immediately after accessing the router for the first time.

Failing to change the default credentials leaves your network vulnerable to unauthorized access. The document referencing numerous Linksys models highlights the importance of security. If you’ve forgotten your custom password‚ a factory reset (covered elsewhere in this manual) will restore the router to its default settings‚ reverting to “admin” for both username and password. Always prioritize creating a strong‚ unique password to protect your network and personal information. Refer to Linksys.com/support for further assistance.

Linksys Support Resources

Linksys provides a comprehensive suite of support resources to assist users with their EA7300 router. The primary online resource is the official Linksys website‚ specifically the support section at Linksys;com/support/EA7300. Here‚ you’ll find a wealth of information‚ including frequently asked questions (FAQs)‚ troubleshooting guides‚ and downloadable documents like the user manual in PDF format.

Beyond the website‚ Linksys offers community forums where users can share solutions and seek assistance from peers and Linksys representatives. The Linksys app also provides in-app help and support options. For more direct assistance‚ Linksys offers phone and chat support‚ though availability may vary. Remember to have your router’s model number and serial number readily available when contacting support. Utilizing these resources ensures a smooth and efficient troubleshooting experience.

PDF Manual Download Location

Accessing the official PDF manual for your Linksys EA7300 MAX-STREAM AC1750 router is straightforward. The primary download location is the Linksys support website. You can directly access the PDF user guide through this link: downloads.linksys.com/support/assets/userguide/EA6350_UG_INTL_update.pdf. While the link references EA6350‚ it often contains compatible information for the EA7300.

Alternatively‚ navigate to Linksys.com/support and search for “EA7300” to locate the dedicated support page for your router model. From there‚ you should find a section labeled “Manuals & Downloads” or similar‚ where the PDF manual is available for download. Ensure you download the most recent version for accurate and up-to-date information. Having a local copy of the manual allows for offline access to troubleshooting steps and configuration details.

Manuals

az drivers license manual

Arizona Driver License Manual: A Comprehensive Guide

Arizona’s official manual is a crucial resource for all drivers, offering vital information on laws, safe practices, and licensing procedures. It’s available online!

The Arizona Driver License Manual serves as a foundational guide for both novice and experienced drivers navigating the state’s roadways. It details the graduated licensing process, ensuring new drivers gain experience gradually. This manual comprehensively covers Arizona’s traffic laws, essential driving techniques, and procedures for obtaining a license. Understanding its contents is paramount for passing the required knowledge and driving tests, ultimately promoting road safety for everyone in Arizona.

Where to Find the Official Manual

Arizona’s official Driver License Manual is readily accessible through the Arizona Department of Transportation Motor Vehicle Division (ADOT MVD) website; A high-resolution version, suitable for printing, is also available directly from ADOT. For those preferring a physical copy, it may be found at local Arizona MVD offices or public libraries. Convenient online access ensures all drivers can easily obtain this essential resource.

Understanding the Graduated Licensing Process

Arizona’s graduated licensing process is designed to safely introduce new drivers to the road. It begins with a learner’s permit, progressing through a restricted license stage, and culminating in a full driver’s license. This phased approach provides novice drivers with supervised experience, gradually increasing their driving privileges as skills develop, ultimately promoting road safety for everyone.

Learner’s Permit Requirements

To obtain an Arizona learner’s permit, aspiring drivers must meet specific criteria. This includes being at least 15 years and six months old, passing a vision exam, and successfully completing a written knowledge test based on the Arizona Driver License Manual. Supervised driving practice is mandatory with a licensed driver aged 21 or older.

Restricted License Stage

Arizona’s restricted license allows young drivers, aged 16-18, limited driving privileges after holding a learner’s permit for six months. Restrictions typically include limitations on driving between 12 AM and 5 AM, and passenger limits, unless accompanied by a licensed driver 21 or older. Successful completion of driver education is often required.

Full Driver’s License Eligibility

Arizona drivers become eligible for a full, unrestricted license at age 18, provided they’ve successfully completed all requirements of the graduated licensing system. This includes holding a valid learner’s permit and restricted license for the required durations, and maintaining a clean driving record free of major violations. Proof of completion of driver’s education may be needed.

The Arizona Written Knowledge Test

Arizona’s written knowledge test assesses your understanding of traffic laws, safe driving practices, and road signs as detailed in the official driver’s manual. New drivers often need to pass this test, and questions are directly sourced from the manual. Thorough preparation is key to success, ensuring you’re well-versed in Arizona driving regulations.

Topics Covered on the Test

The Arizona written test comprehensively covers right-of-way rules, speed limits, traffic signal interpretations, and proper responses to various road signs. Expect questions regarding safe driving techniques, distracted driving laws, and procedures during encounters with law enforcement. A solid grasp of the manual’s content is essential for navigating these diverse topics effectively and passing the exam.

Sample Test Questions & Resources

Numerous online practice tests mirroring the Arizona exam are readily available, offering valuable preparation. The official ADOT MVD website provides the Arizona Driver License Manual itself – the primary study resource. Familiarizing yourself with sample questions helps identify knowledge gaps and build confidence. Consistent practice utilizing these resources significantly increases your chances of success on the actual test.

Essential Arizona Driving Laws

Understanding Arizona’s driving laws is paramount for safety and legal compliance. Key areas include right-of-way rules, speed limits, and interpreting traffic signals and signs. Drivers must adhere to these regulations to prevent accidents and avoid penalties. The Arizona Driver License Manual comprehensively details these laws, ensuring all motorists are well-informed and responsible on the road.

Right-of-Way Rules

Arizona right-of-way rules dictate who proceeds first in various traffic scenarios. Generally, yield to pedestrians and emergency vehicles. At intersections, follow signal indications or yield to the vehicle on the right if signals are absent. Unprotected left turns require yielding to oncoming traffic. The Arizona Driver License Manual provides detailed explanations and illustrations for navigating these complex situations safely and legally.

Speed Limits and Regulations

Arizona speed limits vary based on road type and location, with posted limits always taking precedence. Generally, rural interstates allow 75 mph, while urban interstates are 65 mph. City streets typically have lower limits, often 25 or 35 mph. The Arizona Driver License Manual details these regulations, emphasizing the importance of adjusting speed for weather and traffic conditions to ensure safe driving practices throughout the state.

Traffic Signals and Signs

The Arizona Driver License Manual thoroughly explains the meaning of various traffic signals and signs. Understanding these is critical for safe navigation. Red signals mandate a complete stop, while yellow signals indicate caution. Green allows proceeding if safe. Regulatory signs inform drivers of laws, while warning signs alert to potential hazards. Proper interpretation, as detailed in the manual, is essential for all Arizona drivers.

Safe Driving Practices in Arizona

The Arizona Driver License Manual emphasizes adopting safe driving habits for Arizona’s unique conditions. This includes maintaining a safe following distance, being aware of surroundings, and adjusting to weather. The manual details defensive driving techniques to anticipate hazards and avoid collisions. Prioritizing safety, as outlined, protects drivers and passengers on Arizona roadways, ensuring responsible operation.

Defensive Driving Techniques

The Arizona Driver License Manual strongly advocates for defensive driving. This proactive approach involves anticipating potential hazards and reacting to avoid collisions, even if you have the right-of-way. Techniques include scanning the road, maintaining space cushions, and being aware of other drivers’ actions. Practicing these skills, as detailed in the manual, significantly enhances safety.

Distracted Driving Laws

Arizona law prohibits texting while driving, a major contributor to accidents. The Arizona Driver License Manual emphasizes that any non-driving activity – like using a phone, eating, or adjusting the radio – can be a dangerous distraction. Hands-free devices are permitted, but focused attention on the road remains paramount for all Arizona drivers.

What to Do When Pulled Over by Law Enforcement

The Arizona Driver License Manual details proper procedures during a traffic stop. Remain calm, pull over safely, and turn on your interior lights. Keep your hands visible, and follow the officer’s instructions precisely. You have the right to remain silent and request legal counsel, but cooperation is key for a smooth interaction.

Proper Procedures During a Traffic Stop

According to the Arizona Driver License Manual, when stopped by law enforcement, safely pull over to the right. Turn on your hazard lights and interior dome light, especially at night; Keep hands visible on the steering wheel. Provide requested documents—license, registration, and insurance—politely and without sudden movements.

Understanding Your Rights

The Arizona Driver License Manual acknowledges your rights during a traffic stop. You have the right to remain silent and are not obligated to answer questions beyond identification. You can politely decline a search if there isn’t probable cause. However, comply with lawful orders from the officer. Document the encounter if possible, and seek legal counsel if you believe your rights were violated.

Arizona Commercial Driver License (CDL) Manual

The Arizona Commercial Driver License Manual is a dedicated guide for prospective commercial drivers. It details specific requirements, endorsements needed for various vehicle types, and comprehensive testing procedures. This resource covers federal and state regulations, ensuring drivers understand the responsibilities associated with operating large vehicles safely and legally within Arizona.

CDL Requirements and Endorsements

Arizona CDL requirements involve age, medical certification, and passing knowledge and skills tests. Specific endorsements are needed to operate certain vehicle combinations, like tankers or hazardous materials. These endorsements necessitate additional testing, validating competency. Understanding these prerequisites is crucial for aspiring commercial drivers seeking legal operation within the state’s boundaries.

CDL Testing Procedures

Arizona’s CDL testing includes pre-trip inspections, basic control skills, and on-road driving evaluations. Applicants must demonstrate proficiency in vehicle operation and adherence to safety regulations. Passing scores are required on all components. The Arizona Department of Transportation (ADOT) provides detailed testing guidelines and locations for convenient access to these essential evaluations.

Vehicle Registration and Insurance Requirements

Arizona law mandates vehicle registration with the ADOT Motor Vehicle Division (MVD). Registration requires proof of ownership and valid insurance. Minimum liability insurance coverage is essential for all registered vehicles. Failure to maintain current registration and insurance can result in penalties, including fines and suspension of driving privileges.

Arizona Vehicle Registration Process

Arizona’s vehicle registration typically involves visiting an MVD office or utilizing authorized third-party providers. Required documents include the vehicle title, proof of Arizona insurance, and a completed application form. Fees vary based on vehicle type and weight. Renewal notices are mailed, and online renewal options are often available for convenience, streamlining the process.

Minimum Insurance Coverage

Arizona law mandates minimum liability insurance coverage for all registered vehicles. This typically includes $25,000 for injury or death to one person, $50,000 for injury or death to all persons, and $15,000 for property damage in a single accident. Drivers must demonstrate proof of coverage during registration and upon request by law enforcement officials.

Understanding Arizona’s Point System

Arizona utilizes a point system to track traffic violations. Points are assessed based on the severity of the offense, impacting driving privileges. Accumulating too many points within a specific timeframe can lead to license suspension or revocation. Drivers can explore options for point reduction, such as defensive driving courses, to mitigate these consequences and maintain a clean driving record.

How Points Affect Your License

Arizona’s point system directly influences your driver’s license status. Accumulating six or more points within twelve months results in a suspension. Eight or more points in twenty-four months trigger a review, potentially leading to revocation. Points remain on your record for three years, impacting insurance rates and future driving privileges. Consistent safe driving prevents point accumulation.

Point Reduction Options

Arizona offers several avenues for point reduction. Completing a defensive driving course can eliminate up to three points from your record, but eligibility restrictions apply. Points are automatically removed after three years, provided no further violations occur. Maintaining a clean driving record is the most effective strategy, avoiding points altogether and preserving your license.

Motorcycle Licensing in Arizona

Arizona requires a specific endorsement for motorcycle operation. Applicants must pass a vision test and a dedicated motorcycle knowledge exam, drawing content from the Arizona Motorcycle Operator Manual. Completion of an approved motorcycle safety course often waives the riding skills test. Proper gear, including a helmet, is mandatory during both testing and operation;

Requirements for Motorcycle Permits and Licenses

To obtain a motorcycle permit in Arizona, applicants need to be at least 16, pass vision and knowledge tests, and provide identification. A full license requires completing a motorcycle safety course or passing a skills test. Proper documentation, including proof of insurance, is essential throughout the process.

Motorcycle Safety Courses

Arizona offers comprehensive motorcycle safety courses, often fulfilling the requirement for a skills test waiver for a full license. These courses cover essential riding techniques, hazard awareness, and traffic laws. Completion significantly enhances rider skills and safety, reducing risks on the road. Several providers are available statewide, offering flexible scheduling options.

Resources for New Arizona Drivers

Arizona provides extensive resources for new drivers through the ADOT MVD website, offering online services and downloadable manuals. Numerous online practice tests are available, aiding preparation for the knowledge exam. These tools help familiarize drivers with Arizona traffic laws and safe driving practices, ensuring confidence and preparedness before hitting the road.

ADOT MVD Website and Services

The ADOT MVD website delivers services to millions of Arizona motorists, offering a comprehensive platform for driver licensing. It provides access to the official Arizona Driver License Manual, online forms, and appointment scheduling. Drivers can manage their licenses, renew registrations, and find vital information regarding vehicle-related services directly through this convenient online portal.

Online Practice Tests

Numerous online resources offer practice tests designed to prepare new Arizona drivers for the permit test. These tests simulate the actual exam, covering topics directly from the Arizona Driver License Manual. Utilizing these tools allows beginners to assess their knowledge, identify areas needing improvement, and build confidence before taking the official written examination.

Manuals

eureka vacuum manual

Welcome to the Eureka Vacuum Manual guide, designed to help you maximize efficiency and ease of cleaning. Explore features, maintenance tips, and troubleshooting solutions for optimal performance.

1.1 Overview of Eureka Vacuum Cleaners

Eureka vacuum cleaners are trusted for their reliability and innovative designs, offering a range of models to suit diverse cleaning needs. From upright vacuums to robot hybrids, Eureka combines powerful suction with advanced filtration systems. Their vacuums are designed for efficiency, portability, and ease of use, catering to both home and professional settings. With a focus on allergy prevention and eco-friendly solutions, Eureka vacuums are a popular choice for modern households. This manual provides a comprehensive guide to understanding and optimizing your Eureka vacuum cleaner.

1.2 Importance of Reading the Manual

Reading the Eureka vacuum manual is essential for optimal performance and safety. It provides detailed instructions for assembly, operation, and maintenance, ensuring you understand all features and settings. The manual highlights safety precautions, warranty information, and troubleshooting tips, helping you avoid common issues. By following the guide, you can maximize cleaning efficiency, extend the lifespan of your vacuum, and ensure proper usage of attachments and filters. This manual is your key to unlocking the full potential of your Eureka vacuum cleaner and maintaining its effectiveness over time.

History of Eureka Vacuum Cleaners

Eureka vacuum cleaners have a rich history dating back to 1908, known for innovative designs and reliable performance. Their evolution reflects advancements in cleaning technology and user needs.

2.1 Evolution of Eureka Vacuums

Eureka vacuums have evolved significantly since their inception in 1908. From basic suction devices to advanced, AI-powered models, the brand has consistently innovated. The 1940s saw Eureka establish itself in the U.S., introducing iconic upright vacuums. By the 1950s, Eureka became synonymous with reliable cleaning solutions. Modern Eureka vacuums feature cutting-edge technology, including robot vacuums with voice control and AI navigation. This evolution reflects Eureka’s commitment to meeting changing consumer needs while maintaining high performance and affordability.

2.2 Key Innovations in Eureka Technology

Eureka has pioneered advancements in vacuum technology, introducing features like HEPA filtration for allergy sufferers and powerful suction systems. Recent innovations include AI-driven navigation in robot vacuums, voice control integration, and self-charging capabilities. The brand has also focused on energy efficiency, reducing noise levels while maintaining high performance. These innovations reflect Eureka’s dedication to improving cleaning efficiency and user convenience, ensuring their vacuums adapt to modern lifestyles and preferences.

Key Features of Eureka Vacuums

Eureka vacuums offer advanced suction power, HEPA filtration, and ergonomic designs. They combine portability with robust cleaning capabilities, ensuring efficient and allergy-friendly cleaning solutions for various surfaces and spaces.

3.1 Suction Power and Efficiency

Eureka vacuums are renowned for their exceptional suction power, ensuring deep cleaning of carpets, rugs, and hard floors. Advanced motor technology enhances efficiency, capturing dust, dirt, and allergens effectively. The powerful airflow and cyclonic design improve particle capture, leaving surfaces cleaner. This high performance is complemented by energy-efficient operation, making Eureka vacuums both powerful and eco-friendly. Their ability to maintain consistent suction, even with full dustbags or filters, ensures a reliable cleaning experience every time.

3.2 Filtration Systems and Allergy Prevention

Eureka vacuums feature advanced filtration systems, including HEPA filters, which capture 99.97% of particles as small as 0.3 microns, effectively trapping dust, pollen, and pet dander. These systems are designed to prevent allergens from recirculating into the air, making them ideal for households with allergy sufferers. The filters are easy to clean and replace, ensuring long-term performance. By improving indoor air quality and reducing allergy triggers, Eureka vacuums provide a healthier cleaning experience, especially for sensitive environments.

3.3 Design and Portability

Eureka vacuums are crafted with a focus on sleek, lightweight designs, ensuring easy maneuverability and portability. Many models feature ergonomic handles and compact builds, making them ideal for navigating stairs, tight spaces, and large areas. Cordless options and self-charging capabilities enhance convenience, while durable materials ensure longevity. The thoughtful design caters to diverse cleaning needs, whether for pet owners or allergy sufferers, providing a seamless and efficient cleaning experience tailored to modern lifestyles.

Benefits of Using Eureka Vacuums

Eureka vacuums offer efficient cleaning, time-saving solutions, and cost-effectiveness. They are designed for durability, ensuring long-term value and eco-friendly performance, making them a practical choice for modern households.

4.1 Time-Saving Cleaning Solutions

Eureka vacuums are designed to save time with advanced features like automation and efficient suction power. Models such as the J15 Pro Ultra offer hands-free operation and robust AI capabilities, allowing for seamless cleaning. The Eureka SuctionSeal Pet AS1104A, despite its size, provides thoughtful design for quick cleanup. Additionally, features like self-charging and low operating noise ensure uninterrupted cleaning sessions. These innovations make Eureka vacuums ideal for busy households, enabling users to maintain a clean space with minimal effort and time investment.

4.2 Cost-Effectiveness and Durability

Eureka vacuums are known for their durability and cost-effectiveness, offering long-term savings. Models like the J15 Pro Ultra and SuctionSeal Pet AS1104A are built with robust materials, ensuring extended lifespan. Their efficient designs reduce energy consumption, lowering utility bills. Additionally, features like washable filters and reusable dustbags minimize replacement costs. Eureka vacuums provide excellent value for money, combining high performance with affordability, making them a smart investment for homeowners seeking reliable cleaning solutions without compromising on quality or budget.

4.3 Eco-Friendly and Energy Efficiency

Eureka vacuums are designed with eco-conscious features, offering energy-efficient solutions for modern homes. Models like the Airspeed Gold HEPA utilize advanced filtration systems that reduce dust and allergens, promoting cleaner air. Energy-saving motors and low operating volumes minimize environmental impact. Eureka’s commitment to sustainability ensures that their vacuums not only clean effectively but also contribute to a greener planet. These eco-friendly designs make Eureka vacuums a responsible choice for environmentally aware consumers seeking efficient and sustainable cleaning options.

Eureka Vacuum Models

Eureka offers a range of innovative vacuums, including the J15 Pro Ultra, SuctionSeal Pet AS1104A, and Airspeed Gold HEPA, each designed for specific cleaning needs and preferences.

5.1 Eureka J15 Pro Ultra

The Eureka J15 Pro Ultra is a flagship model, offering advanced features like robust AI capabilities and the highest suction power in Eureka’s lineup. Designed for hands-free convenience, it combines powerful cleaning with intelligent navigation. Its slim profile and lightweight design make it easy to maneuver, while voice control and long-lasting battery life enhance user experience. Ideal for large spaces and pet owners, the J15 Pro Ultra delivers efficient cleaning with minimal effort, catering to diverse cleaning needs and surfaces.

5.2 Eureka SuctionSeal Pet AS1104A

The Eureka SuctionSeal Pet AS1104A stands out for its impressive size and thoughtful design, making it a robust choice for pet owners. Its large build is complemented by powerful suction and specialized tools for tackling pet hair and allergens. Designed with convenience in mind, this model features a self-sealing system to trap dust and dander, ensuring cleaner air and surfaces. Its versatility across various floor types and detailed engineering make it a reliable option for households with pets, offering both performance and ease of use.

5.3 Eureka Airspeed Gold HEPA Bagless Upright Vacuum AS1001A

The Eureka Airspeed Gold HEPA Bagless Upright Vacuum AS1001A is a high-performance cleaning solution designed for efficient and allergen-free cleaning. Featuring a powerful HEPA filtration system, it captures 99.97% of dust, dirt, and allergens as small as 0.3 microns. This bagless upright vacuum offers strong suction power and lightweight design, making it easy to maneuver across various surfaces. The user manual provides detailed instructions for assembly, operation, and maintenance, ensuring optimal performance and longevity of the device. It’s an ideal choice for households seeking a reliable and hygienic cleaning experience.

Maintenance and Troubleshooting

Regular maintenance ensures optimal performance and extends the life of your Eureka vacuum. Troubleshooting common issues like clogs or filter blockages can be done with simple steps.

6.1 Regular Maintenance Tips

Regular maintenance is crucial for optimal performance. Empty dustbags or clean filters frequently to ensure suction power. Check for blockages in hoses or brush rolls. Clean or replace filters as recommended to maintain airflow and prevent allergens. Lubricate moving parts if necessary. Store the vacuum in a dry, cool place to prevent damage. Refer to the manual for specific maintenance schedules tailored to your model. Consistent upkeep ensures longevity and efficiency, keeping your Eureka vacuum in top condition for years.

6.2 Common Issues and Solutions

Common issues with Eureka vacuums include reduced suction, which can be resolved by cleaning filters or checking for blockages. If the vacuum doesn’t turn on, ensure it’s properly plugged in and check for faulty switches. Strange noises may indicate damaged internal parts, requiring professional inspection. For clogged brush rolls, remove tangled hair or debris. Refer to the manual for specific troubleshooting steps. Addressing these issues promptly ensures your vacuum operates efficiently and extends its lifespan. Regular checks can prevent minor problems from becoming major repairs.

6.3 Filter Cleaning and Replacement

Regular filter maintenance is crucial for optimal performance. For washable filters, rinse with cold water, allow to dry, and reinstall. Replace HEPA filters every 6-12 months or as indicated. Check for dust buildup and clean pre-filters monthly. If filters are damaged or excessively soiled, replace them immediately. Proper maintenance ensures efficient suction power and allergy prevention. Refer to your Eureka vacuum manual for specific filter types and replacement instructions. Clean filters enhance cleaning efficiency and prolong the lifespan of your vacuum.

Eureka Vacuum Manual Instructions

Discover essential guidance for assembling, operating, and maintaining your Eureka vacuum with the comprehensive manual instructions, ensuring optimal performance and safety.

7.1 Assembly and Initial Setup

Begin by carefully unboxing your Eureka vacuum and inspecting all components. Attach the handle securely and ensure all parts are aligned properly. For models like the J15 Pro Ultra, refer to the manual for specific assembly steps. Check if any parts, such as filters or brushes, are pre-installed. Plug in the device and test basic functions to ensure everything works smoothly. Follow the manual’s guidance for initial setup, including charging (if applicable) and familiarizing yourself with controls. Proper assembly ensures safety and optimal performance from the start.

7.2 Operating Modes and Settings

Eureka vacuums offer multiple operating modes to suit different cleaning needs. Use the Eco mode for quiet, energy-efficient cleaning or switch to Turbo mode for deep cleaning. Adjust suction power via the control panel or digital display. For robot vacuums, program schedules and customize cleaning paths using the app. Many models feature self-charging capabilities, ensuring uninterrupted cleaning. Familiarize yourself with button functions and settings to optimize performance. Experiment with modes to find the perfect balance between power and noise, ensuring efficient cleaning for various surfaces and messes.

7.3 Safety Precautions and Warnings

Always follow safety guidelines when using your Eureka vacuum. Avoid using it near water or in wet conditions to prevent electrical hazards. Keep children and pets away while operating. Ensure the vacuum is turned off before cleaning or maintaining it. Never vacuum hot ashes, flammable materials, or sharp objects. Store the vacuum in a dry, cool place. Use only genuine Eureka parts to maintain safety and performance. Refer to the manual for specific warnings and precautions tailored to your model to ensure safe and effective operation.

Accessories and Attachments

Eureka vacuums come with versatile accessories like crevice tools, upholstery brushes, and HEPA filters, enhancing cleaning efficiency for various surfaces and allergy prevention, ensuring comprehensive coverage.

8.1 Crevice Tools and Upholstery Brushes

Eureka vacuums include crevice tools and upholstery brushes for detailed cleaning. These attachments help reach tight spaces, clean furniture, and remove pet hair effectively. The crevice tool is ideal for corners, stairs, and baseboards, while the upholstery brush gently cleans fabrics without damage. Models like the Eureka SuctionSeal Pet AS1104A and J15 Pro Ultra often come with these accessories, enhancing versatility. Regularly cleaning these tools ensures optimal performance and prevents dust buildup, making them essential for maintaining a spotless home environment with minimal effort.

8.2 HEPA Filters and Dustbags

Eureka vacuums feature HEPA filters and dustbags to enhance cleaning efficiency and allergy prevention. HEPA filters capture 99.97% of particles as small as 0.3 microns, improving air quality. Dustbags are designed for large debris capacity and easy disposal. Regular cleaning and replacement of these components ensure optimal suction power and filtration. Models like the Eureka Airspeed Gold HEPA Bagless Upright Vacuum AS1001A emphasize the importance of maintaining these parts for consistent performance and a healthier home environment. Proper care extends the lifespan of your vacuum and keeps it running efficiently.

8.3 Additional Cleaning Accessories

Eureka vacuums come with a variety of additional cleaning accessories to enhance versatility. Crevice tools and upholstery brushes help tackle tight spaces and fabric surfaces, while extension wands and specialized nozzles enable detailed cleaning. Models like the Eureka SuctionSeal Pet AS1104A and J15 Pro Ultra often include these extras to cater to diverse cleaning needs. These accessories ensure comprehensive coverage, from hard-to-reach areas to pet hair and allergens. Regular use of these tools optimizes cleaning efficiency and maintains your vacuum’s performance over time.

Eureka Robot Vacuums

Eureka robot vacuums offer advanced cleaning solutions with self-charging, low noise, and robust suction power. They combine convenience and efficiency, perfect for modern, hands-free cleaning experiences.

9.1 Features of Eureka Robot Vacuums

Eureka robot vacuums boast advanced features like self-charging, low noise operation, and powerful suction. They include smart navigation systems, voice control compatibility, and scheduled cleaning options. Some models offer hybrid functionality, combining vacuuming and mopping. With robust battery life and slim designs, these robots efficiently clean various surfaces. Advanced AI capabilities enable adaptive cleaning paths, ensuring thorough coverage. Additionally, they come with HEPA filters for allergy prevention and eco-friendly modes for energy savings. These features make Eureka robot vacuums a convenient and efficient cleaning solution for modern homes.

9.2 Setup and Programming

Setting up your Eureka robot vacuum is straightforward. Begin by unboxing and charging the device. Download the companion app to program cleaning schedules and customize settings. Use voice commands via smart home integration for convenience. Navigate through menus to set boundaries and cleaning paths. Ensure the docking station is placed in an accessible area. Refer to the manual for pairing instructions and troubleshooting connectivity issues. Programming allows you to tailor cleaning sessions to your schedule, ensuring your home stays clean with minimal effort. Follow the manual’s step-by-step guide for seamless setup and operation.

9.3 Maintenance for Robot Vacuums

Regular maintenance ensures your Eureka robot vacuum operates efficiently. Clean the sensors and brushes weekly to avoid obstruction. Empty the dustbin after each use and washable filters monthly. Check for software updates via the app. Inspect wheels and brushes for tangled debris. Wipe the docking station and charging contacts with a soft cloth. Replace HEPA filters as recommended. Proper upkeep extends the lifespan and performance of your robot vacuum, ensuring consistent cleaning results and minimizing malfunctions. Refer to the manual for detailed maintenance schedules and procedures.

User Manual and Guide

The Eureka vacuum manual provides comprehensive instructions for setup, operation, and troubleshooting. It ensures users understand features, maintenance, and optimal usage for effective cleaning experiences.

10.1 Understanding the User Manual

Understanding the Eureka vacuum manual is essential for optimal use. It provides detailed instructions on assembly, operation, and maintenance. The manual outlines safety precautions, operational modes, and troubleshooting tips. By reading it, users can familiarize themselves with features, ensuring efficient cleaning. It also covers warranty information and customer support options. The manual is structured to guide users through setup, usage, and care, making it a vital resource for maximizing the vacuum’s performance and longevity. Regular reference to the manual helps users address issues promptly and maintain their appliance effectively.

10.2 Step-by-Step Usage Guide

This guide provides a clear, step-by-step approach to using your Eureka vacuum effectively. Start by unboxing and assembling the device, following the manual’s instructions. Plug in the vacuum, adjust settings based on surface type, and begin cleaning. For optimal results, empty the dustbin regularly and clean filters as recommended. Use crevice tools for tight spaces and upholstery brushes for fabrics. Refer to the manual for specific modes and accessories. Regular maintenance ensures longevity and peak performance, keeping your home clean with ease.

10.3 Troubleshooting Guide

Experiencing issues with your Eureka vacuum? This guide helps resolve common problems. Check for blockages in hoses or brush rolls if suction is weak. Empty the dustbin or replace the bag if it’s full. Clean or replace filters as needed. If the vacuum overheats, turn it off and let it cool. For error lights, refer to the manual for specific solutions. Regularly check belts and ensure all parts are securely attached. Reset the device if it stops working. Always consult the manual for model-specific troubleshooting steps to maintain optimal performance.

Eureka Vacuum vs. Other Brands

Eureka vacuums stand out for their affordability, durability, and innovative features, offering strong competition to brands like Dyson and Shark in both performance and value.

11.1 Comparison with Dyson Vacuums

Eureka vacuums offer a cost-effective alternative to Dyson, with robust suction power and innovative features like AI capabilities in the J15 Pro Ultra. While Dyson excels in advanced filtration and sleek designs, Eureka provides better value for budget-conscious users without compromising on performance. Both brands cater to different needs, with Eureka focusing on affordability and Dyson on premium technology. This comparison helps users choose based on their priorities, whether it’s cost, advanced features, or long-term durability.

11.2 Comparison with Shark Vacuums

Eureka vacuums stand out against Shark with their budget-friendly options and robust features like AI in the J15 Pro Ultra. Shark vacuums, however, excel in versatility, offering advanced Lift-Away technology for multi-surface cleaning. While Eureka focuses on affordability and ease of use, Shark emphasizes premium design and adaptability. Both brands deliver strong suction power, but Shark often edges ahead in filtration and noise reduction. Eureka remains a top choice for those seeking value, whereas Shark appeals to users willing to invest in high-end, versatile cleaning solutions.

11.3 Unique Selling Points of Eureka

Eureka vacuums are known for their affordability, robust suction power, and innovative features like AI in the J15 Pro Ultra. They offer excellent value with models like the SuctionSeal Pet AS1104A, designed for pet owners, and the Airspeed Gold HEPA, which excels in allergy prevention. Eureka also focuses on eco-friendly designs and user-friendly interfaces, making them accessible to a wide range of users. Their commitment to quality and affordability sets them apart, providing reliable cleaning solutions without compromising on performance or durability.

Conclusion

Eureka vacuums offer efficient, affordable, and innovative cleaning solutions, meeting modern household needs with ease. Their robust designs and user-friendly features make them a top choice for clean spaces.

12.1 Final Thoughts on Eureka Vacuums

Eureka vacuums are a reliable choice for efficient cleaning, offering powerful suction, advanced filtration, and eco-friendly designs. Their models cater to diverse needs, from pet owners to allergy sufferers. With cost-effective options and durable construction, Eureka vacuums provide long-term value. The J15 Pro Ultra and SuctionSeal Pet AS1104A stand out for their innovative features and user-friendly designs. Whether you prioritize portability or advanced AI capabilities, Eureka delivers high-performance cleaning solutions that adapt to modern lifestyles, making them a top recommendation for anyone seeking a balance of quality and affordability.

12.2 Recommendations for Potential Buyers

When choosing a Eureka vacuum, consider your specific cleaning needs and preferences. For pet owners, the SuctionSeal Pet AS1104A is an excellent choice, while the J15 Pro Ultra excels for advanced, hands-free cleaning. If budget is a concern, Eureka’s mid-range models offer great value without compromising on performance. Always read the manual to understand features and maintenance requirements. Prioritize models with HEPA filtration if allergies are a concern. Eureka vacuums are a smart investment for anyone seeking reliability, efficiency, and long-term durability in their cleaning routine.

Manuals

fisher paykel oven instruction manual

Welcome to the Fisher & Paykel Oven Manual! This guide provides comprehensive instructions for installing, operating, and maintaining your oven, ensuring optimal performance and safety.

1.1 Purpose and Scope of the Manual

This manual is designed to guide users in the safe and effective operation of their Fisher & Paykel oven. It covers installation, operation, maintenance, and troubleshooting, ensuring optimal performance. The manual outlines essential safety precautions, key features, and step-by-step instructions for various cooking modes. It also provides details on customization options and advanced functions. Whether you’re setting the time, using the touchscreen interface, or exploring cooking modes like bake, roast, or grill, this guide offers clear instructions. Additionally, it includes maintenance tips, error code solutions, and resources for further assistance. By following this manual, users can maximize their oven’s potential while ensuring safety and efficiency. Refer to the final installation checklist and user preferences section for personalized settings.

1.2 Key Features Overview

This manual highlights the advanced features of your Fisher & Paykel oven, designed to enhance your cooking experience. Key features include a user-friendly touchscreen interface, multiple cooking modes such as Bake, Roast, and Grill, and advanced functions for precise temperature control. The oven also offers customizable settings, allowing you to tailor cooking preferences to your needs. Additionally, it includes energy-efficient technologies and safety features like automatic shut-off and child safety locks. The manual also covers the 6-button timer operation, making it easy to manage cooking times. These features ensure versatility, convenience, and safety, helping you achieve professional-grade results in the comfort of your home. Explore these features in detail to maximize your oven’s capabilities.

Installation Instructions

Ensure the installation site meets all requirements, including proper ventilation and electrical connections. Refer to the final checklist to confirm all pre-installation steps are completed successfully.

2.1 Pre-Installation Requirements

Before installing your Fisher & Paykel oven, ensure the installation site meets all specified requirements. Verify proper ventilation and electrical connections, and ensure the area is clear of obstructions. Check that the oven dimensions match the allocated space and that all necessary tools and materials are available. Ensure the installer has completed the final checklist to confirm readiness for installation. Proper preparation ensures a safe and efficient installation process. Refer to the manual for detailed guidelines and safety precautions to avoid potential issues during setup. Always follow manufacturer recommendations to guarantee optimal performance and longevity of your appliance.

2.2 Final Checklist for Installation

Before completing the installation, ensure all pre-installation requirements are met. Verify that electrical connections are secure and meet the oven’s specifications. Check that proper ventilation is in place to prevent moisture buildup and ensure safe operation. Confirm the oven is level and aligned correctly with surrounding surfaces. Test all functions to ensure they operate as intended. Review the installation manual to confirm all steps have been followed accurately. Ensure the installer has completed the final checklist provided in the manual. This checklist includes verifying electrical connections, proper ventilation, and leveling. Additionally, confirm that all safety features are activated and functioning correctly. Refer to the manual for detailed steps and guidelines to ensure a safe and correct installation process. Proper completion of this checklist guarantees optimal performance and longevity of your Fisher & Paykel oven.

Safety Precautions

Always read and follow the manual carefully. Ensure proper installation and operation to avoid hazards. Familiarize yourself with safety features like child locks and heat indicators for safe usage.

3.1 General Safety Warnings

Always follow safety guidelines to ensure safe operation of your Fisher & Paykel oven. Never leave cooking unattended, especially when using high-heat functions. Keep children away from the oven while it is in use. Ensure proper ventilation in your kitchen to prevent carbon monoxide buildup. Avoid wearing loose clothing that could catch fire near an open flame or hot surfaces. Do not store flammable materials near the oven. Regularly inspect electrical connections and ensure they are secure. Never attempt to repair the oven yourself; contact a qualified technician. Failure to follow these precautions may result in injury or damage. Always refer to the manual for specific safety recommendations tailored to your model.

3.2 Specific Safety Features of Fisher Paykel Ovens

Fisher & Paykel ovens are equipped with advanced safety features to protect users. The child safety lock prevents accidental operation, while the automatic shut-off function turns off the oven if it detects inactivity or an issue. The cool-touch door minimizes heat transfer, reducing the risk of burns. Additionally, the oven features overheat protection, which activates if temperatures exceed safe levels. These features, combined with secure installation requirements, ensure a safe cooking environment. Always follow the manual’s guidelines to maximize these safety benefits and maintain your oven’s performance. Regular maintenance, as outlined in the manual, further enhances safety and longevity.

Operating Your Fisher Paykel Oven

Mastering your Fisher & Paykel oven is straightforward with its intuitive interface. Navigate effortlessly through cooking modes, adjust settings, and enjoy precise temperature control for perfect results every time.

4.1 Setting the Time on Your Oven

Setting the time on your Fisher & Paykel oven is a straightforward process. Begin by accessing the time settings through the touchscreen interface or control buttons. Select the “Clock” or “Time” option, then use the arrows or number pad to set the current time. Ensure the time zone is correctly configured if applicable. Once set, confirm the time and save your settings. For wall ovens, refer to the tutorial by Noel Leeming for a step-by-step guide. Always ensure the time is accurate for proper cooking timer functionality. If you encounter issues, consult the user manual or online resources for troubleshooting tips.

4.2 Using the Touchscreen Interface

Your Fisher & Paykel oven features an intuitive touchscreen interface designed for easy navigation. To use it, gently tap the screen to select options such as cooking modes, timers, and temperature settings. The interface is responsive, allowing you to adjust settings with precision. For example, when setting the time or selecting a cooking mode, simply tap the desired option and follow the on-screen prompts. The touchscreen also provides visual feedback, ensuring your selections are confirmed. Regularly cleaning the screen with a soft cloth will maintain its responsiveness. If you need assistance, refer to the online tutorials or user guides for detailed instructions on maximizing the touchscreen’s functionality.

4.3 Understanding Cooking Modes and Functions

Your Fisher & Paykel oven offers a variety of cooking modes and functions to suit different culinary needs. The Bake mode provides consistent heat for even cooking, while the Roast mode is ideal for large cuts of meat. The Grill mode allows for precise control over browning and crisping. Advanced functions, such as slow cooking and steam cooking, offer versatility for complex recipes. To select a mode, tap the corresponding icon on the touchscreen and adjust settings like temperature and timer. Customization options enable you to tailor cooking parameters for specific dishes. Regularly reviewing the user manual or online guides will help you master these features and enhance your cooking experience.

Cooking Modes and Functions

The Fisher & Paykel oven offers multiple cooking modes and functions, including Bake, Roast, Grill, and advanced options like slow cooking and steam cooking. These modes provide precise control over cooking parameters, ensuring optimal results. Customization options allow for tailored cooking experiences, and mastering these features is made easy with the user manual and online guides.

5.1 Bake Mode

Bake Mode on your Fisher & Paykel oven is designed for even heating and consistent results. Ideal for cakes, cookies, and pastries, it ensures uniform cooking throughout. To use Bake Mode, select it via the touchscreen interface, set your desired temperature, and choose the timer if needed. The oven will preheat automatically, and you’ll receive a notification when it’s ready. For best results, preheat the oven before placing your dish inside. Always use oven-safe cookware and follow the recommended temperature settings for your recipe. Refer to the user manual or online guides for additional tips on achieving perfect baking outcomes. This mode is perfect for home bakers and professionals alike, offering precision and reliability.

5.2 Roast Mode

Roast Mode on your Fisher & Paykel oven is perfect for cooking large cuts of meat, vegetables, and whole dishes evenly. This mode uses precise temperature control and air circulation to ensure a perfect roast every time. To use Roast Mode, select it via the touchscreen interface, set your desired temperature, and choose the timer if needed. The oven will preheat automatically, and you’ll receive a notification when it’s ready. For best results, place your dish in the center of the oven rack to ensure even cooking. Use oven-safe cookware and follow the recommended temperature settings for your recipe. Roast Mode is ideal for achieving a crispy exterior and a tender interior, making it perfect for special occasions or family meals. Always refer to the user manual or online guides for additional tips on achieving perfect roasting results.

5.3 Grill Mode

Grill Mode on your Fisher & Paykel oven is designed to achieve a crispy texture and caramelized flavors, perfect for cooking meats, vegetables, and bread. To use Grill Mode, select it via the touchscreen interface, set your desired temperature, and choose the timer if needed. The oven will preheat automatically, ensuring even heat distribution. Place your dish on the middle rack for optimal results. Use oven-safe cookware and ensure food is properly positioned to avoid splatter. Grill Mode combines direct heat with air circulation for consistent cooking. For best results, marinate or season your food before grilling. Always refer to the user manual or online guides for additional tips on using Grill Mode effectively. This feature is ideal for achieving restaurant-quality grilled dishes at home.

5.4 Advanced Cooking Functions

Fisher & Paykel ovens offer advanced cooking functions designed to enhance your culinary experience. These include multi-function cooking, smart algorithms, and precision temperature control. The oven’s intelligent system ensures even heat distribution, while features like moisture control and steam cooking allow for versatile meal preparation. Wi-Fi connectivity enables remote monitoring and control via the Fisher & Paykel app, giving you flexibility in managing your cooking tasks. Additional functions like slow cooking, proofing, and dehydrating expand your cooking possibilities. These advanced features are designed to cater to both novice and experienced cooks, ensuring perfect results every time. Refer to the user manual or online guides for detailed instructions on utilizing these functions effectively.

Maintenance and Cleaning

Regular cleaning is essential for optimal performance. Wipe surfaces daily with a damp cloth and avoid harsh chemicals. Use catalytic liners for easy food residue breakdown. Refer to the user guide for detailed cleaning procedures.

6.1 Regular Cleaning Tips

Regular cleaning is crucial for maintaining your Fisher & Paykel oven’s performance and appearance. Daily, wipe down surfaces with a damp cloth to remove splatters and spills. Avoid using harsh chemicals or abrasive cleaners, as they may damage the finish. For tougher stains, mix baking soda and water to create a paste, apply it, and let it sit overnight before wiping clean. Clean racks and shelves in warm soapy water, and dry thoroughly before replacing. For models with catalytic liners, ensure they are free from food residue to maintain their self-cleaning function. Always refer to your user manual for specific cleaning recommendations tailored to your oven model.

6.2 Deep Cleaning Procedures

For a thorough clean, turn off and unplug your Fisher & Paykel oven, allowing it to cool completely. Remove racks and shelves, washing them in warm soapy water. Use a gentle cleanser or a mixture of baking soda and water to tackle stubborn stains. Apply the solution to interior surfaces, letting it sit overnight before wiping clean with a damp cloth. For models with steam cleaning functionality, follow the manual’s steam cleaning instructions. Avoid harsh chemicals or abrasive scrubbers to prevent damage. Regular deep cleaning ensures optimal performance and maintains your oven’s appearance. Always refer to your specific model’s manual for detailed guidance.

Troubleshooting Common Issues

Identify common issues like error codes, heating problems, or uneven cooking. Refer to the error code list, check power supply, and ensure proper mode usage.

7.1 Common Error Codes and Solutions

Identify and resolve common issues using error codes displayed on your oven’s interface. For example, E1 indicates a temperature sensor issue, while E2 signals a faulty heating element. E3 may point to a malfunctioning thermostat. Refer to the manual for specific solutions, such as checking connections or replacing faulty parts. Resetting the oven or ensuring proper ventilation often resolves minor issues. If problems persist, contact Fisher & Paykel customer support for professional assistance. Regular maintenance and adherence to troubleshooting steps can prevent recurring errors and ensure optimal performance. Always follow safety guidelines when addressing technical issues to avoid further complications.

7.2 Resolving Heating Issues

If your Fisher & Paykel oven isn’t heating properly, check for common causes like faulty heating elements or thermostats. Ensure the oven is preheated correctly and that the door is sealed tightly. If error codes like E2 (heating element issue) or E3 (thermostat malfunction) appear, refer to the manual for specific solutions. Resetting the oven or checking electrical connections may resolve the problem. Ensure proper ventilation and avoid blocking vents. If issues persist, contact Fisher & Paykel customer support for professional assistance. Regular maintenance, such as cleaning sensors and ensuring proper installation, can prevent heating issues. Always follow safety guidelines when troubleshooting to avoid further complications or damage to the appliance.

User Preferences and Customization

Customize your Fisher & Paykel oven to suit your needs. Adjust display settings, temperature units, and favorite cooking modes for a personalized experience. Refer to the manual for details.

8.1 Setting User Preferences

To tailor your Fisher & Paykel oven to your preferences, navigate to the settings menu via the touchscreen. Adjust display brightness, temperature units (Celsius or Fahrenheit), and default cooking modes. Save your preferred settings for a personalized experience. Refer to the manual for step-by-step guidance on customizing these features effectively.

8.2 Customizing Cooking Settings

Customize your Fisher & Paykel oven’s cooking settings to suit your culinary needs. Access the touchscreen interface to adjust temperature, timer, and cooking modes. Select from options like Bake, Roast, or Grill, and explore advanced functions such as slow cooking or proofing. For precise control, modify settings mid-cooking or save favorite configurations for quick access. The oven allows you to personalize parameters like fan speed and heating elements to achieve desired results. Refer to the manual for detailed steps on tailoring these settings to enhance your cooking experience. This feature ensures your oven adapts to your preferences, making every dish uniquely yours.

Additional Resources

Access the full user manual, contact customer support, and explore online tutorials for detailed guidance on your Fisher & Paykel oven. Visit info@homeappliancesonline.co.nz for assistance.

9.1 Accessing the Full User Manual

To access the full Fisher & Paykel oven user manual, click on the highlighted link provided in the resources section. This manual covers installation, operation, and maintenance for models like OB60SDPTX1 and OB60SDPTDX1. It includes detailed instructions for setting the time, using the touchscreen interface, and understanding cooking modes. Additionally, the manual provides troubleshooting tips and safety precautions. For specific queries, email info@homeappliancesonline.co.nz for assistance. Online tutorials and guides are also available to help you maximize your oven’s features. Ensure you refer to the official Fisher & Paykel website for the most accurate and up-to-date information.

9.2 Contacting Customer Support

For any inquiries or assistance with your Fisher & Paykel oven, contact customer support via email at info@homeappliancesonline.co.nz. This service is available for troubleshooting, maintenance, or technical questions. Additionally, Thermo Fisher Scientific offers support for lab equipment and supplies, ensuring your needs are met. Visit their official website for more details on their services and solutions. The Fisher & Paykel Built-In Oven User Guide is also accessible online, providing comprehensive guidance for models like OB60SDPTX1 and OB60SDPTDX1. Their team is dedicated to helping you optimize your oven’s performance and address any issues promptly.

9.3 Online Tutorials and Guides

Fisher & Paykel provides extensive online resources to help you master your oven. Visit their official website or platforms like Vimeo to access tutorials, such as the Wall Oven OB30/OB76 – Setting The Time and User Preference Settings videos. These guides offer step-by-step instructions for operating and customizing your oven. Additionally, the Fisher & Paykel Technical channel on Vimeo features detailed demonstrations for models like OB60SDPTX1 and OB60SDPTDX1. Online manuals and troubleshooting tips are also available, ensuring you can resolve issues and optimize your cooking experience. Explore these resources to get the most out of your Fisher & Paykel oven.

Conclusion

With this manual, you’re now equipped to make the most of your Fisher & Paykel oven. From installation and safety to advanced cooking modes, we’ve covered everything you need for a seamless experience. Regular maintenance and troubleshooting tips ensure longevity and efficiency. Explore online tutorials and guides for additional support. Fisher & Paykel’s commitment to innovation and quality shines through in every feature. Enjoy experimenting with new recipes and settings to enhance your culinary creations. Refer back to this manual for any questions, and don’t hesitate to reach out to customer support for further assistance. Happy cooking with your Fisher & Paykel oven!