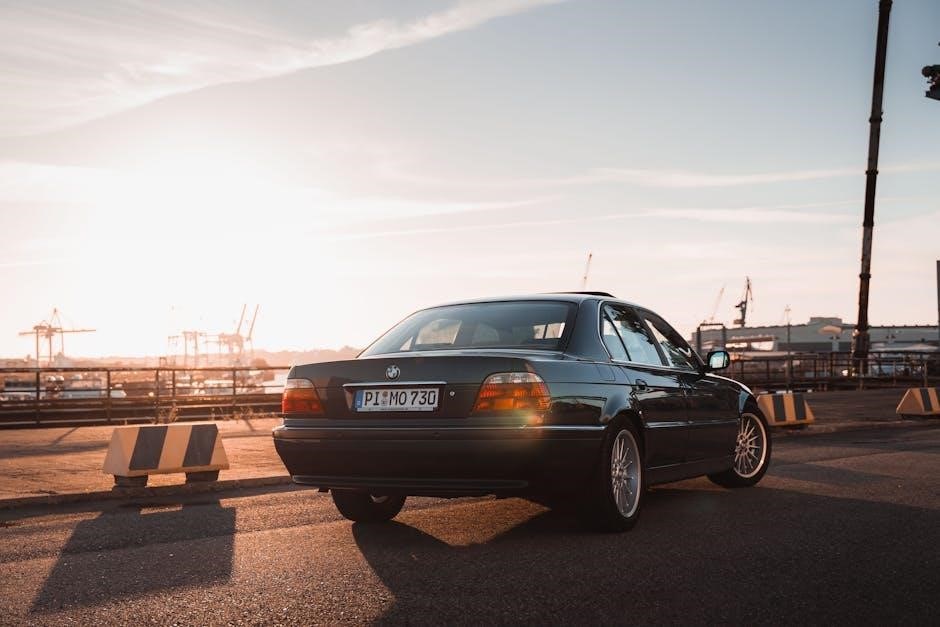
Guide

meyer snow plow troubleshooting guide

Welcome to the Meyer snow plow troubleshooting guide. This article helps identify and resolve common issues, ensuring optimal performance. Learn how to address problems with hydraulics, blades, and electrical systems for efficient and safe snow plowing operations.

Common Issues

Common issues with Meyer snow plows include problems with plow raise/lower functionality, angling malfunctions, hydraulic system errors, uneven blade wear, and electrical connectivity. Early identification of these issues can prevent severe damage and ensure reliable winter performance.

2.1 Plow Not Raising or Lowering

If your Meyer snow plow isn’t raising or lowering, check the hydraulic fluid level first. Low fluid levels can disrupt plow functionality. Ensure the reservoir is filled to the recommended level. Next, inspect for hydraulic leaks or blockages in the system. If issues persist, examine the solenoid or valve for proper operation. Electrical connections should be secure and free from corrosion. If all components are functioning correctly, consult the operator’s manual or contact a certified technician for assistance. Regular maintenance can help prevent these issues and ensure smooth operation during winter conditions.

2.2 Plow Not Angling

If your Meyer snow plow fails to angle properly, start by checking the hydraulic system for any obstructions or leaks. Low hydraulic fluid levels or a malfunctioning solenoid can prevent proper angling. Ensure all electrical connections, including the angle switch, are secure and free from corrosion. If the issue persists, inspect the plow’s mechanical linkage for damage or wear. Lubricate moving parts and verify that the relief valve is functioning correctly. If the plow still doesn’t angle, consult the operator’s manual or contact a certified technician for professional assistance. Regular maintenance of both hydraulic and electrical systems can help prevent such issues and ensure smooth operation during winter conditions.

Hydraulic System Issues

Hydraulic system problems can hinder plow performance. Common issues include low fluid levels, solenoid malfunctions, or blockages in hydraulic lines. Check fluid levels, inspect for leaks, and ensure all hydraulic components are functioning properly. Consult the manual for specific troubleshooting steps.

3.1 Low Hydraulic Fluid Levels

Low hydraulic fluid levels can significantly impair the functionality of your Meyer snow plow. This issue often arises due to leaks, improper filling, or excessive wear on system components. Start by inspecting the reservoir for any signs of damage or leaks. Use a hydraulic fluid level gauge to measure and top up the fluid as needed. Always refer to your owner’s manual to ensure you are using the correct type of hydraulic fluid. If the level drops consistently, it may indicate a more serious problem, such as a damaged seal or a malfunctioning pump. In such cases, it’s advisable to seek professional assistance to prevent further damage to the hydraulic system. Regular maintenance can help prevent low fluid levels and ensure smooth operation of your snow plow during the winter season.

3.2 Solenoid Issues

Solenoid issues can disrupt the proper functioning of your Meyer snow plow’s hydraulic system. Common problems include the solenoid failing to activate or inconsistent operation of the plow. Start by checking the electrical connections and ensuring they are clean and free from corrosion. A blown fuse or tripped circuit breaker might also prevent the solenoid from functioning. If the issue persists, inspect the solenoid coil for damage or wear. Low hydraulic fluid levels or contaminated fluid can also affect solenoid performance, so ensure the system is properly maintained. If the solenoid is faulty, it may need to be replaced. Always refer to your owner’s manual for specific instructions and safety precautions when working with electrical components. Addressing solenoid issues promptly can prevent further damage to the hydraulic system and ensure reliable operation of your snow plow during winter conditions.

Blade Issues

Blade issues often arise from uneven wear or failure to spin. Inspect for damage, misalignment, or debris buildup. Regular maintenance, such as cleaning and balancing, can prevent these problems. Addressing blade issues promptly ensures efficient and safe snow plowing performance.

4.1 Uneven Wear

Uneven wear on the Meyer snow plow blade is a common issue that can lead to reduced efficiency and increased maintenance costs. This problem often occurs due to misalignment of the blade, improper adjustment of the plow angle, or frequent operation on uneven surfaces. Over time, uneven wear can cause the blade to vibrate excessively, leading to structural stress and potentially damaging the plow frame or hydraulic system. Regular inspection of the blade edge and cutting surface is essential to identify uneven wear early. If left unchecked, it can result in poor snow-clearing performance and safety hazards. To address uneven wear, ensure the blade is properly aligned with the vehicle and adjust the plow angle as needed. Additionally, cleaning debris from the blade regularly can help prevent uneven stress. Rebalancing the blade or replacing worn sections can restore even wear patterns. By addressing uneven wear promptly, you can maintain optimal plowing efficiency and extend the lifespan of your Meyer snow plow.

4.2 Blade Not Spinning

A stationary blade is a significant issue that can render the Meyer snow plow ineffective. If the blade fails to spin, it may be due to a malfunction in the motor, gearbox, or control system. Over time, wear and tear on moving parts, such as bearings or gears, can cause the blade to stop rotating. Additionally, freezing temperatures can cause components to seize, preventing movement. Another common cause is a disruption in the electrical or hydraulic systems powering the blade. Inspect the blade’s drive system for blockages, such as ice or debris, which may impede rotation. Check the motor and gearbox for signs of damage or excessive wear. Ensure all electrical connections are secure and functioning properly. If the issue persists, consult a professional to repair or replace faulty components. Regular maintenance, such as lubricating moving parts and clearing debris, can help prevent the blade from stopping mid-operation. Addressing this issue promptly is crucial to maintain efficient snow-clearing performance and avoid further damage to the plow.

Electrical System Issues

Electrical system problems can significantly disrupt the operation of your Meyer snow plow. Common issues include faulty wiring, blown fuses, or malfunctioning sensors. Over time, exposure to harsh winter conditions can cause corrosion in electrical connectors, leading to poor connections and intermittent operation; Additionally, extreme cold can affect the performance of electrical components, such as solenoids or relays, which may fail to activate properly. Another issue is damage to wires due to abrasion or impact, which can result in open circuits. If the plow’s electrical system is not functioning, it may prevent key features like blade angling or raising/lowering from working correctly.

To troubleshoot, start by inspecting all electrical connections for signs of corrosion or damage. Clean or replace corroded connectors and ensure all wires are securely connected. Check the fuse box and replace any blown fuses. If the problem persists, use a multimeter to test for continuity in suspect wiring or components. Addressing electrical issues promptly is crucial to maintaining reliable performance and ensuring safe operation of your Meyer snow plow during winter conditions.

Mounting System Issues

The mounting system of your Meyer snow plow is crucial for ensuring proper alignment and stability. However, issues such as misaligned mounting brackets, loose bolts, or worn-out hardware can arise, leading to poor performance. Over time, the mounting system may become corroded due to exposure to salt and moisture, causing parts to seize or rust. Additionally, improper installation of the plow can result in uneven weight distribution, putting extra strain on the vehicle and the plow itself.

Common problems include the plow shifting during operation, which can damage the vehicle or the plow. Another issue is difficulty attaching or detaching the plow due to misaligned or damaged mounting pins. To address these issues, inspect the mounting hardware regularly for signs of wear or corrosion. Tighten all bolts and ensure proper alignment. If corrosion is present, clean or replace the affected parts. Lubricate moving components to prevent seizing. Proper maintenance of the mounting system is essential for safe and efficient snow plowing operations. Regular checks can help prevent costly repairs and ensure your Meyer snow plow functions reliably throughout the winter season.

Winter Maintenance Tips

Regular maintenance is key to ensuring your Meyer snow plow performs optimally during winter. Start by inspecting all components, including the blade, hydraulic system, and electrical connections, for signs of wear or damage. Lubricate moving parts, such as hinges and pivot points, to prevent freezing and corrosion. Check the hydraulic fluid levels and top them off if necessary, using the recommended type of fluid for your system.

Inspect the blade for uneven wear or damage and replace it if needed. Ensure the cutting edge is sharp to maintain effective snow removal. Clean the plow thoroughly after each use, paying special attention to areas prone to rust or corrosion. Apply a rust-inhibiting coating to protect metal surfaces from harsh winter conditions.

Test all electrical components, such as lights and sensors, to ensure they are functioning properly. Replace any damaged or worn-out wires or connectors. Store the plow in a dry, sheltered area when not in use to prevent exposure to moisture. Schedule an annual professional inspection to address any underlying issues before the next winter season.

By following these winter maintenance tips, you can extend the lifespan of your Meyer snow plow and ensure it operates efficiently and safely throughout the winter months.

Guide

woolino temperature guide

Woolino Sleep Bags offer a thoughtful solution for safe and comfortable baby sleep‚ combining soft‚ breathable materials with a built-in temperature guide for optimal dressing. Woolino ensures both style and functionality‚ making it a preferred choice for parents seeking reliable sleep solutions for their infants.

What is a Woolino Sleep Bag?

A Woolino Sleep Bag is a premium‚ wearable blanket designed for infants‚ crafted from breathable‚ natural fabrics like Merino wool. It combines comfort with functionality‚ featuring a built-in temperature guide to help parents dress their baby appropriately for different room temperatures‚ ensuring safe and restful sleep. The sleep bag replaces loose bedding‚ promoting a secure and cozy environment for babies to thrive in.

Importance of Temperature Regulation for Baby Sleep

Temperature regulation is crucial for safe and comfortable baby sleep. Overheating can pose health risks‚ while a stable environment promotes better rest. Woolino Sleep Bags are designed to maintain optimal body temperature‚ reducing the risk of overheating and ensuring a safe sleep environment. This thoughtful approach helps parents create a cozy yet secure space for their baby‚ fostering healthy sleep habits and peace of mind.

Understanding the Woolino Temperature Guide

The Woolino Temperature Guide is a detailed chart helping parents dress their baby appropriately based on room temperature‚ ensuring comfort and safety during sleep.

How the Guide Helps Determine the Right Clothing for Baby

The Woolino Temperature Guide provides a clear framework for parents to select appropriate clothing for their baby based on room temperature. It categorizes clothing choices across different temperature ranges‚ from cooler to warmer environments‚ ensuring the baby’s comfort and safety. By considering factors like layering and fabric breathability‚ the guide helps prevent overheating and maintains a stable body temperature‚ promoting restful sleep and peace of mind for parents.

Key Factors Influencing Room Temperature for Safe Sleep

Room temperature plays a crucial role in ensuring safe and comfortable sleep for babies. The ideal range is typically between 20-22°C‚ as extreme temperatures can lead to overheating or overcooling. Factors like humidity‚ air circulation‚ and the baby’s clothing also influence comfort. Natural fabrics‚ such as merino wool‚ help regulate body temperature naturally. Parents should monitor their baby’s comfort by checking the back of their neck or stomach to ensure optimal conditions for restful sleep.

Dressing Your Baby According to Room Temperature

Dressing your baby based on room temperature ensures comfort and safety. Use the Woolino temperature guide to layer clothing appropriately‚ promoting natural body temperature regulation for restful sleep.

General Guidelines for Layering Clothing

Layering clothing based on room temperature is essential for baby’s comfort. Start with a lightweight base layer‚ add mid-layers for cooler rooms‚ and finish with the Woolino Sleep Bag. Always check the back of your baby’s neck or stomach to ensure they’re not too hot or cold. The Woolino temperature guide provides clear recommendations for layering‚ ensuring your baby stays comfortable and safe. This approach promotes natural temperature regulation and restful sleep.

Specific Recommendations for Different Temperature Ranges

For rooms below 64°F (18°C)‚ opt for warmer layers like a thermal onesie and socks under the Woolino Sleep Bag. Between 64°F and 70°F (18°C-21°C)‚ a lightweight onesie and the sleep bag suffice. Above 70°F (21°C)‚ a short-sleeve onesie or just the sleep bag is ideal. Always adjust layers based on your baby’s comfort‚ checking the back of their neck or stomach. The Woolino temperature guide ensures your baby stays cozy without overheating‚ promoting safe and restful sleep.

Materials Used in Woolino Sleep Bags

Woolino Sleep Bags are crafted from merino wool and natural fabrics‚ ensuring breathability and softness for sensitive skin. These materials promote a comfortable and regulated sleep environment for babies.

Merino Wool and Its Breathable Properties

Merino wool is a natural‚ soft‚ and breathable fabric that regulates body temperature effectively; It wicks moisture away‚ preventing overheating and keeping babies comfortable in all seasons. Its fine fibers ensure gentle comfort against sensitive skin‚ making it ideal for sleepwear. The breathability of merino wool allows for airflow‚ maintaining a safe and cozy environment. This natural fabric is a key component in Woolino Sleep Bags‚ promoting restful sleep and aligning with the temperature guide’s purpose of ensuring babies’ comfort and safety.

Why Natural Fabrics Are Ideal for Baby Sleep

Natural fabrics like merino wool and cotton are ideal for baby sleep due to their breathability and ability to regulate body temperature. These materials wick moisture away‚ preventing overheating and ensuring comfort. Unlike synthetic fabrics‚ natural fibers promote airflow‚ reducing the risk of overloading with blankets. This aligns with safe sleep practices and ensures babies remain at a safe temperature‚ making natural fabrics a recommended choice for sleepwear.

Safety and Comfort Benefits of Woolino Sleep Bags

Woolino Sleep Bags ensure safe sleep by preventing overheating and maintaining a stable body temperature. Their breathable design and natural fabrics promote comfort‚ reducing risks associated with loose bedding.

Preventing Overheating and Maintaining a Safe Body Temperature

Woolino Sleep Bags are designed to prevent overheating‚ a common concern for parents. The merino wool fabric wicks moisture and regulates body temperature naturally‚ ensuring baby stays comfortable. The built-in temperature guide helps parents dress their baby appropriately based on room temperature‚ avoiding the risks of over-layering. This thoughtful design ensures a safe and cozy sleep environment‚ promoting healthy sleep patterns and giving parents peace of mind.

How the Design Promotes Better Sleep Quality

The Woolino Sleep Bag’s ergonomic design ensures a snug‚ comfortable fit‚ allowing for natural movement while preventing the baby from getting tangled. The seamless construction reduces irritation‚ and the breathable merino wool fabric regulates temperature‚ preventing overheating. This promotes consistent sleep patterns and reduces restlessness. The design also keeps the baby in a safe sleep position‚ aligning with pediatric recommendations for optimal sleep quality and safety.

Comparing Woolino to Other Sleep Sacks

Woolino stands out for its premium materials‚ merino wool breathability‚ and built-in temperature guide‚ surpassing other sleep sacks in comfort‚ functionality‚ and adaptability to varying room conditions.

Key Differences in Material and Functionality

Woolino sleep bags excel with their use of merino wool‚ a natural‚ breathable fabric that regulates body temperature effectively. Unlike other sleep sacks‚ Woolino’s design incorporates a built-in temperature guide‚ offering parents a practical tool to dress their baby appropriately based on room conditions. This unique combination of material quality and functional guidance sets Woolino apart‚ ensuring optimal comfort and safety for infants in varying environments.

What Makes Woolino Stand Out in Temperature Regulation

Woolino’s standout feature is its merino wool fabric‚ which naturally regulates body temperature‚ keeping babies cool in summer and warm in winter. The built-in temperature guide provides clear layering recommendations based on room temperature‚ ensuring parents can dress their baby appropriately. This unique combination of breathable material and practical guidance ensures optimal comfort and safety‚ making Woolino a superior choice for maintaining a healthy sleep environment for infants.

Real User Experiences and Reviews

Parents praise the Woolino temperature guide for its effectiveness in helping dress babies appropriately for different room temperatures‚ promoting safe and comfortable sleep environments consistently.

Parent Feedback on the Effectiveness of the Temperature Guide

Parents highly praise the Woolino temperature guide for its clear and practical advice‚ ensuring babies stay comfortable in various room temperatures. Many appreciate how it helps prevent overheating and promotes safe sleep environments. The guide’s ease of use and effectiveness have made it a trusted tool for dressing babies appropriately‚ fostering peace of mind for caregivers. Its versatility across different climates and seasons is particularly highlighted‚ making it a reliable choice for maintaining optimal comfort.

Woolino users consistently report improved sleep quality for their infants‚ attributing it to the guide’s accuracy and the breathable‚ natural fabrics used in the sleep bags. This combination ensures a perfect balance of warmth and ventilation‚ adapting seamlessly to changing conditions.

Overall‚ the temperature guide is celebrated for its role in enhancing both safety and comfort‚ solidifying Woolino’s reputation as a leader in innovative baby sleep solutions.

Common Praise and Suggestions for Improvement

Parents often commend the Woolino temperature guide for its simplicity and effectiveness in ensuring their baby’s comfort. Many praise the guide’s ability to prevent overheating and its adaptability to different room temperatures. The use of natural‚ breathable fabrics is also frequently highlighted as a key advantage. However‚ some users suggest adding more detailed size charts and care instructions to enhance usability. Overall‚ the guide is well-received‚ with minor tweaks suggested for an even better user experience.

Suggestions for improvement include expanding the temperature range and offering more visual aids‚ but the guide remains a highly recommended tool for parents seeking to dress their babies appropriately for sleep.

Expert Recommendations for Using Woolino Sleep Bags

Experts recommend using the Woolino temperature guide to dress babies appropriately‚ ensuring comfort and safety. Regularly check your baby’s temperature by touch and combine the guide with other sleep tips for optimal results.

How to Combine the Temperature Guide with Other Sleep Tips

For optimal results‚ pair the Woolino temperature guide with a consistent bedtime routine and a dark sleep environment. Ensure the room temperature aligns with the guide’s recommendations. Dress your baby in breathable‚ natural fabrics like merino wool‚ and layer clothing based on the room’s temperature. Regularly check your baby’s comfort by touching the back of their neck or stomach. By integrating these strategies‚ you create a safe and cozy sleep setting that promotes better rest for your infant.

Ensuring the Best Results for Your Baby’s Comfort

Ensuring the best results for your baby’s comfort involves following the Woolino temperature guide closely. Use natural‚ breathable fabrics and monitor room temperature to prevent overheating. Check your baby’s comfort by gently touching the back of their neck or stomach. Consistency in these practices helps maintain a safe and restful sleep environment‚ ensuring your baby stays comfortable throughout the night.

The Woolino Sleep Bag is a must-have for parents‚ offering a reliable solution for safe sleep with its innovative temperature guide and premium materials.

Final Thoughts on the Woolino Temperature Guide

The Woolino Temperature Guide is a game-changer for parents‚ ensuring babies sleep safely and comfortably. By preventing overheating and providing clear layering advice‚ it promotes better sleep quality. Made from breathable‚ natural fabrics like merino wool‚ Woolino sleep bags are both functional and gentle on sensitive skin. Parents praise the guide for its effectiveness‚ making it an essential tool for maintaining optimal temperatures and peace of mind.

Why It’s a Must-Have for Every Parent

The Woolino Temperature Guide is a must-have for every parent due to its simplicity and effectiveness in ensuring safe sleep conditions. It takes the guesswork out of dressing your baby‚ offering clear guidelines tailored to room temperature. With its focus on natural‚ breathable fabrics and prevention of overheating‚ it provides peace of mind‚ making it an indispensable tool for all parents seeking the best for their baby’s comfort and safety.

Guide

dekalb corn seed guide 2024

Welcome to the DeKalb Corn Seed Guide 2024, your ultimate resource for maximizing corn yield and farm productivity․ This guide provides insights into high-performing hybrids, planting strategies, and disease management to help farmers achieve optimal results․ With a focus on innovation and sustainability, DeKalb corn seeds are designed to thrive in diverse conditions, ensuring a successful harvest season․

1․1 Overview of DeKalb Corn Seeds

DeKalb corn seeds are renowned for their high-yielding potential, drought tolerance, and robust disease resistance․ These seeds are engineered to thrive in diverse climates and soil conditions, ensuring consistent performance․ With traits like strong root systems and adaptability, DeKalb seeds are a trusted choice for farmers seeking reliability and productivity․ Their resistance to diseases such as leaf rust and Maize Streak Virus further enhances their appeal․ Whether you’re farming in challenging or ideal conditions, DeKalb corn seeds are designed to deliver exceptional results, supported by cutting-edge agronomic expertise․

1․2 Importance of Choosing the Right Corn Seed

Selecting the right corn seed is crucial for maximizing yield, adapting to environmental challenges, and ensuring long-term profitability․ The right seed choice aligns with your farm’s specific conditions, such as soil type, climate, and pest pressures․ DeKalb corn seeds are bred for high performance, offering traits like drought tolerance and disease resistance, which are essential for overcoming farming obstacles․ By choosing the optimal hybrid, farmers can enhance productivity, reduce losses, and achieve a more sustainable and successful harvest․ This decision is the foundation of a profitable and resilient farming operation․

Key Features of DeKalb Corn Seeds

DeKalb corn seeds offer exceptional yield potential, drought tolerance, and robust disease resistance, ensuring adaptability to various environmental conditions and maximizing farming productivity․

2․1 High-Yielding Potential

DeKalb corn seeds are renowned for their high-yielding potential, making them a preferred choice for farmers seeking maximum productivity․ These seeds are bred to optimize kernel production and plant density, ensuring robust growth even in challenging conditions․ With advanced genetic traits, DeKalb hybrids consistently deliver superior yields compared to other varieties․ Farmers can expect increased profitability due to improved grain quality and quantity, supported by tailored agronomic practices․ This high performance makes DeKalb seeds a reliable option for achieving successful harvests season after season․

2․2 Drought Tolerance and Stress Management

DeKalb corn seeds excel in drought tolerance and stress management, ensuring consistent performance even under water-limited conditions․ Their robust root systems and genetic resilience enable them to maintain growth and productivity when water is scarce․ These seeds are engineered to optimize water use efficiency, reducing yield loss during dry spells․ Farmers can rely on DeKalb hybrids to deliver stable results in challenging environments, making them an ideal choice for regions prone to drought or irregular rainfall patterns․

2․3 Disease Resistance (Leaf Rust, Maize Streak Virus, etc․)

DeKalb corn seeds are bred with strong resistance to prevalent diseases like leaf rust, maize streak virus, Grey Leaf Spot, and diplodia․ This built-in protection minimizes yield losses and reduces the need for fungicide applications․ By combating these diseases effectively, DeKalb hybrids ensure healthier plants, better standability, and higher overall productivity․ This disease resistance is a key factor in maintaining crop integrity and supporting sustainable farming practices, making DeKalb seeds a reliable choice for farmers facing disease pressures․

Planting Recommendations for DeKalb Corn

For optimal growth, DeKalb corn seeds thrive in well-prepared soil with proper drainage․ Plant at recommended depths and spacing to ensure healthy root development and maximum sunlight exposure․

3․1 Optimal Soil Conditions for Planting

DeKalb corn seeds excel in well-draining, fertile soils with a pH range of 5․8 to 7․0․ Rich, loamy soils promote robust root growth and nutrient uptake, while sandy soils may require additional irrigation․ Ensure soil is free from compaction and debris for optimal germination․ Proper tillage enhances soil aeration, supporting healthy plant development․ Testing soil fertility and adjusting fertilizers according to recommendations ensures balanced nutrient levels, maximizing yield potential and crop resilience․

3․2 Planting Depth and Spacing Guidelines

For optimal growth, DeKalb corn seeds should be planted at a depth of 1․5 to 2 inches, depending on soil moisture․ Ensure the soil is firm around the seed to maintain consistent contact․ Row spacing typically ranges from 30 inches, allowing for adequate sunlight and airflow․ Intra-row spacing of 8 to 12 inches promotes healthy competition and prevents overcrowding․ Proper spacing enhances root development, improves pest resistance, and maximizes sunlight absorption, leading to higher yields and better crop quality․

Disease and Pest Management

Effective disease and pest management is crucial for DeKalb corn․ Built-in resistance to leaf rust, Maize Streak Virus, and Grey Leaf Spot reduces crop threats․ Regular monitoring and timely application of controls ensure optimal yields and long-term field health․

4․1 Common Diseases in Corn Crops

Corn crops are susceptible to various diseases that can significantly impact yield․ Common diseases include leaf rust, Maize Streak Virus, Grey Leaf Spot, and diplodia․ These diseases can weaken plants, reduce photosynthesis, and lower grain quality․ Leaf rust and Grey Leaf Spot are fungal infections that thrive in moist conditions, while Maize Streak Virus is transmitted by insect vectors․ Early detection and genetic resistance, like that built into DeKalb seeds, are critical for managing these threats and ensuring healthy crop development․

4․2 Effective Pest Control Strategies

Managing pests is crucial for maintaining healthy corn crops․ Common pests include aphids, rootworms, and armyworms․ Effective strategies involve crop rotation, using resistant hybrids like DeKalb seeds, and integrated pest management (IPM)․ Monitoring pest populations and applying pesticides only when necessary helps minimize environmental impact․ Cultural practices, such as maintaining proper soil health and watering schedules, can also deter pests․ DeKalb’s disease-resistant and pest-tolerant hybrids further enhance protection, ensuring optimal growth and yield․ Regular scouting and timely interventions are key to preventing infestations and safeguarding your investment․

Choosing the Right Hybrid for Your Farm

Selecting the right DeKalb hybrid involves understanding your farm’s specific needs, including soil type, climate, and desired yield potential․ DeKalb offers a range of hybrids tailored to different growing conditions, ensuring optimal performance․ Consider factors like drought tolerance, disease resistance, and maturity rates to maximize productivity․ By matching the hybrid to your farm’s unique environment, you can achieve higher yields and better crop resilience․

5․1 Understanding Hybrid Characteristics

Understanding hybrid characteristics is crucial for selecting the right DeKalb corn seed for your farm․ Hybrids vary in yield potential, maturity rates, and stress tolerance․ Traits like drought resistance, disease immunity, and adaptability to soil types are key factors․ High-yielding hybrids often balance productivity with resilience, while shorter maturity hybrids suit regions with shorter growing seasons․ Disease resistance, such as against leaf rust and Maize Streak Virus, ensures crop health․ Farmers should assess local conditions and goals to match the hybrid’s traits, optimizing performance and profitability․

5․2 Climate and Soil Type Considerations

Climate and soil type play a critical role in determining the success of DeKalb corn seeds․ Hybrids are tailored to thrive in specific conditions, such as drought-prone areas or waterlogged soils․ Farmers in regions with moderate rainfall benefit from drought-tolerant varieties, while those in wetter climates may opt for hybrids with strong root systems to resist waterlogging․ Soil fertility and pH levels also influence growth, with certain hybrids performing better in low-fertility or high-salinity soils․ Matching the hybrid to local conditions ensures optimal yield and resilience, maximizing the farm’s potential․

Agronomic Support and Resources

DeKalb provides comprehensive agronomic support, including expert guidance, soil analysis tools, and data-driven insights to optimize corn production and address farm-specific challenges effectively․

6․1 DeKalb’s Agronomic Support Services

DeKalb offers tailored agronomic support services, ensuring farmers maximize their yields․ From soil analysis to crop monitoring, their experts provide data-driven recommendations․ With access to advanced tools and resources, growers can make informed decisions․ Regular field visits and personalized advice help address specific challenges, fostering sustainable and profitable farming practices․ DeKalb’s commitment to innovation and farmer success sets them apart, making them a trusted partner in agriculture․

6․2 Access to Expert Guidance and Tools

DeKalb provides access to expert guidance and cutting-edge tools, empowering farmers to make data-driven decisions․ Their digital platforms offer insights into soil health, weather patterns, and crop performance․ Customizable tools, like yield forecasting and seed selection guides, help optimize farm operations․ Seasonal webinars and workshops further enhance knowledge, ensuring growers stay ahead of challenges․ This comprehensive support system equips farmers with the resources needed to maximize productivity and achieve long-term success in an ever-evolving agricultural landscape․

DeKalb corn seeds offer high-yielding, drought-tolerant, and disease-resistant solutions, supported by expert guidance․ This guide equips farmers with tools to enhance productivity and sustainability, ensuring superior performance․

7․1 Summary of Benefits

DeKalb corn seeds deliver exceptional value with high-yielding potential, drought tolerance, and robust disease resistance․ They offer adaptability across diverse climates and soil types, ensuring consistent performance․ Farmers benefit from strong agronomic support, expert guidance, and advanced hybrid traits․ These seeds are engineered to maximize productivity while minimizing environmental stress․ With DeKalb, growers can achieve superior yields, reduced crop risks, and long-term sustainability․ Their innovative genetics and proven reliability make them a top choice for modern farming needs․

7․2 Future Prospects for DeKalb Corn Seeds

DeKalb corn seeds are poised for continued growth with advancements in seed genetics and technology․ Future prospects include new hybrid releases tailored to evolving climate challenges, enhanced disease resistance, and improved drought tolerance․ DeKalb’s commitment to innovation ensures farmers access to cutting-edge solutions, optimizing yields and sustainability․ With a focus on R&D, DeKalb aims to lead the industry in addressing global food demands while supporting environmentally friendly practices․ Their dedication to farmer success positions them as a key player in shaping the future of agriculture․

Guide

kingdom man rising bible study guide pdf

The Kingdom Man Rising Bible Study Guide empowers men to embrace their divine purpose, offering insights into biblical manhood and kingdom living through transformative teachings and practical application.

Overview of the Study Guide

The Kingdom Man Rising Bible Study Guide is an eight-session resource designed to empower men to embrace their role in God’s kingdom. Created by Tony Evans, it combines personal study with group discussion, offering practical application of biblical truths. Each session includes relevant Scripture, teaching videos, and reflective exercises to deepen understanding. The guide is complemented by a leader kit and supplementary materials, making it versatile for both individual and group settings. Its structured approach ensures a comprehensive exploration of kingdom living, equipping men to lead with purpose and integrity in their daily lives and communities.

Target Audience and Purpose

The Kingdom Man Rising Bible Study Guide is primarily designed for men seeking to deepen their faith and understand their role in God’s kingdom. It targets both young and mature believers, offering a platform for spiritual growth and leadership development. The guide aims to empower men to embrace their divine purpose, equipping them with biblical truths and practical wisdom. By fostering a deeper connection with Scripture, it encourages men to lead with integrity, influence their communities, and live out their faith authentically. Its purpose is to inspire transformation, enabling men to become the leaders God has called them to be.

Key Concepts Explored in the Study Guide

The guide explores biblical truths about manhood, leadership, and kingdom living, equipping men to embrace their divine purpose and influence their communities with integrity and faith.

Understanding the Kingdom Man

The study guide delves into the concept of a Kingdom Man, highlighting his identity, purpose, and responsibilities as a spiritual leader. It emphasizes how a Kingdom Man aligns his life with God’s will, demonstrating integrity, courage, and servant-leadership. By exploring biblical examples and teachings, participants gain clarity on what it means to live as a man of God in today’s world, fostering a deeper understanding of their role in advancing God’s kingdom through personal and communal transformation.

The Role of Men in God’s Kingdom

The guide explores men’s vital role in advancing God’s kingdom, emphasizing leadership, accountability, and spiritual influence. It encourages men to embrace their divine mandate to lead with humility, integrity, and purpose. By aligning their lives with biblical principles, men can effectively serve as husbands, fathers, and community leaders, fostering a culture of faith and responsibility. The study underscores the importance of men living out their faith authentically, impacting their families and communities for eternal significance.

Structure and Content of the Bible Study

The guide features eight sessions with printed content, personal study sections, and key Scriptures. It also includes video teachings and supplementary materials for deeper engagement and leadership.

Session Breakdown and Key Scriptures

The study guide is divided into eight structured sessions, each containing printed content, personal study sections, and relevant Scriptures. Sessions explore themes like identity, purpose, and leadership, with teachings from Tony Evans. Key Scriptures, such as Matthew 5:13-16, highlight Kingdom living principles. Session 1 focuses on understanding the Kingdom Man, while Session 4 delves into leadership. Video teachings enhance understanding, and supplementary materials aid application. This breakdown ensures a comprehensive journey through biblical manhood, equipping men to live purposefully in God’s Kingdom. Additional resources support deeper reflection and group discussion.

Personal Study and Group Discussion Elements

The guide balances personal reflection and communal engagement. Personal study sections include reflection questions, Scripture application, and space for notes, fostering individual growth. Group discussions are enriched with guided questions and video teachings, encouraging accountability and shared insights. Each session’s content transitions seamlessly between personal devotion and collective exploration, ensuring a holistic learning experience. Supplementary materials further enhance both individual and group interactions, providing practical tools for applying Kingdom principles in daily life. This dual approach ensures that participants deepen their understanding and apply biblical truths effectively in their personal and communal journeys.

Practical Application and Impact

The study guide equips men to apply biblical truths, empowering them to lead, serve, and live purposefully, fostering personal transformation and impactful kingdom living in their communities.

Empowering Men for Kingdom Living

The Kingdom Man Rising Bible Study Guide equips men to embrace their God-given dominion, offering a kingdom-focused perspective that challenges them to step into their divine purpose. By exploring key Scriptures and practical life applications, participants are empowered to lead with integrity, serve with humility, and influence their spheres of influence for Christ. This study fosters spiritual growth, enabling men to align their lives with God’s kingdom agenda and live out their faith authentically in daily life, making a lasting impact in their families, communities, and the world.

Transformative Lessons for Daily Life

The Kingdom Man Rising Bible Study Guide provides practical, actionable lessons that empower men to apply kingdom principles in their everyday lives. Through insightful teachings, participants learn to navigate challenges with faith, lead with integrity, and serve others selflessly. The study emphasizes the importance of aligning daily decisions with God’s purpose, fostering a deeper commitment to spiritual growth. By integrating biblical truths into real-life scenarios, men gain the tools to live authentically as kingdom ambassadors, transforming their relationships, workplaces, and communities. These lessons inspire lasting change, equipping men to live purposefully for God’s glory.

Leadership and Guidance

The guide equips leaders with resources like video teachings and supplementary materials to effectively facilitate discussions, empowering men to embrace their roles in God’s kingdom purposefully.

Resources for Leading the Study

The Kingdom Men Rising Leader Kit provides essential tools for facilitating the study, including a Bible Study Book and a DVD featuring video teachings by Tony Evans. These resources are designed to help leaders guide group sessions effectively. The kit also includes supplementary materials, such as discussion guides and notes, to enhance engagement. Leaders can use these resources to create a structured and impactful learning environment, ensuring participants gain a deeper understanding of kingdom living. The materials are tailored to support both individual and group study, fostering spiritual growth and accountability among participants. They are invaluable for leading a transformative study experience.

Video Teaching and Supplementary Materials

The study is complemented by video teachings from Tony Evans, offering profound insights into kingdom living and biblical manhood. These videos, available on DVD, provide dynamic instruction to enhance group sessions. Supplementary materials, such as discussion guides and notes, are included to deepen understanding and engagement. These resources are designed to support both individual and group study, ensuring a comprehensive and transformative experience. They equip participants with practical tools to apply kingdom principles in daily life, fostering spiritual growth and accountability. The combination of video content and additional materials creates a robust framework for effective Bible study and discipleship.

The Kingdom Man Rising Bible Study Guide concludes by empowering men to embrace their God-given roles, encouraging ongoing spiritual growth and leadership. Participants are challenged to apply kingdom principles in daily life, fostering transformative change and eternal impact through dedicated study and community engagement.

Continuing the Kingdom Journey

The Kingdom Man Rising Bible Study Guide equips men to continue their spiritual journey beyond the study sessions. It emphasizes the importance of ongoing growth, encouraging men to deepen their relationship with God and live out their faith in everyday life. Participants are challenged to apply kingdom principles in their families, communities, and workplaces, fostering transformative change. The guide provides resources for sustained learning, including video teachings and personal study materials, ensuring men remain empowered to lead and serve. By continuing this journey, men can fulfill their divine purpose, becoming influential leaders in God’s kingdom.

Encouragement for Ongoing Spiritual Growth

The Kingdom Man Rising Bible Study Guide motivates men to pursue lifelong spiritual growth, emphasizing the importance of consistent faith and kingdom-focused living. It provides practical tools and insights to help men deepen their relationship with God and apply biblical principles in daily life. Through personal study, group discussion, and video teachings, men are equipped to overcome challenges and embrace their role in God’s kingdom. The guide encourages men to stay committed to their faith journey, seeking continuous transformation and becoming influential leaders in their families, communities, and beyond. Ongoing spiritual growth is essential for fulfilling their divine purpose.

Guide

longboard size guide

Longboard size plays a crucial role in performance, comfort, and riding style․ Boards typically range from 32 to 45 inches in length and 8 to 10 inches in width․ The right size depends on your height, weight, and riding preferences, ensuring stability and maneuverability for an optimal experience․

Why Longboard Size Matters

Longboard size significantly impacts stability, maneuverability, and overall riding comfort․ The right size ensures proper foot placement and balance, crucial for control․ Riders of different heights and weights require varying lengths and widths to optimize performance․ A board that’s too small may lack stability, while one that’s too large can be harder to maneuver․ Size directly affects the riding experience, making it essential to choose wisely for your specific needs and style․

Overview of Longboard Dimensions

Longboards vary in length from 32 to 45 inches and width from 8 to 10 inches․ These dimensions cater to different riding styles, with shorter boards offering agility and longer ones providing stability․ Width affects foot placement and control, while length influences speed and maneuverability․ Understanding these measurements helps riders select a board that aligns with their preferences and skill level for optimal performance․

Understanding Longboard Length

Longboards typically range from 32 to 45 inches in length․ Shorter boards (32-38 inches) offer agility for tricks, while longer boards (38-45 inches) enhance speed and stability․

Standard Length Ranges for Longboards

Longboards typically range from 32 to 45 inches in length․ Cruising boards are usually 35-42 inches, offering a balance of stability and maneuverability․ Downhill boards are longer, often 38-45 inches, designed for speed and control․ Shorter boards (32-38 inches) are ideal for tricks or tight spaces, while longer boards enhance comfort and glide for commuting or carving․

How Length Affects Performance and Stability

Longer longboards provide greater stability at higher speeds, making them ideal for downhill and commuting․ Shorter boards are more maneuverable and easier to handle, perfect for tricks and tight spaces․ The length directly impacts the rider’s ability to balance and control the board, with longer boards offering more comfort and shorter boards enhancing agility and responsiveness․

Longboard Width and Its Importance

Longboard width significantly impacts stability, maneuverability, and comfort․ Wider boards offer greater stability, while narrower boards allow for quicker turns․ Proper width ensures optimal foot placement and control․

Typical Width Measurements for Longboards

Longboard widths generally range from 8 to 10 inches, with 9 inches being the most common․ Wider boards, up to 10 inches, enhance stability, while narrower widths, around 8 inches, improve maneuverability․ The choice depends on personal preference, riding style, and shoe size to ensure a comfortable and secure stance on the board․

Width and Foot Size: Finding the Right Fit

Matching your foot size to the board’s width ensures comfort and control․ A common guideline is to subtract 1;5–2 inches from your shoe length to determine the ideal width․ For example, a size 10 shoe fits well on a 9-inch board․ Proper fit prevents foot overlap and enhances stability, making your riding experience more enjoyable and precise․

Choosing the Right Longboard for Your Height and Weight

Height and weight influence longboard size, with taller riders often preferring longer boards for stability, while heavier riders may benefit from wider or stiffer decks․

Height-to-Board Length Chart

For riders up to 5’10”, boards between 32-40 inches are ideal․ Heights around 5’10” may prefer 40-inch boards․ Taller riders often opt for longer boards, ensuring stability and control, while shorter riders benefit from more maneuverable, shorter decks․ Use this chart as a starting point, adjusting based on personal comfort and riding style․

Weight Considerations for Longboard Size

Weight significantly influences longboard size, as heavier riders often require stiffer, longer boards for stability, while lighter riders may prefer shorter, more maneuverable options․ Boards between 35-42 inches are recommended for heavier riders, ensuring durability and control․ Lighter riders can opt for shorter lengths, enhancing agility․ Balancing weight with board size is key for optimal performance and comfort․

Longboard Size Chart

Longboard sizes vary by style: cruising boards range from 32-40 inches, while downhill boards are slightly longer, typically between 35-42 inches for optimal stability and speed․

Size Recommendations by Riding Style

Cruising boards, ideal for casual rides, are typically between 32-40 inches long and 8․5-10 inches wide, offering stability and comfort․ Downhill boards, designed for speed, are longer (35-42 inches) and narrower (8-9 inches) to enhance control and aerodynamics․ Freestyle boards, shorter (28-34 inches) and wider (9-10 inches), allow for tricks and tight turns with ease․

General Size Guidelines for Beginners and Advanced Riders

Beginners should opt for boards between 32-42 inches long and 8․5-10 inches wide for stability and ease of control․ Advanced riders can choose shorter boards (28-34 inches) for tricks or longer ones (35-45 inches) for speed, depending on their skill level and riding style preferences, ensuring optimal performance in various terrains and conditions․

Longboard Shapes and Their Impact on Size

Longboard shapes vary, with pintails and cruisers offering stability, while downhill boards prioritize speed․ Shape influences size by optimizing performance for specific riding styles and terrains․

Common Longboard Shapes and Their Purposes

Longboards come in various shapes, such as pintails, downhill boards, and cruisers․ Pintails are ideal for carving and cruising, while downhill boards are designed for speed and stability․ Wider boards offer more stability, making them suitable for beginners․ Each shape serves a specific purpose, ensuring optimal performance for different riding styles and terrains, from hills to flat grounds․

How Shape Influences Size and Performance

A longboard’s shape directly impacts its size and performance․ Wider shapes enhance stability and are often preferred by taller or heavier riders, while narrower boards improve maneuverability․ Concave shapes improve foot grip, aiding downhill performance․ The shape also determines the board’s length and width, ensuring it meets the rider’s needs for speed, control, and comfort across various riding styles and terrains․

Material and Size Considerations

Material choice significantly impacts longboard size and performance․ Carbon fiber boards are lightweight yet durable, while wooden decks offer flexibility․ Composite materials balance stiffness and weight, affecting overall ride quality and responsiveness․

How Board Materials Affect Size and Performance

Different materials greatly influence longboard size and performance․ Carbon fiber boards are lightweight and durable, often smaller in size for agility․ Wooden decks provide flexibility, requiring slightly larger dimensions for stability․ Composite materials combine stiffness and weight efficiency, allowing for a balanced size that enhances both speed and maneuverability, catering to various riding styles and preferences․

Flexibility and Stiffness in Relation to Size

Flexibility and stiffness are key factors linked to longboard size․ Smaller boards tend to be more flexible, offering better maneuverability, while larger boards are stiffer, enhancing stability at higher speeds․ The right balance ensures optimal performance, with flexibility aiding in turns and stiffness providing durability and control, making size a critical consideration for desired riding dynamics and responsiveness․

Tips for Beginners

Start with a larger, more stable board (32-42 inches long) for better balance․ Try before buying to ensure comfort and control, and practice basic skills in open spaces․

Starting with the Right Size for Beginners

Beginners should opt for a longboard between 32-42 inches long and 8-10 inches wide for stability․ Longer boards (38-42 inches) are ideal for taller or heavier riders, while shorter boards (32-38 inches) suit smaller riders or those prioritizing maneuverability․ Consider your height, weight, and riding style when choosing․ Testing a board before purchase ensures the best fit and comfort for learning․

Trying Before Buying: A Beginner’s Guide

Test riding a longboard before purchasing is crucial for beginners․ Rent or borrow a board to assess comfort, stability, and ease of control․ Pay attention to how your feet fit on the deck and whether the length and width suit your stance; This hands-on experience helps narrow down the best size and style, ensuring confidence and satisfaction with your final choice․

Advanced Riders and Customization

Advanced riders often customize their longboards for specific riding styles, such as downhill or freestyle, by adjusting length, width, and shape to suit their performance needs perfectly․

Customizing Your Longboard for Specific Needs

Advanced riders often tailor their longboards to meet specific performance requirements․ Adjusting length, width, and shape can enhance stability or maneuverability․ For downhill, stiffer boards with reduced flex are preferred, while freestyle riders may opt for shorter, more agile designs․ Customizing materials, such as carbon fiber for durability or bamboo for flexibility, can further refine the board’s responsiveness․ Riders can also experiment with truck setups and wheel sizes to achieve their desired ride characteristics, ensuring optimal performance for their riding style․

Size Preferences for Advanced Riding Styles

Advanced riders often select longboards based on specific riding styles․ Downhill enthusiasts favor longer boards (38-42 inches) for stability at high speeds, while freestyle riders prefer shorter boards (32-36 inches) for trick performance․ Cruisers may opt for mid-length boards (35-40 inches) for versatility, balancing speed and maneuverability․ Each style demands precise size adjustments to maximize performance and control, ensuring the board meets the rider’s specialized needs․

Selecting the right longboard size is essential for optimal performance and comfort․ By considering length, width, and riding style, riders can choose a board that suits their needs perfectly․

Final Thoughts on Choosing the Right Longboard Size

Choosing the right longboard size is crucial for a enjoyable and efficient ride․ Riders should consider their height, weight, and riding style to select a board that offers optimal stability and maneuverability․ Beginners may prefer longer boards for stability, while experienced riders might opt for shorter, more agile options depending on their preferred terrain․ Always test a board before purchasing to ensure the best fit for your needs and preferences, as this will significantly enhance your overall longboarding experience․

Summarizing Key Takeaways for Every Rider

Longboard size is tailored to rider height, weight, and riding style․ Beginners benefit from longer, wider boards for stability, while advanced riders may prefer shorter, narrower options for agility․ Consider your personal needs, test boards when possible, and align your choice with your riding goals for an optimal longboarding experience․

Guide

the complete visual guide to building a house

Welcome to the Complete Visual Guide to Building a House! This comprehensive resource offers a detailed, step-by-step approach to constructing your dream home. With over 1,200 full-color illustrations, it empowers you to understand every phase, from excavation to finishing touches, ensuring clarity and confidence throughout your building journey.

Understanding the Importance of a Step-by-Step Approach

A step-by-step approach is essential for managing the complexity of building a house. It ensures clarity, reduces errors, and helps track progress; By breaking the process into manageable phases, homeowners can understand each stage’s requirements and prepare accordingly. Detailed illustrations and expert guidance provide confidence, especially for first-time builders. This methodical framework simplifies decision-making and execution, ensuring a smooth transition from planning to completion. It empowers individuals to navigate the construction journey effectively, regardless of their experience level.

Overview of the Complete Visual Guide to Building a House

This guide provides an in-depth, visually driven exploration of the home-building process. Combining expertise from builder-author John Carroll and illustrator Chuck Lockhart, it covers every aspect, from site preparation to final inspections. With over 1,200 detailed illustrations, it offers a clear understanding of each construction phase. Designed for both novices and experienced builders, the guide demystifies complex processes, ensuring a seamless journey from groundbreaking to move-in. Its comprehensive approach makes it an indispensable resource for anyone embarking on a construction project.

Site Preparation and Planning

Site preparation involves clearing land, removing debris, and surveying the property to ensure accurate boundaries. Grading the site ensures proper water drainage and a level surface for construction.

Clearing the Land and Surveying the Property

Clearing the land involves removing brush, debris, and vegetation down to ground level, extending at least 25 feet around the planned house perimeter. Surveying the property ensures accurate boundary identification, staking out the lot based on original drawings. This step is crucial for ensuring compliance with property lines and preparing the site for construction. Proper clearing and surveying set the foundation for a successful building process, preventing future issues and ensuring precise alignment with architectural plans.

Grading the Site for Construction

Grading the site involves leveling the land to alter its topography and ensure proper water flow. This process is essential for creating a stable building surface and preventing water accumulation. By adjusting the terrain, grading ensures that the site meets the required elevation specifications for construction. Proper grading also facilitates effective drainage, safeguarding the structure from water damage. This step is critical for preparing the land for foundation work and ensuring a smooth construction process.

Hiring the Building Team

Hiring the right team is crucial for a successful build. Start by selecting a reliable general contractor to oversee the project. They will manage subcontractors, ensuring expertise and smooth execution.

Selecting the Right General Contractor

Selecting the right general contractor is a critical step in your home-building journey. Look for a contractor with proven experience, a solid reputation, and excellent communication skills. Ensure they are licensed, insured, and familiar with local building codes. Research their portfolio, read reviews, and request references to assess their reliability and work quality. A trustworthy general contractor will oversee subcontractors, manage timelines, and ensure your project stays on track. Interview multiple candidates to find the best fit for your vision and budget.

Understanding the Roles of Subcontractors

Subcontractors are specialists hired by the general contractor to handle specific tasks like plumbing, electrical work, HVAC, and carpentry. Each subcontractor brings expertise to their area, ensuring high-quality workmanship. They operate under the general contractor’s supervision but focus on their unique trade. Reliable subcontractors are essential for meeting deadlines and maintaining project quality. A good contractor typically has a network of trusted subcontractors to ensure seamless collaboration and a successful build.

Foundation Work

Foundation work involves excavation and laying a sturdy base to support the house. Proper excavation ensures level ground, while footings and walls provide structural integrity for the building.

Excavation and Footings

Excavation begins with clearing the site and digging to the required depth for the foundation. Footings are then laid, transferring the house’s weight evenly to the ground. Proper excavation ensures level ground, while footings provide structural integrity. This step is critical for preventing future settling issues. The process involves digging trenches, pouring concrete, and allowing it to cure before proceeding. Accurate measurements and adherence to building codes are essential for a stable foundation.

Laying the Foundation

Laying the foundation involves constructing the walls and floors that form the base of your house. This step ensures the structure is level, secure, and prepared for the framing phase. Concrete is typically used to create a durable base, with proper alignment and drainage systems in place. The foundation must cure fully before proceeding to ensure strength and stability. This critical phase sets the stage for the entire building process, requiring precision and adherence to building codes for long-term durability.

Framing the House

Framing involves erecting the walls and roof, defining the home’s structure and layout. This step sets the stage for installing windows, doors, and exterior finishes, shaping the house’s appearance and functionality.

Erecting Walls and Installing Windows

Erecting walls involves constructing the structural framework using wood or steel, ensuring the frame is square and level. Windows are then installed, carefully sealed to prevent air leaks. This step is crucial for defining the home’s layout and ensuring proper alignment with architectural plans. Properly installed windows enhance natural lighting and energy efficiency, while the walls provide the structural integrity needed for subsequent stages of construction, such as roofing and exterior finishes.

Constructing the Roof

Constructing the roof involves assembling roof trusses or rafters, ensuring proper alignment and structural integrity. Sheathing is then installed to create a solid surface for roofing materials. An underlayment is applied to protect against weather elements. Roofing materials, such as shingles or tiles, are installed next, followed by flashing around vents, chimneys, and skylights. This step is critical for weatherproofing the home and completing its exterior envelope, ensuring long-term durability and protection from environmental factors.

Installing Exterior Finishes

Exterior finishes include adding siding, trim, and roofing materials, ensuring weather protection and aesthetic appeal. House wrap is applied first to prevent moisture damage, followed by siding installation for a polished look.

Adding Siding and Trim

Installing siding and trim enhances your home’s exterior appearance while providing protection. Begin with a house wrap to create a moisture barrier. Siding options like vinyl, brick, or stucco are then attached, ensuring proper alignment and secure fastening. Trim is added around windows, doors, and eaves to cover gaps and add aesthetic detail. Both processes require precision to ensure durability and a polished finish, completing your home’s exterior transformation.

Installing Roofing Materials

Installing roofing materials is crucial for weather resistance and structural integrity. Begin with a durable underlayment to protect against moisture. Choose from materials like asphalt shingles, metal, or clay tiles, each offering unique benefits. Ensure proper alignment and secure fastening to prevent leaks. Flashing around vents, chimneys, and skylights is essential for sealing gaps. A well-installed roof safeguards your home from the elements, providing long-lasting protection and enhancing curb appeal.

Interior Systems and Finishes

This section covers the installation of essential interior systems, including plumbing, electrical, and HVAC, followed by insulation, drywall, and painting to create a comfortable living space.

Plumbing, Electrical, and HVAC Installation

Installing plumbing, electrical, and HVAC systems is a critical phase, ensuring functionality and comfort. Plumbers lay pipes for water and gas, while electricians install wiring, outlets, and circuits. HVAC professionals set up heating, ventilation, and cooling systems. Proper planning ensures efficient layout and compliance with safety codes. Inspections are conducted to verify system integrity before moving to the next stages of construction, ensuring everything operates smoothly and safely for future occupants.

Insulation, Drywall, and Painting

Insulation is installed to enhance energy efficiency and soundproofing, followed by drywall for smooth walls and ceilings. Joints are taped, mudded, and sanded for a seamless finish. Painting begins with a primer to ensure better adhesion and color consistency. Finish coats are applied to achieve the desired aesthetic. This stage transforms the structure into a polished, comfortable living space, ready for interior fixtures and furnishings, ensuring a professional and inviting appearance throughout the home.

Final Touches and Inspection

The final phase involves installing flooring, fixtures, and completing interior finishes. A thorough inspection ensures all systems function properly and meet building codes, finalizing your dream home.

Installing Flooring and Fixtures

Installing flooring and fixtures is a crucial final step in bringing your home to life. Choose materials that align with your design vision, such as hardwood, tile, or carpet. Ensure flooring is level and securely fastened for durability. Fixtures, including lighting, cabinets, and plumbing accessories, are then added to enhance functionality and aesthetics. This phase completes the interior transformation, turning the house into a cozy and functional living space ready for occupancy.

Conducting Final Inspections

Conducting final inspections ensures your home meets safety and quality standards. Inspectors review electrical, plumbing, and HVAC systems for proper installation and functionality. They verify compliance with building codes and check for any defects or incomplete work. This thorough process guarantees that every detail, from flooring to fixtures, is flawless. A successful inspection marks the final step before receiving your certificate of occupancy, allowing you to move in with confidence and peace of mind.

Guide

unit 5 test study guide relationships in triangles

Understanding Triangle Relationships

Triangles are foundational in geometry, defined by their sides and angles. Key relationships include side lengths, angle measures, and properties like congruence and similarity. Mastering these basics is essential for advanced concepts.

1.1 Types of Triangles by Sides

Triangles are classified by their side lengths into three main categories. A scalene triangle has all sides of different lengths, resulting in all angles being unequal. An isosceles triangle has at least two equal sides, with the angles opposite those sides also being equal. Finally, an equilateral triangle has all three sides equal, making all angles 60 degrees. Understanding these classifications is crucial for solving problems involving triangle properties and relationships.

1.2 Types of Triangles by Angles

Triangles can also be categorized based on their angles. An acute triangle has all three angles measuring less than 90 degrees. A right triangle contains one 90-degree angle, with the other two angles summing to 90 degrees. Lastly, an obtuse triangle has one angle greater than 90 degrees, making it the largest angle in the triangle. These classifications are fundamental for understanding triangle behavior, especially in geometric constructions and trigonometric applications. Recognizing the type of triangle by its angles is essential for solving various geometric problems and theorems.

1.3 Basic Properties of Triangles

The basic properties of triangles are fundamental to understanding their structure and behavior. A triangle has three sides and three angles, with the sum of its interior angles always equal to 180 degrees. The triangle inequality theorem states that the sum of any two sides must be greater than the third side. Additionally, triangles can be classified as scalene (all sides unequal), isosceles (two sides equal), or equilateral (all sides equal). These properties form the foundation for solving problems involving triangles and are essential for advanced geometric concepts.

The Pythagorean Theorem

The Pythagorean Theorem relates the sides of right-angled triangles, stating that ( a^2 + b^2 = c^2 ), where c is the hypotenuse. Essential for calculating distances and heights in various geometric problems.

2.1 Definition and Formula

The Pythagorean Theorem is a fundamental principle in geometry that describes the relationship between the sides of a right-angled triangle. It states that the square of the hypotenuse (the side opposite the right angle) is equal to the sum of the squares of the other two sides. The formula is expressed as:

a² + b² = c², where a and b are the lengths of the legs, and c is the length of the hypotenuse. This theorem is crucial for solving problems involving right triangles and is widely used in various fields, including architecture, engineering, and physics. Understanding this formula is essential for applying it correctly in real-world scenarios.

2.2 Applications in Right-Angled Triangles

The Pythagorean Theorem is invaluable for solving problems in right-angled triangles, enabling the calculation of unknown side lengths. It is widely applied in construction to determine diagonal measurements and in physics for calculating distances in motion. Additionally, it aids in verifying if a triangle is right-angled by checking if the sides satisfy the theorem. Its versatility makes it a fundamental tool in various fields, ensuring accurate and efficient problem-solving in both academic and real-world contexts. Mastering its applications is crucial for advancing in geometry and applied sciences.

Special Right Triangles

Special right triangles, such as 45-45-90 and 30-60-90, have unique side ratios and angles, making them essential in geometry for solving problems efficiently. Their properties simplify calculations.

3.1 45-45-90 Triangles

A 45-45-90 triangle is an isosceles right triangle with two equal sides and angles of 45°, 45°, and 90°. The legs are equal, and the hypotenuse is √2 times longer than each leg. This ratio is crucial for solving problems involving such triangles, as it allows for quick calculations without requiring the Pythagorean theorem each time. These triangles are commonly found in contexts like isometric drawings and square diagonals, making their properties indispensable in various geometric applications. Understanding the side ratios and angle relationships in 45-45-90 triangles is fundamental for more advanced geometric concepts.

3.2 30-60-90 Triangles

A 30-60-90 triangle is a right-angled triangle with angles of 30°, 60°, and 90°. The sides are in the ratio 1 : √3 : 2, where the side opposite the 30° angle is the shortest, the side opposite the 60° angle is √3 times longer, and the hypotenuse is twice the shortest side. This ratio is vital for solving problems involving these triangles, as it simplifies calculations without needing the Pythagorean theorem. These triangles often appear in contexts like half equilateral triangles and are essential in various geometric proofs and applications, making their side and angle relationships fundamental to master for further geometric studies.

Triangle Inequality Theorem

The Triangle Inequality Theorem states that the sum of the lengths of any two sides of a triangle must be greater than the length of the remaining side. This fundamental principle ensures that the three sides can form a valid triangle. It is crucial for determining whether given side lengths can form a triangle and is widely used in solving geometric problems. The theorem also has practical applications in fields like construction and design, where understanding spatial relationships is essential. By applying this rule, one can verify if a set of sides can form a stable and balanced triangle, making it a cornerstone of geometric analysis and problem-solving.

Trigonometric Relationships

Trigonometric relationships in triangles involve ratios like sine, cosine, and tangent, essential for finding unknown sides and angles. Laws of Sines and Cosines extend these principles to non-right triangles, aiding in solving complex geometric problems with applications in various fields.

5.1 Law of Sines

The Law of Sines is a fundamental trigonometric principle that relates the sides and angles of any triangle. It states that the ratio of a side length to the sine of its opposite angle is constant for all three sides and angles. Mathematically, it is expressed as a/sin(A) = b/sin(B) = c/sin(C), where lowercase letters represent side lengths and uppercase letters represent their opposite angles. This law is particularly useful for solving triangles when at least one angle and its opposite side are known. It simplifies finding unknown sides or angles, making it a powerful tool in geometry and trigonometry. Understanding the Law of Sines is crucial for advanced topics like the Law of Cosines and solving complex triangles. By mastering this relationship, students can tackle a wide range of problems involving triangles in various applications. This law is essential for analyzing and solving triangular systems accurately.

5.2 Law of Cosines

The Law of Cosines is a trigonometric principle that relates the lengths of the sides of a triangle to the cosine of one of its angles. It is especially useful for solving triangles that are not right-angled. The formula is c² = a² + b² ─ 2ab*cos(C), where C is the angle opposite side c. This law allows mathematicians to find unknown sides or angles when at least two sides and one angle are known. Unlike the Pythagorean theorem, it applies to all types of triangles, making it a versatile tool in geometry and engineering. Mastery of the Law of Cosines is essential for advanced problem-solving in trigonometry and spatial analysis.

Congruent and Similar Triangles

Congruent triangles have identical side lengths and angle measures, making them exact replicas. They are identified using criteria like SSS (side-side-side), SAS (side-angle-side), ASA (angle-side-angle), and AAS (angle-angle-side). Similar triangles, however, have proportional sides and equal angles but are not necessarily identical in size. They are determined by AA (angle-angle), SSS (side-side-side), or SAS (side-angle-side) similarity. Understanding these relationships is crucial for solving complex geometric problems and applying concepts to real-world scenarios, such as engineering and architecture, where scaling and precise measurements are essential. Mastering congruence and similarity enhances problem-solving skills in geometry and related fields.

Area of a Triangle

The area of a triangle is calculated using the formula (base × height) / 2. Heron’s formula offers an alternative method when side lengths are known. Understanding these concepts is essential for various applications in geometry and real-world problems.

7.1 Using Base and Height

The area of a triangle can be calculated using the formula: Area = (base × height) / 2. The base is any side of the triangle, and the height is the perpendicular distance from the base to the opposite vertex. To find the area, identify the base and corresponding height, ensuring they are perpendicular. For example, if the base is 5 units and the height is 6 units, the area is (5 × 6) / 2 = 15 square units. This method is straightforward and relies on knowing or measuring the base and height accurately. It is widely used in geometry and real-world applications.

7.2 Using Heron’s Formula

Heron’s Formula is a method to find the area of a triangle when all three side lengths are known. First, calculate the semi-perimeter (s) by adding the sides and dividing by two. Then, use the formula:
Area = √[s(s ‒ a)(s ‒ b)(s ‒ c)], where a, b, and c are the side lengths. This approach is particularly useful when the height is unknown. For example, if a triangle has sides of 7, 8, and 9 units, the semi-perimeter is 12. The area would then be √[12(12-7)(12-8)(12-9)] = √720 ≈ 26.83 square units. This method is essential for solving geometric problems without height information.

Real-World Applications

Triangles are fundamental in various real-world applications. In engineering, they are used to design stable structures like bridges and buildings. In physics, triangles help analyze forces and motion. Geography relies on triangulation for mapping and determining locations. Art and design use triangular compositions for balance and perspective. Navigation systems, such as GPS, employ triangular relationships to determine precise positions. Even in sports, triangles are used to optimize field layouts and strategies. Understanding triangle relationships is crucial for solving practical problems across multiple disciplines, making them a cornerstone of applied mathematics and real-world problem-solving.

Guide

gate guide rollers

Gate guide rollers are essential components that ensure smooth operation of sliding gates, guiding them along their tracks․ They prevent derailment and extend the gate’s lifespan by reducing friction and wear․ Available in various types and materials, these rollers are versatile, durable, and crucial for maintaining efficient gate performance․

Overview of Gate Guide Rollers

Gate guide rollers are crucial components in gate systems, ensuring smooth operation by guiding gates along their tracks․ They prevent derailment and reduce friction, enhancing durability․ Made from materials like steel, they offer strength and resistance to corrosion, ensuring reliable performance and extending the gate’s lifespan․ Regular maintenance is key to optimal function, making them a vital part of any sliding gate mechanism․

Importance of Gate Guide Rollers in Gate Systems

Gate guide rollers are critical for ensuring smooth, efficient, and safe gate operation․ They prevent derailment by keeping gates aligned on their tracks, reducing friction and wear․ Made from durable materials like steel, they enhance longevity and performance․ Properly functioning rollers minimize maintenance needs and ensure gates open and close reliably, contributing to both security and convenience in various settings․

Types of Gate Guide Rollers

Gate guide rollers come in standard, heavy-duty, and adjustable designs, catering to different gate systems․ They are made from materials like steel or plastic, ensuring durability and smooth operation․

Standard Gate Rollers

Standard gate rollers are durable, versatile components designed for everyday use․ Typically made from steel or plastic, they offer reliable performance, reducing friction and wear on gate systems․ Easy to install and suitable for most gates, these rollers ensure smooth operation and are widely used due to their cost-effectiveness and simplicity․ They are a practical choice for maintaining efficient gate functionality without requiring specialized features․

Heavy-Duty Gate Rollers

Heavy-duty gate rollers are designed for robust applications, offering superior strength and durability․ Constructed from high-quality materials like steel, they are ideal for large or heavy gates․ Featuring reinforced brackets and sturdy axles, these rollers withstand harsh conditions and heavy use․ They provide smooth operation and minimal wear, making them perfect for commercial or industrial settings where reliability is crucial․ Their durable design ensures long-lasting performance and reduced maintenance needs․

Adjustable Gate Guide Rollers

Adjustable gate guide rollers offer flexibility and customization, allowing precise alignment with gate tracks․ Designed for versatility, they suit various gate sizes and materials․ Their adjustable features ensure smooth operation and minimize wear․ Ideal for gates that require frequent adjustments, these rollers are easy to install and maintain․ They provide enhanced stability and durability, making them a practical choice for both residential and commercial gate systems․ Their adaptability ensures optimal performance in diverse settings․

Materials and Construction

Gate guide rollers are made from durable materials like steel and plastic, each offering unique benefits for different applications and environments․

Steel Gate Rollers

Steel gate rollers are known for their exceptional durability and strength, making them ideal for heavy-duty gate systems․ They are resistant to corrosion and rust, ensuring long-lasting performance․ These rollers are often used in industrial and commercial settings where gates are subjected to high stress; Their robust construction minimizes wear and tear, providing smooth operation and reliability over time․ Steel rollers are a preferred choice for large and heavy gates․

Plastic Gate Rollers

Plastic gate rollers are lightweight, durable, and ideal for light-duty gate systems․ They are resistant to corrosion and rust, making them suitable for outdoor use․ Plastic rollers operate quietly and require minimal maintenance․ They are often used in residential settings where gates are lighter and less frequently used․ Their smooth surface reduces friction, ensuring effortless gate movement․ Plastic rollers are a cost-effective and practical choice for smaller gates and simpler systems․

Installation and Maintenance

Proper installation ensures smooth gate operation, while regular maintenance like lubrication and alignment checks prevents wear and extends roller lifespan, keeping gates functioning efficiently over time․

How to Install Gate Guide Rollers

Installing gate guide rollers involves measuring the track, aligning the roller brackets, and securing them with bolts․ Ensure the rollers are level and properly spaced for smooth operation․ Lubricate the moving parts and test the gate’s movement․ If unsure, consult a professional to avoid misalignment or damage․ Proper installation ensures optimal performance and longevity of the gate system․

Regular Maintenance Tips

Regular maintenance of gate guide rollers involves cleaning them with a cloth or brush to remove dirt and debris, which can cause friction․ Apply a silicone-based lubricant to moving parts to ensure smooth operation․ Check for wear and tear; replace worn rollers promptly to prevent misalignment․ Ensure proper alignment to maintain smooth gate movement․ Inspect and maintain rollers every six months or more frequently with heavy use․

Choosing the Right Gate Guide Rollers

Gate guide rollers must be selected based on factors like weight capacity, material durability, and system compatibility․ Ensure the rollers match your gate’s size and operational demands․

Factors to Consider When Selecting Gate Rollers

When choosing gate guide rollers, consider the gate’s weight, material durability, and compatibility with the track system․ Assess environmental conditions, such as exposure to moisture or heavy use․ Ensure the rollers’ load capacity matches the gate’s weight and size․ Additionally, evaluate the type of bearing used for smooth operation and longevity․ Finally, consider the brand’s reputation for quality and durability to make an informed decision․

Compatibility with Gate Systems

Ensuring compatibility between gate guide rollers and the gate system is crucial for smooth operation and longevity․ The roller’s size and type must match the gate’s weight and material for proper alignment․ Compatibility with the track system prevents derailment and ensures smooth sliding․ Select rollers with adequate load capacity to avoid strain․ Consider environmental conditions when choosing materials for durability․ Proper compatibility ensures efficient operation, reduces wear, and extends lifespan․

Safety Considerations

Safety considerations involve proper installation, regular inspection, and maintenance of gate guide rollers to prevent accidents․ Ensuring rollers are securely fastened and free from obstructions is critical․ Heavy-duty materials like steel or durable plastics enhance safety by withstanding wear and tear, minimizing hazards․ Always follow manufacturer guidelines to avoid potential risks associated with gate operation․

Safety Precautions When Using Gate Guide Rollers

When using gate guide rollers, ensure proper installation and regular maintenance to prevent accidents․ Always follow manufacturer guidelines for secure fastening and alignment․ Wear protective gear during installation to avoid injury․ Regularly inspect rollers for wear or damage and replace them promptly․ Keep loose clothing and long hair tied back to avoid entanglement․ Ensure children stay away from moving gates and rollers․ Proper lubrication and alignment can prevent sudden malfunctions and enhance safety․

Potential Hazards and Solutions

Potential hazards with gate guide rollers include wear-induced malfunctions and improper installation causing gate derailment․ Regular lubrication and timely replacement of worn parts can mitigate these risks․ Ensuring correct alignment during installation prevents uneven wear․ Additionally, loose components pose injury risks, so secure fastening is crucial․ Regular inspections can identify issues early, preventing accidents․ Proper maintenance ensures smooth operation and minimizes hazards, contributing to a safer and more reliable gate system overall․

Common Issues and Troubleshooting

Common issues with gate guide rollers include derailment, noisy operation, and wear․ Regular maintenance, proper alignment, and timely replacement of worn parts ensure smooth functionality and prevent breakdowns․

Common Problems with Gate Guide Rollers

Common issues with gate guide rollers include misalignment, wear and tear, and obstruction․ Misalignment can cause the gate to derail, while worn rollers reduce efficiency․ Debris or dirt accumulation may obstruct smooth movement․ Corrosion on metal rollers and improper installation also lead to malfunction․ Regular inspection and maintenance are crucial to prevent these problems and ensure optimal performance․

Troubleshooting Tips for Gate Rollers

For misaligned rollers, adjust or replace them promptly․ Clean rollers regularly to remove dirt and debris․ Lubricate moving parts to reduce friction․ Inspect for wear and tear, replacing rollers when necessary․ Tighten loose brackets and ensure tracks are clear․ Address corrosion by applying rust-resistant coatings․ Proper installation and regular maintenance are key to preventing issues and ensuring smooth gate operation․ Always follow manufacturer guidelines for repairs and replacements․

Gate guide rollers are vital for smooth gate operation, offering durability and efficiency․ Proper selection, installation, and maintenance ensure optimal performance and longevity, making them a worthwhile investment for any gate system․

Gate guide rollers are crucial for smooth gate operation, ensuring stability and longevity․ Available in various types like standard, heavy-duty, and adjustable, they cater to different needs․ Constructed from durable materials such as steel or plastic, they offer reliability and resistance to wear․ Proper installation, regular maintenance, and selecting the right rollers are essential for optimal performance and safety․ They prevent derailment, reduce friction, and enhance overall gate functionality, making them a vital component for any gate system․

Final Thoughts on Gate Guide Rollers

Gate guide rollers are indispensable for ensuring smooth, efficient, and safe gate operation․ Their durability, versatility, and ability to reduce wear make them a critical investment for any gate system․ By selecting the right type and maintaining them properly, users can enjoy long-term reliability and performance․ Whether for residential or commercial use, gate guide rollers are a practical solution that enhances functionality and longevity, making them a worthwhile addition to any setup․

Guide

snowboard helmet size guide

Properly fitting snowboard helmets ensure safety, comfort, and optimal protection. Measure head circumference accurately, consider head shape, and test fit with goggles for a secure, enjoyable ride.

Why Proper Sizing Matters

A properly sized snowboard helmet ensures maximum safety, protection, and comfort. A well-fitting helmet distributes impact forces evenly, reducing injury risk. It also stays securely in place, preventing shifting during falls. Proper sizing enhances visibility and minimizes distractions, allowing riders to focus on the slopes. Incorrect sizing can compromise safety, lead to discomfort, and hinder performance. Always prioritize a precise fit for optimal protection and an enjoyable experience.

Overview of Key Considerations

When selecting a snowboard helmet, key factors include accurate head measurement, helmet shape compatibility, and adjustable fit systems. Consider ventilation for temperature control and goggle compatibility for seamless use. Assessing safety certifications and durability ensures reliable protection. Personal preferences like style and weight also play a role, while features such as audio compatibility enhance functionality. Each element contributes to a safer, more enjoyable riding experience.

How to Measure Your Head

Measure your head circumference 1-2 cm above eyebrows using a flexible tape or string. Ensure the tape is level and not too tight for an accurate fit.

Using a Measuring Tape

To measure your head for a snowboard helmet, wrap a flexible measuring tape around your head, positioning it 1-2 cm above your eyebrows. Ensure the tape is level and not too tight. Hold the tape snugly but comfortably to get an accurate circumference. This measurement will guide you in selecting the correct helmet size from the manufacturer’s chart. Proper sizing ensures safety, comfort, and optimal protection while riding.

Using a String Method

If a measuring tape isn’t available, use a string to determine your head size. Wrap the string around your head, about 1-2 cm above your eyebrows, ensuring it’s snug but not too tight. Mark the point where the string overlaps, then measure this length with a ruler. This method provides an accurate circumference, helping you select the correct helmet size for a secure and comfortable fit.

Referencing Size Charts

Once you’ve measured your head circumference, consult the size chart provided by the helmet manufacturer. Each brand may have slight variations in sizing, so it’s essential to compare your measurement with their specific chart. Ensure your size aligns with the chart to guarantee a proper fit. Double-checking with multiple sources can help confirm accuracy, ensuring safety and comfort while snowboarding.

Determining the Right Fit

A properly fitting helmet feels snug but not tight, with even pressure around your head. It should stay in place while allowing clear vision and goggle compatibility.

Checking the Fit

A proper fit ensures the helmet sits level, with padding touching all areas of your head without pressure points. It should stay in place when moving and allow space for goggles. Test the fit by gently shaking your head; the helmet should remain secure. Check for even pressure around your head and ensure no gaps exist between the padding and your skull for optimal safety and comfort.

Making Micro-Adjustments

Most helmets feature adjustable dial systems at the back for a customizable fit. Turn the dial to tighten or loosen the fit as needed. Ensure the adjustment doesn’t cause pressure points or discomfort. Some helmets also allow padding adjustments. Fine-tune these elements to achieve a snug, secure fit that remains comfortable throughout your ride, enhancing both safety and performance on the slopes.

Testing Comfort Over Time

After adjusting your helmet, wear it for at least 30 minutes to assess comfort. Check for pressure points or discomfort, especially during movement. Ensure the fit remains consistent over time, as head shapes can slightly change due to factors like hairstyle or fitness. Re-adjust as needed for long-lasting comfort and safety during extended snowboarding sessions.

Why Proper Fit is Important

A properly fitting helmet ensures maximum safety and protection by staying securely in place, reducing the risk of head injuries during falls or impacts while snowboarding.

Safety and Protection

A properly fitted snowboard helmet is crucial for safety and protection. It ensures optimal impact absorption and stays securely in place, reducing injury risk. A loose helmet can shift, leaving vulnerable areas exposed. Proper sizing and a snug fit are essential for maximum protection during falls or collisions. Always prioritize a helmet that meets safety standards and fits correctly to safeguard your head while snowboarding.

Comfort During Use

A well-fitting snowboard helmet ensures comfort during extended use. Proper sizing prevents pressure points, while adjustable systems and breathable padding enhance comfort. Ventilation features maintain airflow, keeping you cool and dry. A comfortable helmet allows you to focus on your performance without distractions, making your snowboarding experience more enjoyable and stress-free.

Other Factors Influencing Size

Head shape variations and personal preference play a role in sizing. Some helmets cater to different head shapes, while individual comfort expectations may influence size selection.

Head Shape Variations

Head shapes vary, with common types including round, oval, and elongated. Helmets are designed to accommodate these differences, ensuring a snug, even fit. Some brands specialize in specific shapes, offering tailored comfort. Understanding your head shape helps narrow down options, ensuring optimal protection and comfort. Try helmets to assess fit, as shape significantly impacts how well a helmet sits on your head.

Personal Preference

Personal preference plays a significant role in choosing a snowboard helmet. Aesthetics, such as color and design, matter to many riders. Some prefer slim fits, while others opt for more coverage. Additional features like ventilation, audio compatibility, or visor integration can also influence decisions. Ensuring the helmet aligns with your style and needs enhances comfort and confidence on the slopes.

Trying on Helmets

Trying on helmets is crucial to ensure proper fit, comfort, and safety. Wear goggles if applicable to confirm compatibility and overall performance of the helmet.

What to Look for in a Trial

During a helmet trial, ensure it sits level on your head, with no pressure points. Check if goggles fit without slipping and straps adjust securely. Verify the helmet stays in place when moving your head. Comfort and snugness are key for long rides and safety;

Ensuring Comfort and Safety

A properly fitting helmet provides optimal protection and comfort. Look for a snug, even fit with no pressure points. Ensure the helmet stays secure during movement and doesn’t obstruct vision. Check for adequate padding, breathable ventilation, and compatibility with goggles. Test the helmet for at least 30 minutes to ensure long-term comfort and safety on the slopes.

Goggle Compatibility

Ensure goggles fit seamlessly with your helmet, checking strap placement and overall comfort. Proper integration enhances visibility and safety, providing a seamless skiing or snowboarding experience.

Ensuring a Proper Fit with Goggles

Ensuring a proper fit with goggles is crucial for both safety and comfort. Try on goggles with your helmet to check compatibility. The straps should integrate smoothly without causing pressure points. Proper alignment ensures unobstructed vision. A snug, gap-free fit prevents light seeping in, enhancing your experience on the slopes. This seamless integration is key to enjoying your snowboarding adventures.

Checking Strap Placement

Proper strap placement is essential for a secure fit. Ensure straps sit comfortably under your ears, forming a “V” shape. Adjust the straps gently to avoid pressure points. The helmet should stay in place during movement. Test the fit with goggles to ensure straps don’t interfere. Proper alignment guarantees safety and comfort, preventing shifting or slippage while snowboarding.

When to Replace Your Helmet

Replace your helmet if it shows signs of wear, damage, or after 3-5 years. Ensure optimal protection by upgrading to a new helmet when necessary.

Signs of Wear and Tear

Inspect your helmet for cracks, dents, or frayed straps, as these indicate wear. If the padding is worn out or the fit becomes loose, it’s time to replace it. Additionally, helmets should be replaced after 3-5 years or if they’ve been involved in an impact, even if damage isn’t visible. Ensure your safety by monitoring these signs regularly.

Timeframe for Replacement

Replace your snowboard helmet every 3-5 years, as materials degrade over time. If the helmet has been in a crash, replace it immediately, even if no damage is visible. Manufacturers recommend regular checks for wear and tear, ensuring optimal protection. Always follow the manufacturer’s guidelines for replacement to maintain safety and performance on the slopes.

Additional Features to Consider

Look for adjustable fit systems and advanced ventilation to enhance comfort and performance. These features ensure a tailored fit and regulate temperature during rides.

Adjustable Fit Systems

Adjustable fit systems, such as a dial at the back, allow for precise customization to ensure a snug and secure fit. These systems enable you to tailor the helmet’s circumference to your head shape, providing comfort and safety. They also accommodate varying head sizes and layering of clothing, ensuring optimal performance and adaptability during your snowboarding adventures.

Ventilation and Comfort Features

Snowboard helmets often include advanced ventilation systems to regulate temperature and moisture. Built-in vents promote airflow, preventing overheating during intense rides. Many helmets feature removable liners and padding for added comfort and hygiene. These designs ensure a dry, comfortable fit, enhancing performance and focus on the slopes. Proper ventilation also helps reduce fogging of goggles, improving visibility and overall riding experience.

Guide

wow sod molten core guide

Molten Core is a iconic 40-player raid in World of Warcraft: Season of Discovery, offering epic challenges and rewards. Introduced in Phase 4, it remains a cornerstone of classic WoW content, testing players’ skills, strategy, and teamwork. Prepare to face intense boss battles, fiery obstacles, and legendary loot in this unforgettable dungeon experience.

1.1 Overview of Molten Core Raid

Molten Core is a 40-player raid instance in World of Warcraft: Season of Discovery, located in the heart of Blackrock Mountain. This fiery, lava-filled dungeon is home to iconic bosses like Lucifron, Magmadar, and the final showdown with Ragnaros the Firelord. The raid is divided into multiple encounters, each requiring precise strategy and coordination. Players navigate through a challenging environment filled with dangerous mobs, traps, and intense boss mechanics. The dungeon’s theme revolves around fire and magma, with a focus on testing raid teams’ ability to work together under pressure. It is considered one of the most memorable and rewarding experiences in WoW Classic and Season of Discovery.

1.2 Importance of Molten Core in WoW Classic and SoD

Molten Core holds significant importance in World of Warcraft Classic and Season of Discovery as a cornerstone of endgame content. It introduced large-scale raiding, setting the standard for future expansions. The raid’s challenging nature and iconic loot made it a symbol of achievement for players. In SoD, Molten Core remains a nostalgia-driven experience, allowing players to relive classic WoW’s glory. Its influence on both gameplay and community building is undeniable, making it a must-experience for raiders seeking to test their skills and earn legendary rewards in a timeless adventure.

Preparing for Molten Core

Preparing for Molten Core requires a thorough approach. Ensure your gear is optimized, understand your role, and organize your raid team effectively for success.

2.1 Essential Addons for Molten Core

To excel in Molten Core, essential addons like Deadly Boss Mods are crucial for tracking boss mechanics and timers. Decursive simplifies dispelling curses, while Omen Threat Meter helps tanks maintain aggro. HealBot or VuhDo enhance healing management, and Recount tracks DPS and healing metrics for performance analysis. BigWigs offers customizable boss warnings, ensuring raid awareness. These tools streamline communication, strategy execution, and overall raid efficiency. Install them through platforms like CurseForge to optimize your setup and improve your raid team’s performance in Molten Core.

2.2 Best-in-Slot Gear Guide for Your Class and Role

A well-geared character is essential for success in Molten Core. For tanks, prioritize high-stamina and defense gear, such as the Earthfury Set from The Temple of Ahn’Qiraj. Healers should focus on intellect and mana regeneration, with pieces like the Robes of the Archmage from trash mobs. DPS classes should aim for weapons like Ashkandi, Greatsword of the Brotherhood from Magmadar and high-crit gear like Dragonstalker Set from General Drakkisath. Craftable items, such as Flameguard Gauntlets, also provide exceptional stats. Ensure your gear is enchanted and gemmed optimally for your role to maximize effectiveness in raids.

2.3 Attunement Process for Molten Core

Attunement to Molten Core is a prerequisite for raid entry. Begin by speaking to Lothos Riftwaker in Searing Gorge, initiating the questline. Obtain the Magma Core from Golemagg the Incinerator, then extinguish it in water to create the Core of the Magma. Return to Lothos to complete the quest, receiving the Attuned to the Core buff. This process is required once per character and grants access to the raid. Ensure all team members complete this step to avoid entry restrictions. The attunement process is straightforward but essential for raid participation in Molten Core.

Molten Core Boss Strategies

Mastering Molten Core requires tailored strategies for each boss, from Lucifron to Ragnaros. Coordinate with your team to handle mechanics, heal through damage spikes, and optimize tanking rotations for success.

3.1 Lucifron and Magmadar Strategies

Lucifron and Magmadar are the first two bosses in Molten Core, setting the tone for the raid. For Lucifron, focus on interrupting his Curse of Weakness and managing adds effectively. Ensure healers are prepared for consistent damage. Magmadar’s fight revolves around his Trap mechanic. Assign a player to trigger the trap and kite the adds while the raid focuses on burning Magmadar quickly. Both encounters require strong tank coordination and healer awareness. Proper positioning and communication are key to overcoming these challenges and progressing through the raid.

3.2 Gehennas, Garr, and Baron Geddon Tactics

Gehennas requires careful handling of his Curse of Shadow and adds. Designate a player to interrupt his spells and manage adds quickly. Garr introduces a challenging mechanic with his Earthbind Totem and adds. Ensure a dedicated interrupter focuses on totems while the raid burns Garr swiftly. Baron Geddon’s fight involves his Living Bomb mechanic, requiring players to spread out and manage the explosion timer. Use of cooldowns and proper positioning are crucial. These encounters test the raid’s ability to multitask, communicate, and execute strategies flawlessly.

3.3 Shazzrah, Sulfuron, and Golemagg the Incinerator

Shazzrah is a fire mage with teleportation abilities and adds. Assign a dedicated interrupter to stop his spells and manage adds to prevent overwhelming the tank. Sulfuron is a two-phase encounter; burn him during phase one and handle waves of adds in phase two. Use area-of-effect spells to clear adds quickly. Golemagg is a fire-resistant boss requiring precise healer focus on the tank. His high damage output demands consistent DPS to avoid enrage. Proper positioning and cooldown management are critical for success against these challenging bosses.

3.4 Final Boss: Ragnaros the Firelord

Ragnaros, the fiery behemoth, is the final challenge in Molten Core. He begins stationary, slamming the ground and summoning lava eruptions. Avoid these hazards and focus on Adds of Flame. Once his hammer is destroyed, Ragnaros becomes mobile, increasing his damage output. Tanks must maintain aggro while healers sustain the group through intense bursts. DPS should maximize damage during his stationary phase to minimize the chaotic second phase. Proper positioning, Add control, and cooldown management are vital. A well-coordinated team will triumph over this iconic boss, earning the satisfaction of conquering one of WoW’s most legendary encounters.

Optimizing Your Raid Team

A well-structured raid team is crucial for success in Molten Core. Balance class roles, ensure strong communication, and assign a skilled leader to coordinate strategies effectively.

4.1 Class Roles and Responsibilities

In Molten Core, understanding class roles is vital. Tanks, primarily Warriors, must hold aggro and protect the raid. Healers, such as Priests, Druids, and Paladins, must manage mana efficiently and coordinate healing. DPS classes, including Mages, Warlocks, and Rogues, focus on maximizing damage while avoiding unnecessary threat. Each class has unique abilities that contribute to raid success. For example, Mages provide crowd control, while Warlocks offer debuffs. Ensuring roles are clearly defined and executed enhances overall performance and survival in the intense environment of Molten Core.

4.2 Healing and Tanking Strategies

Healing and tanking in Molten Core demand precision and coordination. Healers must manage mana efficiently, prioritizing critical targets during high-damage phases. Tanks should maintain consistent threat generation and use cooldowns strategically to mitigate damage spikes. Assigning healers to specific roles, such as dedicated tank healers or raid healers, ensures balanced support. Communication is key; healers must anticipate damage patterns, while tanks must control aggro and position bosses to minimize raid-wide damage. Proper use of abilities like

Loot and Rewards

Molten Core offers epic loot essential for progression, including powerful weapons, armor, and trinkets. The final reward, Molten Obsidian Core, is a challenging quest line prize, granting unique advantages in raids and PvP.

5.1 Best Loot Items from Molten Core

Molten Core offers some of the most sought-after loot in Season of Discovery, including legendary weapons like Sulfuras, Hand of Ragnaros for warriors and The Eye of Ragnaros for mages. Other top-tier items include Spinal Reaper for rogues, Dragonstalker set for hunters, and T2 armor pieces for all classes. These items significantly enhance performance in raids and PvP, making them highly contested among players. The Molten Core is also a key crafting material for powerful gear. Securing these items ensures a strong foundation for tackling higher-level content and solidifies your role within your raid team.

5.2 Loot Distribution and Group Management

Effective loot distribution is crucial for maintaining raid team morale and cohesion. Many groups adopt the Master Looter system, where a designated leader distributes items based on priority needs. Class leaders often create loot councils to ensure fairness, while others use DKP (Dragon Kill Points) systems for transparency. Communication is key—ensuring everyone understands the distribution rules beforehand prevents disputes. Addons like Loot Council or DKP Reloaded streamline the process. A well-managed loot system fosters trust and motivation, essential for progressing through Molten Core’s challenging content. Fair distribution ensures that everyone feels valued and invested in the team’s success.

Molten Core in Season of Discovery offers an epic challenge, rewarding teamwork and strategy. Conquer its fiery depths, claim legendary loot, and forge unforgettable memories with your raid team.

6.1 Final Tips for Success in Molten Core

Mastering Molten Core demands teamwork, preparation, and execution. Communicate clearly, stick to strategies, and stay adaptable. Prioritize boss mechanics over damage output and ensure healers and tanks are in sync. Loot distribution should be fair and transparent to maintain team morale. Learn from wipes and adjust tactics accordingly. Consistent practice and patience will lead to victory. Remember, success is a team effort, so stay focused and determined!

6.2 Staying Prepared for Future Raids

Success in Molten Core is just the beginning. Continuously improve your gear, refine strategies, and stay updated on the best-in-slot items. Analyze your performance after each raid to identify areas for growth. Focus on building a strong team dynamic, as communication and coordination are key to tackling harder content. Keep your addons optimized and stay informed about upcoming raid content. Prioritize learning from each wipe and adapt to new challenges. By maintaining discipline, patience, and a growth mindset, you’ll be well-prepared for future raids and the evolving challenges of Season of Discovery.