Manuals

concept 2 rowing machine manual

Welcome to the Concept2 Rowing Machine Manual, your comprehensive guide to understanding and optimizing your indoor rowing experience. This manual covers Model D PM5, Model E PM5, and Dynamic, providing detailed assembly, maintenance, and usage instructions. Learn proper rowing techniques, navigate the PM5 monitor, and ensure safety while maximizing your workout efficiency.

Overview of the Manual and Key Sections

This manual serves as a comprehensive guide for Concept2 Rowing Machine users, covering essential information for optimal use. It includes detailed instructions for assembly, maintenance, and troubleshooting, ensuring longevity and performance. Key sections focus on the PM5 monitor, workout setup, and tracking progress. Additionally, it provides safety guidelines and proper rowing techniques to prevent injury and enhance efficiency. The manual also outlines warranty information and support options. Whether you’re a beginner or an experienced user, this guide is indispensable for maximizing your rowing experience.

Concept 2 Rowing Machine Models and Their Manuals

The Concept2 rowing machine is available in several models, including the popular Model D PM5, Model E PM5, and Dynamic. Manuals for these models, as well as legacy models like B and C, are readily available online.

Model D PM5

The Model D PM5 is one of the most popular and widely used indoor rowing machines. Equipped with the advanced Performance Monitor 5 (PM5), it offers precise tracking of your workouts, including distance, speed, and calories burned. Known for its durability and smooth operation, the Model D PM5 is suitable for both home and gym use. Its compact design and separable components make it easy to store. The machine features a flywheel resistance system and a backlit display for visibility. With a 5-year warranty on the frame, it’s a reliable choice for rowers of all levels. Regular maintenance ensures optimal performance.

Model E PM5

The Model E PM5 is a high-end indoor rower designed for comfort and performance. It features a higher seat height than the Model D, making it easier to get on and off, ideal for taller users or those with mobility needs. The PM5 monitor provides detailed workout data and customizable displays. Built with durable materials, the Model E PM5 is designed for heavy use and long-lasting performance. It includes a 5-year frame warranty and is suitable for both home and commercial settings. Its ergonomic design ensures a comfortable rowing experience for users of all skill levels.

Model Dynamic

The Model Dynamic is designed for advanced rowers seeking a dynamic, on-water feel. It features a unique flexfoot system, allowing for natural foot movement during the stroke. This model is ideal for competitive training and those who desire a more immersive rowing experience. The Dynamic requires proper technique to maximize its benefits and comes with the PM5 monitor for tracking workouts. Regular maintenance includes checking the flexfoot and moving parts to ensure optimal performance. Its durable construction supports intense training sessions, making it a favorite among serious athletes.

Model B and Model C

The Model B and Model C are earlier generations of Concept2 rowing machines, known for their durability and reliability. Both models feature a robust frame and a simple, effective design. The Model C includes a basic performance monitor, while the Model B relies on a more straightforward mechanism without advanced tracking features. These models are popular for home use due to their compact size and ease of maintenance. Regular cleaning and lubrication of the chain and moving parts are essential to ensure smooth operation. While they lack the PM5 monitor, they remain excellent choices for those seeking a no-frills, reliable rowing experience.

Assembly and Setup Instructions

Unpack and inventory all parts carefully. Follow step-by-step assembly instructions for your specific model. Ensure the machine is level and stable before use. Refer to the manual for detailed guidance on attaching components and final adjustments to guarantee proper function and safety.

Unpacking and Inventory of Parts

Begin by carefully unpacking the rowing machine from its shipping box. Ensure all components, including the front leg, monorail, PM5 monitor, and hardware, are accounted for. Refer to the provided inventory list to verify the completeness of your package. If any parts are missing or damaged, contact Concept2 support immediately. Inspect all items for shipping damage and ensure proper condition before proceeding with assembly. This step is crucial to ensure a smooth and safe setup process.

Attaching the Front Leg and Monorail

Start by locating the front leg and monorail components from the unpacked parts. Align the front leg with the monorail, ensuring proper connection points match. Secure the front leg to the monorail using the provided hardware, following the manual’s specific torque instructions. Tighten all screws firmly to ensure stability. Double-check the alignment to avoid any wobbling or misalignment. Once attached, verify the monorail is level and the front leg is securely locked in place. This step is critical for ensuring the machine’s stability and proper functionality during use.

Step-by-Step Assembly for Different Models

Assembly instructions vary slightly for each Concept2 model. For Model D and Model E, begin by attaching the monorail to the front leg using the provided bolts. Ensure the monorail is level and secure. For the Dynamic model, follow specific steps to assemble the moving parts and frame. Always refer to the manual for your machine’s serial number to confirm compatibility. Tighten all screws firmly and double-check connections for stability. Proper assembly ensures safety and optimal performance. Follow the guide carefully to avoid misalignment or loose parts.

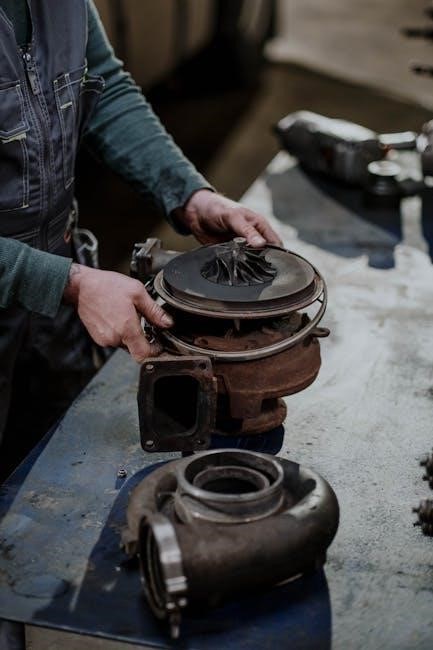
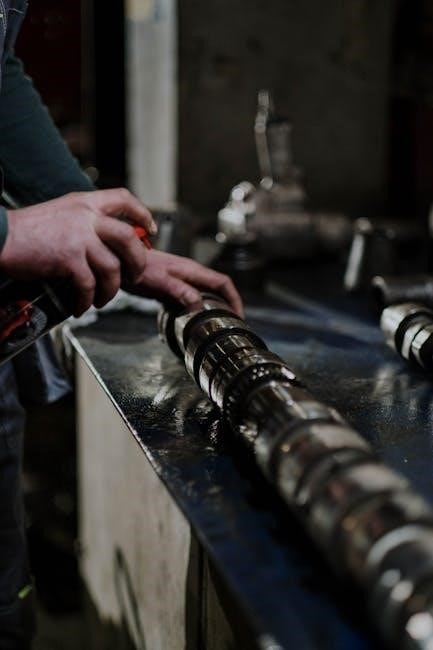
Maintenance and Troubleshooting

Regular cleaning and chain lubrication are essential. Inspect for worn parts and tighten loose screws. Troubleshoot common issues like misaligned tracks or faulty monitor connections. Ensure optimal performance by addressing these maintenance and troubleshooting steps.

Recommended Maintenance Schedule

Regular maintenance ensures optimal performance and longevity of your Concept2 rowing machine. Clean the monitor and frame monthly, and lubricate the chain every 50 hours of use. Inspect chains, handle connections, and foot straps for wear. Tighten all bolts and screws annually. For institutional models, check and replace chains and bearings as needed. Follow the detailed schedule in your manual to prevent issues and maintain accuracy. Proper care ensures a smooth and safe rowing experience, while adhering to warranty requirements for different models.

Common Issues and Troubleshooting Tips

Common issues with the Concept2 rowing machine include loose chains, faulty monitor connections, and worn foot straps. To address these, regularly inspect and tighten chains, restart the PM5 monitor, and replace worn parts. For connectivity problems, ensure Bluetooth is enabled and devices are paired correctly. If the machine feels unstable, check leveling and tighten frame locks. Refer to the manual for specific solutions, and contact Concept2 support for persistent issues. Proper troubleshooting ensures smooth operation and extends the machine’s lifespan.

Using the Performance Monitor 5 (PM5)

The Performance Monitor 5 (PM5) is an advanced tool for tracking workouts on your Concept2 rowing machine. It displays data such as distance, speed, and calories burned, while offering customizable options to focus on specific metrics during your row. The PM5 also supports Bluetooth connectivity, allowing seamless integration with apps like ErgData for detailed performance analysis and real-time data sharing. Its intuitive interface ensures a user-friendly experience, making it easier to set goals and monitor progress effectively.

Navigating the PM5 Display Options

The PM5 monitor offers a user-friendly interface with multiple display options to track your rowing performance. You can cycle through screens showing distance, speed, calories, and stroke rate. The monitor also provides pre-set options for time, distance, and interval workouts. Customize your display to focus on specific metrics or use the default view for a comprehensive overview. Bluetooth connectivity allows syncing with apps like ErgData for detailed insights. Navigate effortlessly using the buttons to switch between options, ensuring a seamless and personalized workout experience tailored to your goals.

Setting Up Workouts and Tracking Progress

The PM5 monitor allows you to create custom workouts tailored to your fitness goals. Choose from time, distance, or interval-based sessions, and set targets for calories or strokes. Track your progress in real-time, with detailed metrics such as stroke rate, pace, and power output. Sync your data with apps like ErgData for in-depth analysis and storage. Store favorite workouts for quick access, and join Concept2’s daily workouts or challenges. This feature-rich system helps you stay motivated and monitor improvements over time, ensuring an engaging and effective training experience.

Rowing Technique and Safety Guidelines

Mastering proper rowing technique is essential for efficiency and safety. Focus on a smooth stroke, engaging your legs, core, and arms. Maintain good posture to avoid injury. Always review safety notes before rowing, especially for beginners, to ensure a safe and effective workout experience.

Proper Rowing Stroke and Body Position

A proper rowing stroke involves four key phases: the catch, drive, finish, and recovery. Start with your knees slightly bent, shins vertical, and hands gripping the bar firmly. During the drive, push through your legs, engage your core, and pull the handle to your chest. Maintain a straight back and avoid extreme layback. Recovery involves returning to the starting position smoothly. Proper body positioning ensures efficiency and reduces injury risk. Keep your feet strapped securely and adjust the damper setting to suit your workout intensity.

Important Safety Notes and Precautions

Always ensure proper rowing technique to avoid injury. Consult a physician before starting a strenuous exercise program. Avoid extreme layback or jumping off the seat, as this can cause harm. Ensure the frame lock is secured when connecting or moving the machine. Never stand the rower upright on its end, as it may tip over. Keep children and pets away during use. Ensure the machine is on a stable, level surface to prevent instability. Follow all maintenance guidelines to ensure optimal performance and safety.

Warranty and Support Information

Concept2 offers a 2-year and 5-year limited warranty for their rowing machines in the US and Canada. For international warranty details, contact your local Concept2 Preferred Reseller. Visit concept2.com/support for assistance or call 800.245.5676 for inquiries.

Warranty Periods for Different Models

The Concept2 rowing machines come with varying warranty periods. Indoor rowers, including Models D, E, and Dynamic, are covered by a 2-year limited warranty, while the frame has a 5-year warranty. The SkiErg and BikeErg also feature a 2-year limited warranty. Accessories like the PM5 monitor are covered for 1 year. International warranty details may vary, so users outside the US and Canada should contact their local Concept2 Preferred Reseller for specific terms.

Contacting Concept2 Support

For assistance with your Concept2 rowing machine, contact their support team via phone at 800.245.5676 or email at info@concept2.com. Visit their official website at concept2.com/contact for more options. International users should reach out to their local Concept2 Preferred Reseller for region-specific support. Ensure you have your machine’s serial number ready for faster assistance. Concept2 also offers extensive online resources, including manuals and FAQs, to help troubleshoot common issues independently.

With proper use and maintenance, your Concept2 rowing machine will provide years of reliable performance. Follow the manual’s guidelines to enhance your rowing experience and achieve your fitness goals effectively.

Maximizing Your Concept2 Rowing Machine Experience

To maximize your Concept2 rowing machine experience, ensure proper assembly and maintenance as outlined in the manual. Regularly check and maintain the chain, handle, and footrest. Adjust the damper setting between 3-5 for optimal workouts. Utilize the PM5 monitor to track progress and set custom workouts. Focus on proper rowing technique to avoid injury and enhance efficiency. Explore additional features like the ErgData app for real-time data and community engagement. By following these tips, you can unlock the full potential of your Concept2 rowing machine and achieve your fitness goals effectively.

Manuals

tennant t17 parts manual

The Tennant T17 Parts Manual is an essential guide for maintaining and repairing your Tennant T17 floor scrubber. It provides detailed diagrams, parts lists, and repair instructions to ensure proper servicing. Designed for authorized personnel, this manual helps maximize machine longevity and performance while adhering to safety standards. Use it to identify genuine parts and follow step-by-step maintenance procedures for optimal results.

1.1 Overview of the Tennant T17 Floor Scrubber

The Tennant T17 is a high-performance, battery-powered rider floor scrubber designed for efficient cleaning in large facilities. It features advanced ec H2O technology, reducing water usage while maintaining superior cleaning results. Built for productivity, the T17 combines durability with user-friendly controls, making it ideal for industrial and commercial settings. Its compact design allows for easy maneuverability, while its robust construction ensures long-term reliability. This machine is perfect for maintaining hard floors in warehouses, schools, and other high-traffic areas, ensuring a clean and safe environment with minimal effort.

1.2 Importance of Using the Parts Manual

Using the Tennant T17 Parts Manual ensures accurate identification and replacement of components, preventing costly errors. It provides detailed diagrams, repair guides, and maintenance schedules, essential for troubleshooting and extending machine lifespan. The manual aligns with safety standards and warranty requirements, ensuring compliance and reliability. By referencing it, users can avoid improper repairs and maintain optimal performance, guaranteeing efficient cleaning operations and protecting their investment in the Tennant T17 floor scrubber.

How to Use the Tennant T17 Parts Manual

Refer to the Tennant T17 Parts Manual for detailed parts lists, repair guides, and maintenance schedules. Use it to navigate diagrams, identify components, and ensure proper servicing.

2.1 Navigating the Manual

Navigating the Tennant T17 Parts Manual is straightforward. The manual is organized into sections, starting with an introduction, followed by detailed parts lists and diagrams. Each section is clearly labeled, making it easy to find specific components or instructions. Use the table of contents to quickly locate information on structural, mechanical, and electrical parts. Refer to the index for alphabetical searches. This structure ensures efficient access to the information needed for maintenance and repairs, saving time and effort.

2.2 Understanding Diagrams and Schematics

The Tennant T17 Parts Manual includes detailed diagrams and schematics to help users identify and locate components. These visuals use color-coding and clear labels to differentiate parts, ensuring accuracy. Diagrams are cross-referenced with parts lists, making it easier to understand assembly and disassembly processes. Schematics provide a comprehensive view of mechanical and electrical systems, aiding in troubleshooting and repairs. By referencing these visuals, users can better comprehend the machine’s structure and perform maintenance tasks effectively. This combination of text and visuals ensures clarity and precision for all servicing needs.

Key Components of the Tennant T17

The Tennant T17 consists of structural, mechanical, and electrical components. Key parts include brushes, squeegees, motors, and batteries, all essential for efficient cleaning operations.

3.1 Structural Components

The Tennant T17’s structural components include the frame, chassis, and scrub deck. These parts provide durability and support, ensuring stable operation. The frame houses key systems, while the chassis protects internal mechanisms. The scrub deck is designed for efficient cleaning, and the recovery tank is built for solution management. These components are essential for the machine’s overall functionality and longevity, ensuring reliable performance in various cleaning environments.

3.2 Mechanical Components

The Tennant T17’s mechanical components include motors, transmissions, and brush assemblies. These parts ensure efficient cleaning and machine movement. The motor powers the brushes and traction system, while the transmission distributes power for smooth operation. Brushes are designed for various surfaces, enhancing cleaning effectiveness. Regular maintenance of these components is crucial for optimal performance and longevity, ensuring the machine operates efficiently in demanding environments. Genuine parts are recommended for reliability and durability.

3.3 Electrical Components

The Tennant T17’s electrical components include control panels, sensors, and wiring harnesses. These systems manage power distribution, monitor machine functions, and ensure safe operation. The control panel houses key electrical circuits, while sensors monitor battery levels and operational status. Wiring harnesses connect components securely, preventing malfunctions. Regular inspection and maintenance of these electrical parts are vital for uninterrupted operation and safety. Use the parts manual to identify and replace electrical components correctly, ensuring optimal performance and longevity of the machine.

Maintenance Schedule for the Tennant T17

Regular maintenance ensures optimal performance and longevity. Follow the schedule for daily, weekly, and monthly tasks to prevent issues and maintain efficiency. Adhere strictly to the manual.

4.1 Daily Maintenance Tasks

Daily maintenance is crucial for the Tennant T17’s performance. Operators should inspect the brush and squeegee for wear, clean the recovery tank, and check battery levels. Ensure all controls function properly and tighten any loose bolts. Regularly lubricate moving parts to prevent friction damage. Refer to the manual for specific checks to ensure optimal operation and extend the machine’s lifespan. Consistency in these tasks prevents unexpected downtime and maintains cleaning efficiency effectively.

4.2 Weekly Maintenance Tasks

Weekly maintenance for the Tennant T17 includes inspecting and replacing worn brushes and squeegees, cleaning the vacuum filter, and checking the battery water levels. Lubricate the caster wheels and brush bearings to ensure smooth operation. Inspect the recovery and solution tanks for debris and drain if necessary. Refer to the manual for specific parts to inspect, such as hoses and connections, to prevent leaks. Using genuine Tennant parts ensures reliability and extends the machine’s lifespan effectively.

4.3 Monthly Maintenance Tasks

Monthly maintenance for the Tennant T17 involves deep-cleaning the scrub deck, checking and replacing the pre-filter, and inspecting the hoses for cracks. Clean the battery terminals and ensure water levels are correct. Lubricate the squeegee pivot points and inspect the vacuum motor for dust buildup. Refer to the manual for specific parts like filters and brushes that may need replacement. Regularly scheduled tasks help prevent downtime and ensure consistent cleaning performance, aligning with Tennant’s recommended maintenance schedule for optimal machine longevity.

Troubleshooting Common Issues

This section helps identify and resolve common problems with the Tennant T17, such as machine startup issues or brush malfunction. Use diagnostic tools and refer to the manual for solutions to ensure optimal performance and minimize downtime.

5.1 Identifying Common Problems

Common issues with the Tennant T17 include faulty brushes, squeegee malfunctions, and electrical system errors. These problems can be identified through unusual noise, reduced cleaning efficiency, or error messages. Refer to the parts manual for diagnostic guides and troubleshooting steps. Regular maintenance and inspections can help prevent these issues, ensuring the machine operates smoothly and effectively. Always consult the manual for specific solutions to avoid further damage or downtime.

5.2 Diagnostic Tools and Techniques

The Tennant T17 parts manual provides detailed diagrams and troubleshooting guides to help identify issues. Use diagnostic tools like multimeters for electrical checks and fault code readers for system errors. Visual inspections of brushes, squeegees, and motors can reveal wear or damage. Refer to the manual’s repair guides and videos for step-by-step solutions. Regularly checking error logs and maintenance records can also aid in early problem detection, ensuring timely repairs and minimizing downtime.

Parts Replacement and Repair

This section guides you through replacing and repairing parts of the Tennant T17. Use genuine OEM components for reliability and longevity. Refer to diagrams and repair guides for precise instructions, ensuring safe and efficient servicing. Proper replacement procedures maintain machine performance and prevent further damage. Always follow the manual’s recommendations for tools and techniques to achieve professional-level repairs.

6.1 Ordering Replacement Parts

To order replacement parts for your Tennant T17, consult the parts manual for accurate identification. Purchase from authorized dealers like SweepScrub, who stock genuine Tennant components. Ensure parts match your machine’s model and serial number. Use the manual’s diagrams to confirm compatibility. Ordering genuine parts guarantees reliability and longevity. Many dealers offer same-day shipping for urgent needs. Verify the seller’s OEM certification to avoid counterfeit items. Proper part selection ensures efficient repairs and maintains your T17’s performance. Always double-check orders before finalizing to prevent errors.

6.2 Step-by-Step Repair Guides

The Tennant T17 Parts Manual includes detailed step-by-step repair guides to help users perform maintenance and fixes efficiently. These guides provide clear instructions, diagrams, and troubleshooting tips to address common issues. Users can follow visual aids and written descriptions to replace components like brushes, motors, and batteries. Safety precautions and tool requirements are highlighted to ensure proper execution. By adhering to these guides, operators can restore their T17 to optimal condition, minimizing downtime and extending machine lifespan. Always refer to genuine Tennant resources for accuracy.

Safety Guidelines for Servicing the T17

Always follow safety guidelines when servicing the T17 to prevent injuries and ensure proper repairs. Conduct pre-service safety checks, wear protective equipment, and adhere to manual instructions.

7.1 Pre-SERVICE Safety Checks

Before servicing the T17, ensure all safety precautions are taken. Disconnect the battery and power sources to prevent accidental startup. Wear appropriate personal protective equipment, including gloves and safety glasses. Inspect the machine for any visible damage or hazards. Ensure the area is well-ventilated and clear of obstacles. Always refer to the manual for specific instructions and adhere to safety guidelines to prevent injuries and ensure effective repairs.

7.2 Personal Protective Equipment

Always wear proper personal protective equipment (PPE) when servicing the T17. This includes gloves, safety glasses, and a face mask to protect against debris and chemicals. Steel-toe boots are recommended to prevent foot injuries from heavy parts. Ensure all PPE is in good condition and suitable for the task. Failure to use PPE can result in serious injury. Always follow safety guidelines to ensure a safe and effective servicing experience.

Warranty and Service Options

Tennant offers comprehensive warranty coverage for the T17, ensuring parts and labor are covered under specified conditions. Genuine parts are recommended for longevity and performance. Contact Tennant support for service inquiries and warranty claims to maintain your machine effectively and uphold its quality standards.

8.1 Understanding Your Warranty

The Tennant T17 warranty ensures coverage for parts and labor under specific conditions. Review your warranty agreement to understand the duration and scope of coverage. Genuine Tennant parts are recommended to maintain warranty validity and ensure optimal performance. Any unauthorized modifications or non-OEM parts may void the warranty. Contact Tennant support for detailed inquiries or to file a claim. Proper documentation and serial number verification are required for warranty services. Understanding your warranty terms helps maximize protection and prolong machine lifespan effectively.

8.2 Contacting Tennant Support

For assistance with your Tennant T17, contact Tennant support through their official website, phone, or email. Their team provides expert guidance on parts, repairs, and maintenance. Access resources like manuals, repair guides, and troubleshooting tips online. Tennant support ensures timely resolution of issues, helping you maximize machine performance and longevity. Use the provided contact information to reach their customer service for inquiries or service requests, ensuring your Tennant T17 operates at its best.

Environmental Considerations

Proper disposal of Tennant T17 parts ensures environmental responsibility. Follow eco-friendly practices for cleaning and maintenance, minimizing chemical use and waste. Recycle materials when possible.

9.1 Proper Disposal of Parts

Proper disposal of Tennant T17 parts is crucial for environmental sustainability. Recycle materials like metals and plastics whenever possible. Dispose of hazardous materials, such as batteries and chemicals, according to local regulations. Use authorized recycling centers to ensure compliance with environmental laws. Always refer to the Tennant T17 Parts Manual for guidance on identifying recyclable and non-recyclable components. Proper disposal helps minimize ecological impact and promotes responsible waste management;

9.2 Eco-Friendly Cleaning Practices

Adopting eco-friendly cleaning practices with the Tennant T17 ensures sustainable operations. Utilize the machine’s ec H2O Cleaning Technology to reduce water and chemical usage. Opt for biodegradable cleaning solutions and energy-efficient modes to minimize environmental impact. Regular maintenance, as outlined in the parts manual, helps maintain optimal performance while reducing waste. Prioritize genuine parts to ensure longevity and support eco-conscious cleaning initiatives. By following these practices, you contribute to a greener and more sustainable cleaning environment.

Additional Resources

Explore online manuals, guides, and diagrams for the Tennant T17 on authorized dealer websites; Visit Tennant’s official site or trusted suppliers like SweepScrub for comprehensive support and resources.

10.1 Online Manuals and Guides

Access comprehensive online resources for the Tennant T17, including detailed service manuals, repair guides, and diagrams. Visit Tennant’s official website or trusted dealers like SweepScrub for downloadable PDF manuals. These resources provide step-by-step instructions, parts lists, and troubleshooting tips. Additionally, find instructional videos and maintenance bulletins to support your servicing needs. Ensure you reference genuine Tennant materials for accuracy and reliability when working on your T17 floor scrubber. These online tools are essential for efficient and correct machine maintenance.