
vanderbilt baseball workout program pdf
Vanderbilt Baseball Workout Program: A Comprehensive Overview (Updated 01/01/2026)
Unlock the secrets to Vanderbilt’s success! Download the official PDF guide, enhancing pitching potential and gaining a competitive edge in the game today.
Vanderbilt baseball embraces a dynamic and evolving training philosophy centered around building athletes capable of consistently performing at a high level within the demanding SEC conference. The core aim isn’t simply physical conditioning, but rather developing an “output” – the ability to translate strength and conditioning into game-ready performance.
This philosophy emphasizes intense and frequent training exposure, believing that consistent, challenging workouts yield positive responses when competition arrives. The program isn’t static; it’s designed to adapt and evolve, recognizing individual athlete needs. Accessing resources like the Vanderbilt Baseball Long Toss Program PDF, alongside instructional videos and webinars on the Vanderbilt Athletics website, is crucial for understanding and implementing these principles.
Ultimately, Vanderbilt’s approach seeks to revolutionize baseball programs, focusing on innovation and maximizing athlete potential through comprehensive training methods.
The Core Principles of Vanderbilt’s Strength and Conditioning
Vanderbilt’s strength and conditioning program revolves around building athletes prepared for the rigors of the SEC. A key principle is maximizing “output,” meaning translating physical gains into demonstrable on-field performance. Intense and frequent training exposure is paramount, fostering positive adaptation and resilience.
The program isn’t a rigid, one-size-fits-all approach. Individual needs and responses are continuously monitored and addressed, ensuring optimal development. Resources like the Vanderbilt Baseball Workout Program PDF provide foundational guidance, but adaptation is key.
Furthermore, the program leverages technology, such as Catapult, to monitor athlete progress and refine training protocols. This data-driven approach ensures effectiveness and minimizes injury risk, solidifying Vanderbilt’s commitment to holistic athlete development.
Vanderbilt’s Approach to Athlete Development
Vanderbilt’s athlete development philosophy centers on a dynamic and evolving process, not a static program. The program aims to cultivate well-rounded players, focusing on physical prowess, mental fortitude, and technical skill. Accessing resources like the Vanderbilt Baseball Workout Program PDF is a starting point, but individualization is crucial.
The emphasis isn’t solely on peak performance during the season; it’s about building a foundation for sustained success. This includes proactive injury prevention strategies and comprehensive recovery protocols.
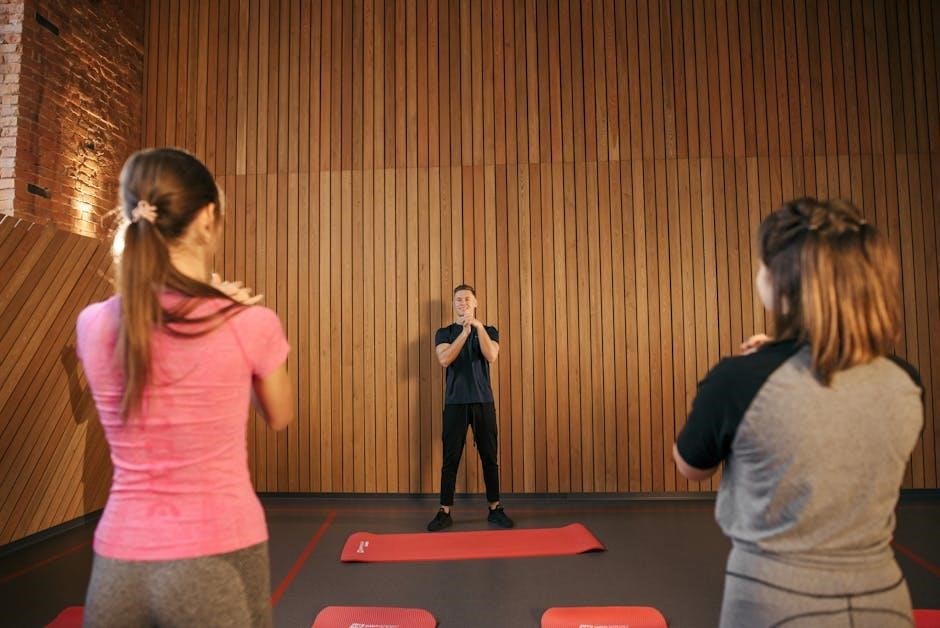
During unusual circumstances, like the recent lockout, players demonstrate initiative, exemplified by Casali and Yastrzemski leading workouts at Vanderbilt. This highlights the program’s success in instilling a strong work ethic and self-sufficiency in its athletes.

Strength and Conditioning Program Details
The Giants’ 10-week program, now extended due to the lockout, emphasizes intense and frequent training exposure, building athletes capable of competing at a high level.
Overview of the 10-Week Program (and Beyond)
Originally prescribed by the San Francisco Giants’ training staff, the core program spans ten weeks, but the current lockout situation has extended its relevance into an eleventh week. This necessitates adaptation and improvisation, as direct instruction from club employees is prohibited during the owner-imposed restrictions.
Players, like Curt Casali and Mike Yastrzemski, are now leading workouts at Vanderbilt University, essentially “ad-libbing” a regimen based on the initial framework. The overarching philosophy, as stated by Vanderbilt’s strength and conditioning staff, centers on building athletes with the capacity for high output, specifically to thrive within the demanding environment of the SEC.
The program’s success relies on intense and frequent training exposure, aiming to elicit positive responses and peak performance leading into competitive games. This extended period allows for continued refinement and individualization, even without direct coaching oversight.
Key Components of the Vanderbilt Workout
Vanderbilt’s dynamic and evolving training philosophy prioritizes building athletes capable of competing at the highest level within the Southeastern Conference. A cornerstone of their approach is the legendary long toss program, readily accessible through official training manuals, instructional videos, and webinars on the Vanderbilt Athletics website.
The program isn’t solely focused on throwing; it encompasses comprehensive strength and conditioning, agility drills, and speed training tailored to both position players and pitchers. PDF guides detail specific exercises and routines designed to maximize athletic output.
Furthermore, the program emphasizes the importance of recovery protocols and nutrition guidelines, recognizing that optimal performance requires a holistic approach to athlete development. Technology, such as Catapult, plays a role in monitoring athlete progress and informing program adjustments.
Importance of Intense and Frequent Training Exposure
Vanderbilt’s training philosophy centers around exposing athletes “intensely and frequently” to demanding workouts. This approach, as stated by Grisanti, aims to ensure positive responses and peak performance during competitive games. The program’s structure, detailed within the downloadable PDF guides, isn’t about sporadic bursts of effort, but consistent, challenging sessions.
This frequent exposure builds resilience, both physically and mentally, preparing players for the rigors of a long season. The program’s intensity is carefully calibrated, utilizing data from monitoring tools like Catapult to optimize workload and minimize injury risk.
Ultimately, the goal is to cultivate athletes who not only possess the necessary skills but also the conditioning to consistently perform at their best under pressure.

Position Player Workout Regimen
Explore the PDF for detailed strength, conditioning, agility, and speed drills tailored for position players, building well-rounded athletes for peak performance.
Strength Training for Position Players
The Vanderbilt Baseball PDF details a comprehensive strength program designed to maximize power and athleticism in position players. This focuses on building a foundation of total-body strength, incorporating exercises like squats, deadlifts, and bench presses.
Emphasis is placed on explosive movements – power cleans, snatches, and plyometrics – to translate strength into on-field performance. The program isn’t static; it evolves throughout the off-season and in-season, adjusting volume and intensity.
Specific attention is given to core stability and rotational power, crucial for hitting and throwing. The PDF likely outlines specific sets, reps, and progression schemes, ensuring players develop the necessary strength to compete at a high level within the SEC.
Conditioning Drills for Position Players
Vanderbilt’s conditioning, as detailed in the program PDF, prioritizes building baseball endurance – the ability to perform repeated high-intensity bursts with short recovery periods. Expect a blend of interval training, including sprints of varying distances, and agility drills designed to mimic game situations.
Shuttle runs, cone drills, and base-running simulations are likely core components, enhancing speed and quickness. The PDF probably outlines specific work-to-rest ratios and progression schemes to avoid overtraining and maximize adaptation.
Beyond speed, the program emphasizes maintaining conditioning throughout the season, incorporating recovery runs and low-intensity cardio to support performance and prevent fatigue. This holistic approach ensures position players are prepared for the demands of a long season.
Agility and Speed Training for Position Players
The Vanderbilt Baseball PDF likely details a comprehensive agility and speed program focused on reactive movements crucial for infielders and outfielders. Expect cone drills designed to improve lateral quickness, change-of-direction speed, and first-step explosiveness – all vital for fielding range.
Plyometrics, such as box jumps and hurdle hops, are probably included to develop power and reactivity. Speed work will likely incorporate short sprints (30-60 yards) with an emphasis on proper running mechanics and acceleration.
The program likely stresses baseball-specific agility, simulating movements like fielding ground balls, making throws, and rounding bases. This ensures the training translates directly to improved performance on the field.

Pitcher-Specific Workout Regimen
The Vanderbilt baseball PDF emphasizes arm care, strengthening, pitching mechanics, and the renowned long toss program – a cornerstone of their pitcher development.
Arm Care and Strengthening Exercises
The Vanderbilt baseball workout PDF details a comprehensive arm care protocol, crucial for pitcher health and performance. This includes dynamic stretching, rotator cuff exercises utilizing resistance bands, and scapular stabilization drills. Focus is placed on pre- and post-throwing routines to enhance blood flow and reduce injury risk.
Strengthening exercises extend beyond the shoulder, incorporating exercises for the forearm, wrist, and elbow. The program emphasizes controlled movements and proper form to build strength without compromising mechanics. Specific exercises detailed in the guide include dumbbell external rotations, internal rotations, and wrist curls, all designed to fortify the arm’s supporting muscles. Consistent implementation of these exercises is paramount for long-term arm health and maximizing pitching velocity.
Pitching Mechanics and Drills
The Vanderbilt baseball workout PDF emphasizes biomechanical efficiency, outlining drills to refine pitching mechanics. Focus is on maintaining a consistent delivery, maximizing ground reaction force, and achieving optimal arm slot. Drills include weighted ball programs, towel drills for proper arm path, and front toss variations to groove mechanics.
The guide details drills for improving lower half drive, core stability, and sequencing of movements. Video analysis is recommended to identify and correct flaws in mechanics. Emphasis is placed on repeatable movements and minimizing stress on the arm. These drills, when consistently practiced, aim to increase velocity, improve command, and reduce the risk of injury, ultimately enhancing pitching performance.
Long Toss Program – A Vanderbilt Staple
The Vanderbilt baseball workout PDF highlights long toss as a cornerstone of pitcher development. It’s not merely about arm strength, but building a robust and resilient throwing shoulder. The program progresses systematically, increasing distance gradually while maintaining proper mechanics and a controlled throwing arc.
The PDF details specific distances and throwing cues for each phase, emphasizing a full, fluid motion. It stresses the importance of a consistent warm-up and cool-down. Long toss is viewed as a foundational element, preparing pitchers for the demands of game-like intensity and promoting long-term arm health; Resources and supplemental materials are linked within the guide for further understanding.
Vanderbilt Baseball Long Toss Program Resources
The Vanderbilt Athletics website serves as a central hub for accessing comprehensive PDF guides detailing the long toss program. Instructional videos break down proper technique, showcasing drills and cues for optimal execution. Webinars featuring Vanderbilt’s coaching staff offer deeper insights into the program’s philosophy and progression.
These resources are designed to supplement the core PDF, providing visual and auditory learning tools. Players and coaches can find detailed explanations of each phase, ensuring consistent implementation. The website also features articles and updates on training methodologies, keeping users informed about the latest advancements. Download the guide and unlock your pitching potential!

Supplemental Training & Recovery
Prioritize recovery protocols alongside the Vanderbilt program PDF; nutrition guidelines and mental conditioning techniques are crucial for peak performance and injury prevention.
Importance of Recovery Protocols
Recovery is paramount within the Vanderbilt Baseball Workout Program, as detailed in the associated PDF guide. Intense training demands strategic recovery to prevent overtraining and maximize athlete availability. Protocols encompass active recovery sessions – light cardio and mobility work – alongside crucial elements like proper hydration and targeted nutrition.
Sleep optimization is also emphasized, recognizing its vital role in muscle repair and cognitive function. The program doesn’t solely focus on pushing limits; it equally prioritizes the body’s ability to adapt and rebuild. Ignoring recovery significantly increases injury risk and hinders performance gains, negating the benefits of the rigorous training schedule outlined in the program materials.

Consistent implementation of these protocols ensures athletes are prepared to consistently perform at their highest level throughout the demanding season.
Nutrition Guidelines for Vanderbilt Baseball Players
Vanderbilt’s PDF workout program emphasizes a nutrition strategy fueling peak performance and recovery. Players are guided to prioritize whole, unprocessed foods – lean proteins, complex carbohydrates, and healthy fats – to support energy demands and muscle repair. Hydration is critical, with specific guidelines for fluid intake before, during, and after training and games.
The program doesn’t advocate restrictive dieting, but rather a balanced approach focused on nutrient timing. Pre-workout meals emphasize carbohydrates for sustained energy, while post-workout nutrition prioritizes protein for muscle recovery. Individualized needs are considered, with potential supplementation discussed based on athlete-specific requirements.
Proper nutrition isn’t merely about fueling workouts; it’s integral to overall health, injury prevention, and maximizing athletic potential.
Mental Conditioning and Visualization Techniques
Vanderbilt’s comprehensive PDF program recognizes the crucial role of mental fortitude in athletic success. Beyond physical training, players engage in techniques to enhance focus, manage pressure, and build confidence. Visualization exercises are a cornerstone, encouraging athletes to mentally rehearse successful performances – hitting, pitching, fielding – creating a positive feedback loop.
The program incorporates mindfulness practices to improve present-moment awareness and reduce anxiety. Athletes learn to control internal dialogue, replacing negative self-talk with empowering affirmations. Goal-setting strategies are employed to provide direction and motivation, fostering a growth mindset.
Mental conditioning isn’t viewed as separate from physical training, but as an integrated component of holistic athlete development.

Analyzing Program Effectiveness & Adaptations
The PDF details monitoring athlete progress, adjusting training based on individual needs, and leveraging technology like Catapult for data-driven improvements.
Monitoring Athlete Progress and Performance
The Vanderbilt Baseball Workout Program, as detailed in available PDF resources, emphasizes consistent monitoring of athlete progress. This isn’t simply tracking weights lifted or times run; it’s a holistic evaluation. The program utilizes data – potentially gathered through tools like Catapult – to assess workload, fatigue levels, and movement patterns.
PDF guides likely outline key performance indicators (KPIs) specific to each position, allowing coaches to objectively measure improvement. Regular assessments, including velocity readings for pitchers and agility tests for position players, are crucial. This data informs adjustments to the program, ensuring athletes are challenged appropriately and minimizing the risk of injury. The goal is to optimize performance by responding to individual athlete needs and maximizing training adaptations.
Adjusting the Program Based on Individual Needs
The Vanderbilt Baseball Workout Program, as suggested by available PDF materials, isn’t a rigid, one-size-fits-all approach. Recognizing the unique physiological profiles of each athlete is paramount. Individual adjustments are driven by data collected during performance monitoring – velocity, agility, and fatigue levels all play a role.
PDF resources likely detail how coaches modify training volume and intensity based on these assessments. For pitchers, this might involve altering long toss distances or adjusting bullpen schedules. Position players may receive customized drills to address specific weaknesses. The program’s adaptability ensures athletes are continually challenged without exceeding their capacity, promoting optimal development and minimizing injury risk. This personalized approach is key to maximizing potential.
The Role of Technology in Training (e.g., Catapult)
Vanderbilt’s commitment to athlete development extends to leveraging cutting-edge technology, notably systems like Catapult. While specific details within the Vanderbilt Baseball Workout Program PDF aren’t explicitly stated, the program’s philosophy emphasizes data-driven decision-making.
Catapult and similar devices monitor athlete workload, tracking metrics like distance covered, speed, acceleration, and deceleration. This data informs adjustments to training intensity and volume, preventing overtraining and optimizing performance. PDF guides likely support this by outlining how coaches interpret Catapult data to personalize training regimens. This technological integration allows for a more objective and precise approach to conditioning, ensuring athletes are prepared for the demands of SEC competition.
External Resources & Program Access
Access Vanderbilt Athletics website resources for supplemental training manuals, instructional videos, and webinars related to the baseball program’s techniques.
Vanderbilt Athletics Website Resources
Explore the official Vanderbilt Athletics website for a wealth of resources designed to complement the baseball program’s training regimen. Discover downloadable PDF guides detailing the legendary long toss program, offering a deep dive into its principles and practical application.
Access instructional videos demonstrating proper techniques for drills and exercises, ensuring athletes maintain correct form and maximize effectiveness. Participate in informative webinars led by Vanderbilt’s coaching staff, providing valuable insights into their training philosophy and athlete development strategies.
Find supplemental materials covering various aspects of the program, from strength and conditioning to pitching mechanics and recovery protocols. Utilize these resources to enhance your understanding and optimize your training efforts, mirroring the methods employed by Vanderbilt’s successful baseball team.
PDF Guides and Instructional Materials
Dive deep into Vanderbilt’s training secrets with readily available PDF guides! Download the comprehensive long toss program manual, a cornerstone of their pitching development, and unlock its proven techniques. Study detailed workout plans outlining strength and conditioning exercises tailored for both position players and pitchers.
Access instructional materials covering proper warm-up routines, injury prevention strategies, and effective recovery methods. Review drill breakdowns with clear visual aids, ensuring correct form and maximizing training benefits.
Utilize these resources to supplement your training, mirroring the methods used by Vanderbilt’s elite athletes. Enhance your understanding of the program’s philosophy and implement its principles to elevate your game – dominate the competition!
Webinars and Online Training Content
Expand your knowledge with Vanderbilt’s exclusive online training resources! Access recorded webinars featuring insights from the coaching and strength & conditioning staff, detailing program philosophies and practical applications. Participate in virtual workshops covering topics like pitching mechanics, defensive strategies, and offensive approaches.
Explore instructional videos demonstrating proper exercise techniques, drill execution, and recovery protocols. Benefit from Q&A sessions with Vanderbilt experts, addressing specific training questions and providing personalized guidance.
Supplement your PDF guide study with these dynamic learning tools, gaining a deeper understanding of the program’s intricacies. Elevate your training regimen and unlock your full potential – become a more informed and effective player!

Current Training Adaptations (Lockout Situations)
Players, like Casali and Yastrzemski, are improvising regimens at Vanderbilt during the lockout, exceeding the original 10-week program’s expiration date.
Player-Led Workouts (e.g., Casali & Yastrzemski)
With club employee contact prohibited during the owner’s lockout, players are taking initiative to maintain their conditioning. San Francisco Giants’ Curt Casali and Mike Yastrzemski exemplify this, leading daily workouts at Vanderbilt University alongside other big leaguers.
These sessions are “ad-libbed” as the original 10-week training program prescribed by the Giants’ staff has expired. Players are creatively adapting, utilizing the Vanderbilt facilities and their collective experience to stay sharp. This demonstrates a proactive approach to fitness, ensuring readiness despite the unusual circumstances.
The focus remains on maintaining peak physical condition, bridging the gap until official training can resume, and leveraging the resources available at Vanderbilt.
Maintaining Fitness During Off-Season Restrictions
The current lockout situation presents unique challenges for maintaining peak athletic condition. Players are proactively addressing these restrictions, demonstrating commitment to their training regimens even without direct coaching oversight.
Utilizing resources like Vanderbilt University’s facilities, athletes are improvising and implementing alternative training methods. This includes self-directed workouts, focusing on strength, conditioning, and skill maintenance. The emphasis is on preserving the physical gains achieved during the regular season.
Access to the Vanderbilt Baseball Workout Program PDF, alongside other available materials, likely aids in structuring these independent sessions, ensuring a degree of consistency and effectiveness.
Improvisation and Alternative Training Methods

With club employee contact prohibited during the lockout, players like Curt Casali and Mike Yastrzemski are leading daily regimens at Vanderbilt, showcasing impressive resourcefulness. This necessitates a shift towards improvisation and creative training solutions.
While the original 10-week program prescribed by the Giants’ staff has expired, players are leveraging their knowledge and potentially referencing resources like the Vanderbilt Baseball Workout Program PDF to maintain fitness. This includes adapting drills and exercises to available equipment and spaces.
The focus is on maintaining a base level of conditioning and skill work, prioritizing injury prevention and readiness for when official training resumes. This player-led initiative highlights dedication and adaptability.